
RAM 2500 Truck 2WD V8-5.2L VIN Y (2000)
7.
Disconnect the gray connector (140 14BR circuit) located to the right of the battery above the power distribution center.
8.
Connect the two remaining leads of the starter solenoid jumper relay/harness assembly to the disconnected gray connector.
9.
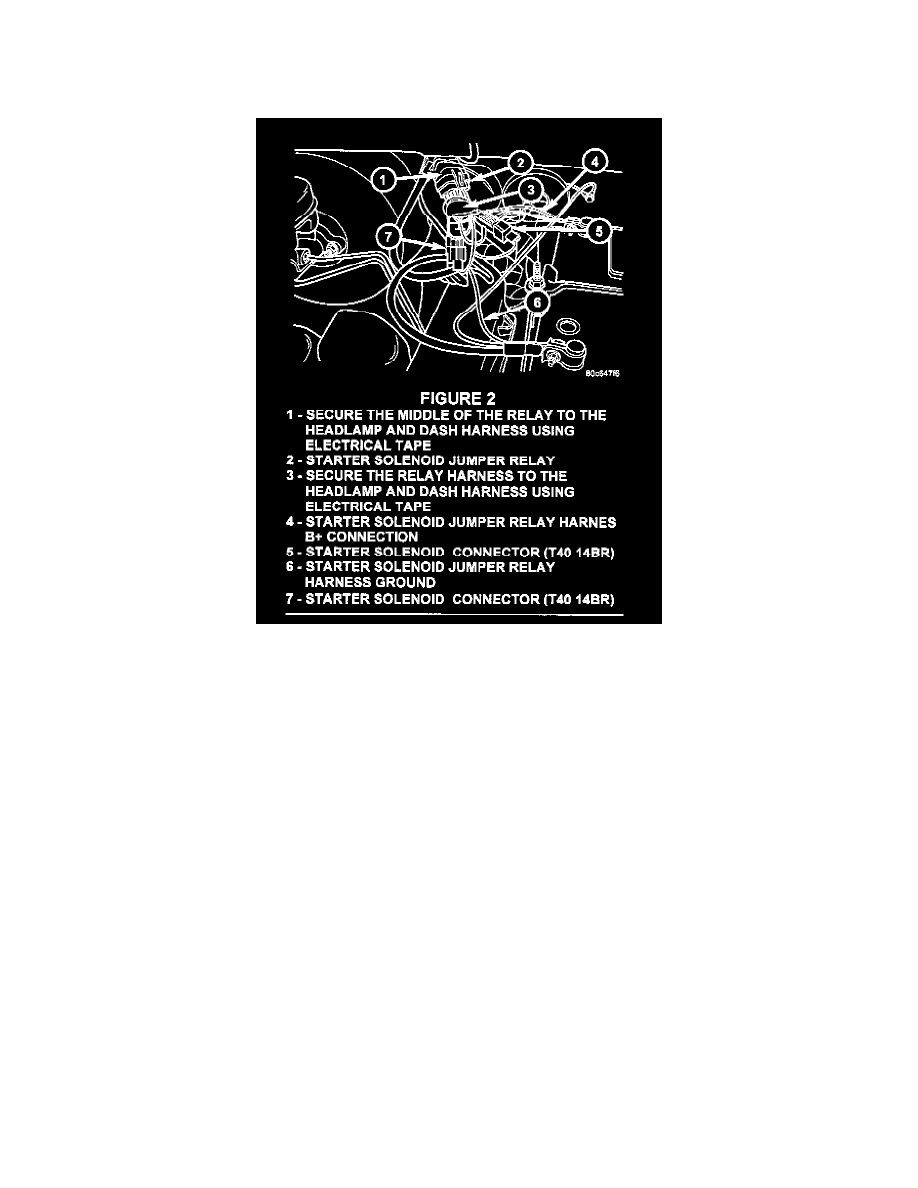
Secure the starter solenoid jumper relay/harness assembly to the headlamp and dash harness as shown in Figure 2. Secure the top of the relay by
placing a tie-strap through the hole of the relay bracket and wrap the tie-strap around the headlamp and dash harness. Secure the middle of the
relay by placing at least four wraps of electrical tape around the relay and the headlamp and dash harness. Secure the wiring harness of the relay
assembly by placing at least two wraps of electrical tape around the jumper harness and headlamp and dash harness.
10.
Remove the blown fuse from the fuse block (cavity 17) and install a 25-amp fuse p/n 04687835.
11.
Connect the battery negative cable. Tighten the nut to 7.9 N.m (70 in. lbs.). Reset the clock.
12.
Verify the repair by ensuring that the engine starter circuit operates.