
RAM 2500 Truck 2WD V8-5.7L VIN D (2004)
Ball Joint: Service and Repair
Upper Control Arm
REMOVAL
1. Raise and support vehicle.
2. Remove wheel and tire assembly.
3. Remove the nut from upper ball joint.
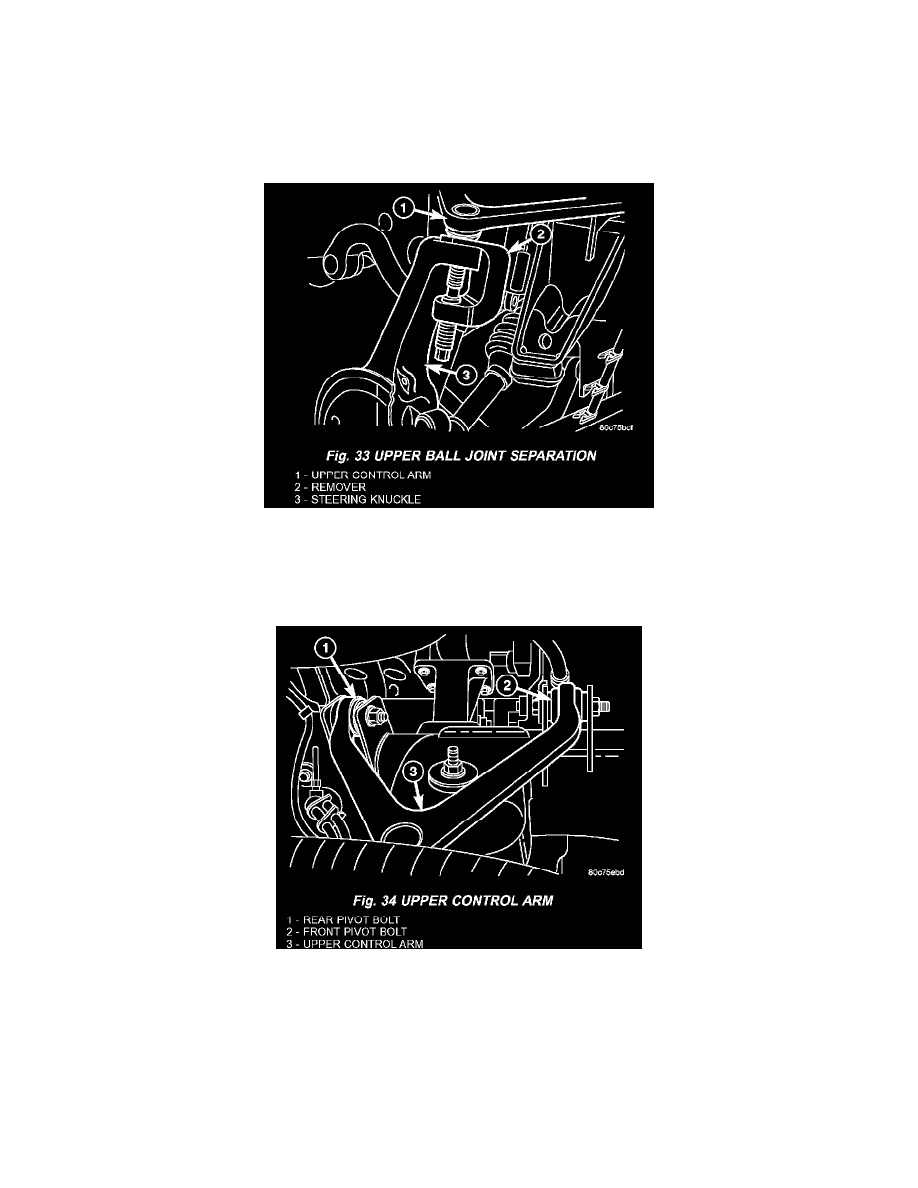
Fig. 33
4. Separate upper ball joint from the steering knuckle with Remover 8677.
CAUTION: When installing Remover 8677 to separate the ball joint, be careful not to damage the ball joint seal.
Fig. 34
5. Remove the control arm pivot bolts and remove control arm.
INSTALLATION
1. Position the control arm into the frame brackets. Install bolts and tighten to 132 Nm (97 ft. lbs.) (LD) or 170 Nm (125 ft. lbs.) (HD 4X2 only).
2. Insert the ball joint in steering knuckle and tighten the upper ball joint nut to 54 Nm (40 ft. lbs.) (on 1500 series only an additional 90° turn is
required).
3. Install the wheel and tire assembly.
4. Remove the support and lower vehicle.