
RAM 2500 Truck 2WD V8-5.9L VIN Z (1997)
Power Take-Off: Service and Repair
Removal and Installation
REMOVAL
1. Raise vehicle.
2. If adapter is to be removed for disassembly and overhaul, remove drain plug and drain lubricant from adapter.
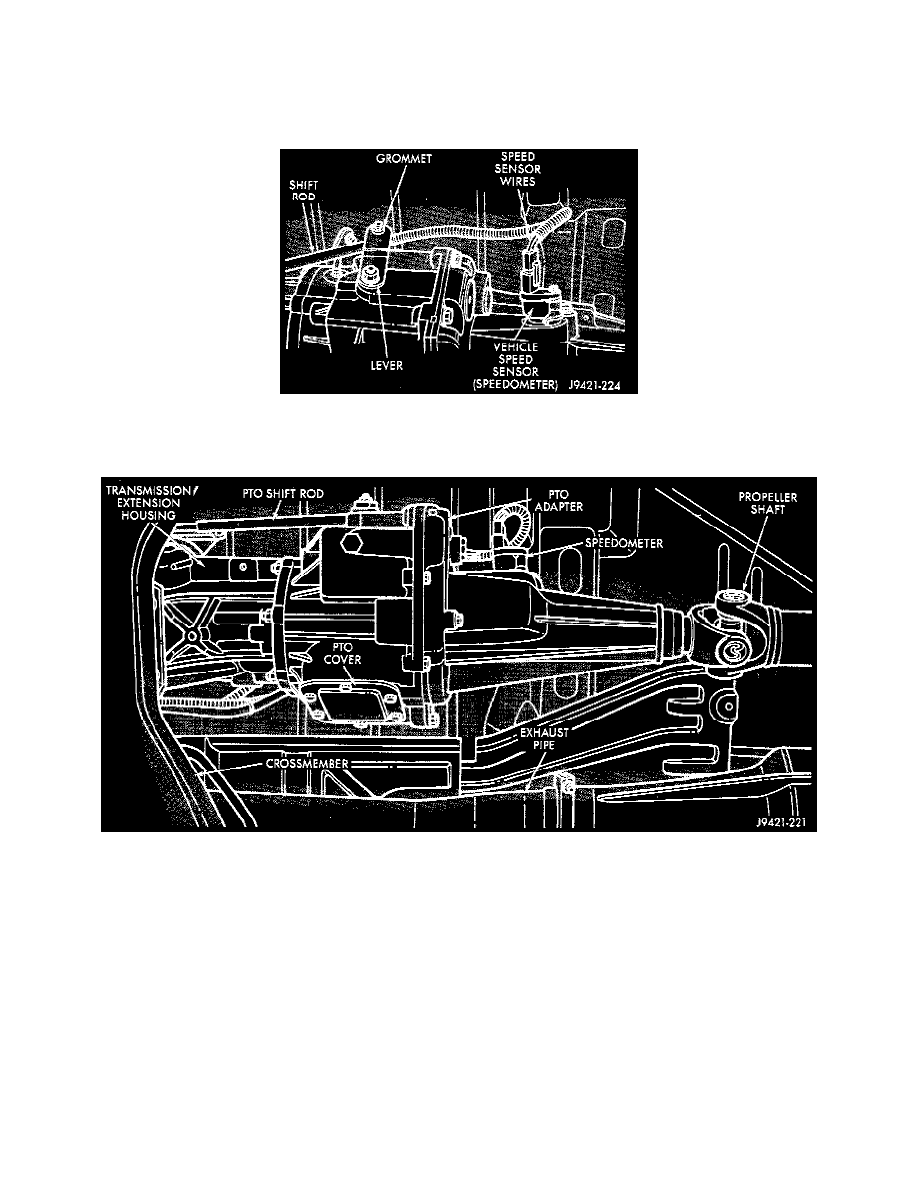
3. Disconnect vehicle speed sensor wires at sensor.
4. Disconnect shift rod from grommet in adapter shift lever. Use channel lock-style pliers to press rod out of grommet.
5. Mark propeller shaft yoke for alignment reference. Then disconnect and remove propeller shaft.
6. Remove nuts securing adapter mounting studs to transmission extension.
7. Slide adapter studs out of transmission extension and remove adapter from vehicle.
8. If a gasket is used between adapter and transmission, retain gasket if in good condition.
INSTALLATION
1. If adapter was overhauled, fill adapter to bottom edge of fill plug hole with MOPAR Dexron II, or ATF Plus transmission fluid. Tighten fill plug
to 41 - 54 Nm (30 - 40 ft. lbs.) torque.
2. Clean mounting surfaces of adapter and transmission extension with solvent.
3. Apply 2-3 drops of MOPAR Lock N' Seal, or Loctite 242 to adapter mounting nuts.
4. Install gasket on adapter (if equipped). Apply thin bead of sealer to transmission extension and to gasket, if used.
5. Install adapter on transmission and install adapter mounting nuts. If adapter has 5/16 studs, tighten nuts to 30 - 41 Nm (22 - 30 ft. lbs.). If adapter
has 3/8 studs, tighten nuts to 41 - 47 Nm (30 - 35 ft. lbs.).
6. Lubricate propeller shaft slip yoke with transmission fluid or petroleum jelly.
7. Align and install propeller shaft. Tighten shaft clamp bolts to 19 Nm (170 inch lbs.) torque.
8. Connect shift rod to adapter shift lever. Be sure rod is fully seated in plastic grommet.
9. Adjust shift rod if necessary.
10. Lower vehicle.