
RAM 2500 Truck 4WD L6-5.9L DSL Turbo VIN 6 (1999)
3. Install the camshaft and thrust plate. Align the timing marks as shown.
4. Install the thrust plate bolts and tighten to 24 Nm (18 ft. lbs.) torque.
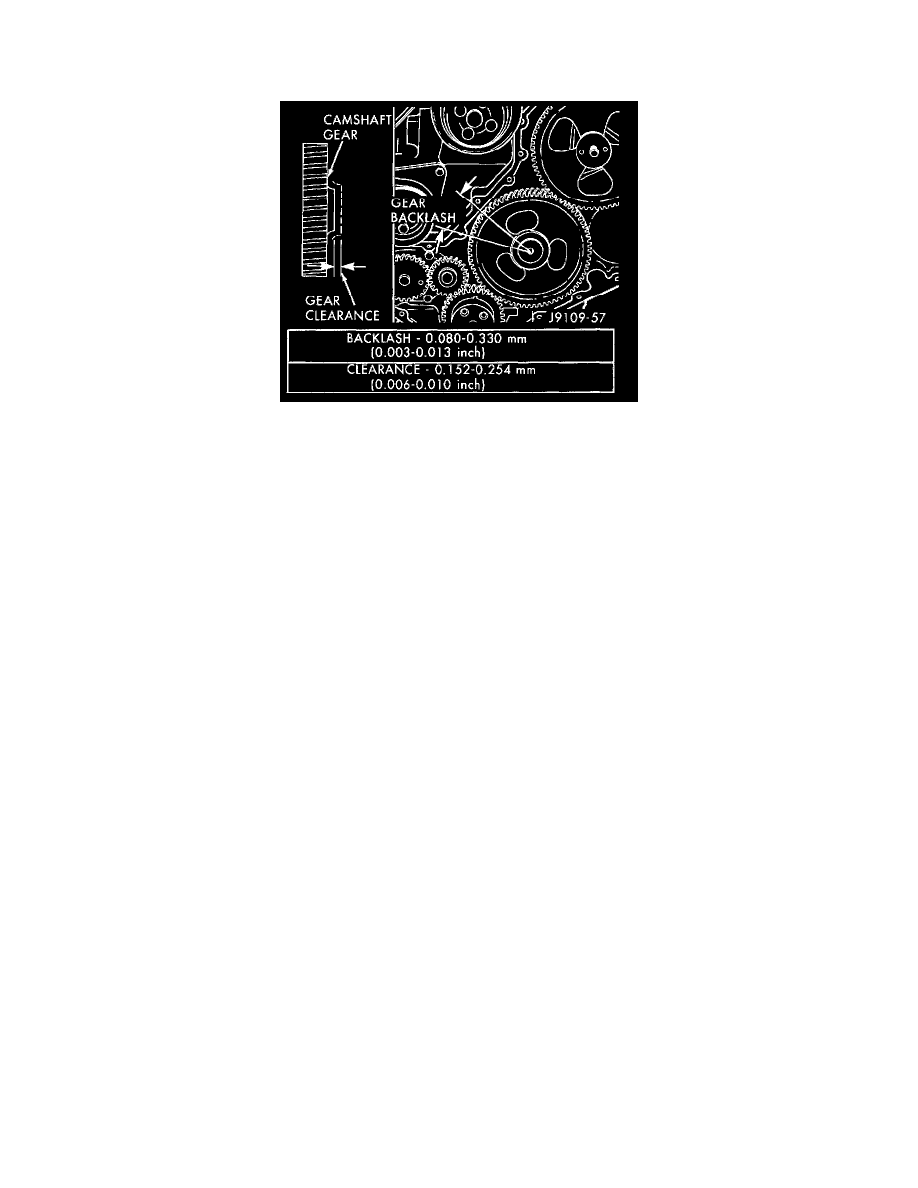
Camshaft Backlash And End Clearance
5. Measure camshaft back lash and end clearance.
6. Remove the wooden dowel rods and rubber bands from the tappets.
7. Lubricate the push rods with engine oil and install in their original location. Verify that they are seated in the tappets.
8. Lubricate the valve tips with engine oil and install the crossheads in their original locations.
9. Lubricate the crossheads and push rod sockets with engine oil and install the rocker arms and pedestals in their original locations. Tighten bolts to
36 Nm (27 ft. lbs.) torque.
10. Verify valve lash adjustment.
11. Install the cylinder head cover and reusable gasket. Torque bolts to 24 Nm (18 ft. lbs.)
12. Apply a bead of Mopar(R) Silicone Rubber Adhesive Sealant or equivalent to the gear housing cover. Install and tighten bolts to 24 Nm (18 ft.
lbs.) torque.
13. Install the crankshaft damper and tighten bolts to 125 Nm (92 ft. lbs.) torque.
14. Install the fan support/hub assembly and tighten bolts to 24 Nm (18 ft. lbs.) torque.
15. Install the fuel pump gear access cover. Tighten clockwise by hand.
16. Install the charge air cooler (with a/c condenser and auxiliary transmission oil cooler, if equipped) and tighten the mounting bolts to 2 Nm (17
inch lbs.) torque.
17. Connect charge air cooler inlet and outlet pipes. Tighten clamps to 10 Nm (100 inch lbs.) torque.
18. Install the radiator upper support panel.
19. Close radiator petcock and lower the radiator into the engine compartment. Tighten the mounting bolts to 11 Nm (95 inch lbs.) torque.
20. Raise vehicle on hoist.
21. Connect radiator lower hose and install clamp.
22. Connect transmission auxiliary oil cooler lines (if equipped).
23. Lower vehicle.
24. Install the fan shroud and tighten the mounting screws to 6 Nm (50 inch lbs.) torque.
25. Install the viscous fan/drive assembly and tighten to 57 Nm (42 ft. lbs.) torque.
26. Install the coolant recovery and windshield washer fluid reservoirs to the fan shroud.
27. Connect the coolant recovery hose to the radiator filler neck.
28. Install the accessory drive belt.
29. Install the front bumper assembly.
30. Add engine coolant.
31. Connect the battery negative cables.
32. Start engine and check for engine oil and coolant leaks.
33. Charge A/C system with refrigerant (if A/C equipped).