
RAM 2500 Truck 4WD L6-5.9L DSL Turbo VIN 6 (1999)
Map Lamp: Service and Repair
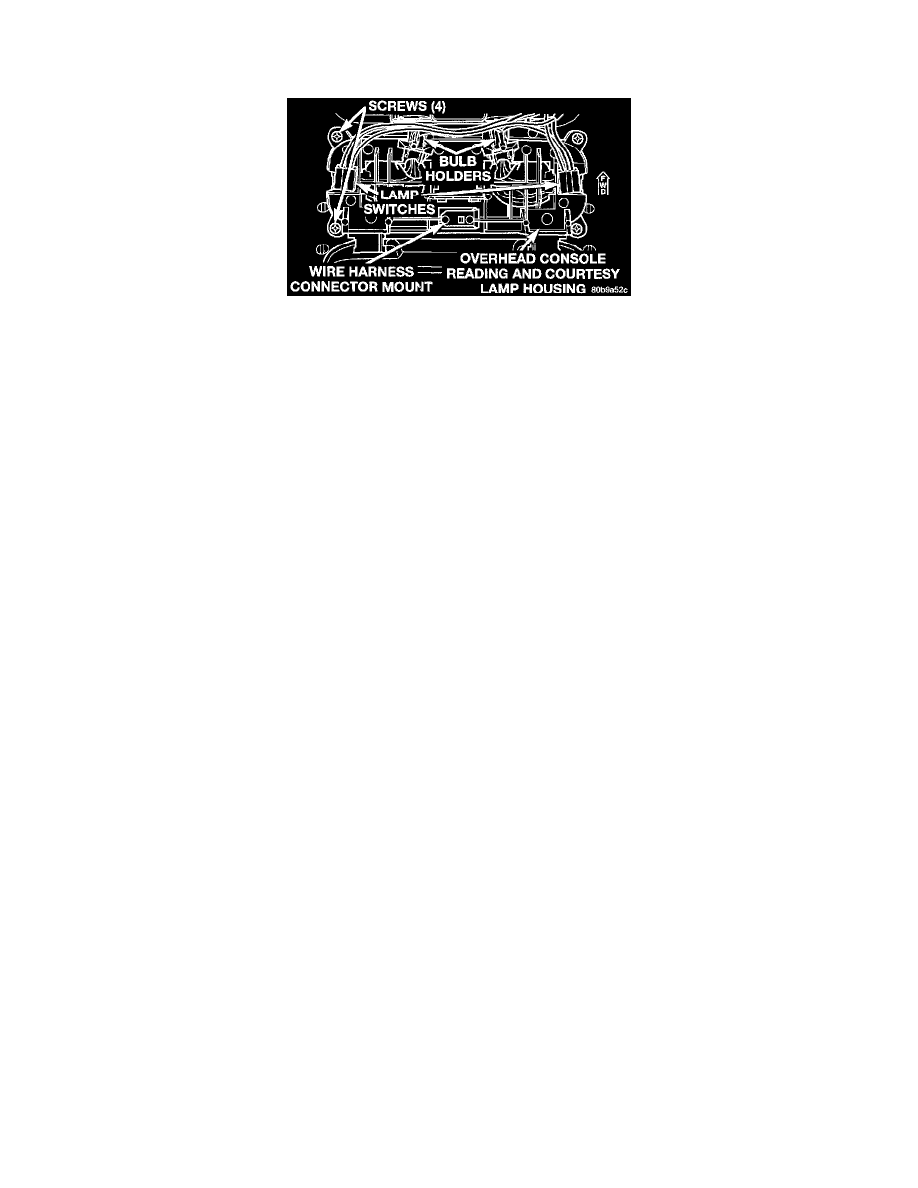
Overhead Console Reading and Courtesy Lamp Housing Replacement
Overhead Console Reading And Courtesy Lamp Housing Remove/Install
REMOVAL
1. Disconnect and isolate the battery negative cable.
2. Remove the overhead console from the headliner. Refer to Overhead Console Replacement for the procedures.
3. From the back of the overhead console housing, slide the overhead console wire harness connector toward the left to disengage it from the mount
on the rear of the reading and courtesy lamp lens housing.
4. Remove the four screws that secure the reading and courtesy lamp housing to the overhead console housing.
5. Pull the reading and courtesy lamp housing away from the overhead console housing far enough to turn it over for access to the lamp bulbs.
6. Remove both reading and courtesy lamp bulbs from their bulb holders by pulling them straight out from the holders.
7. Remove both switches from their mounting slots by sliding them towards their respective outboard ends of the reading and courtesy lamp housing.
8. Remove both bulb holders from their integral mounts in the reading and courtesy lamp housing by lifting the latch on the top of the mount and
pushing the bulb side of the holder out through the wire side of the mount.
9. Remove the reading and courtesy lamp housing from the overhead console housing.
INSTALLATION
1. Position the reading and courtesy lamp housing onto the overhead console housing.
2. Install both bulb holders into their integral mounts in the reading and courtesy lamp housing by inserting the bulb side of the holder into the latch
side of the mount and pushing it through the mount until the latch engages the back of the holder.
3. Install both switches into their mounting slots by sliding them inboard from their respective ends of the reading and courtesy lamp housing until
they snap into place.
4. Install both reading and courtesy lamp bulbs into their bulb holders by pushing them straight into the holders.
5. Position the reading and courtesy lamp housing onto the overhead console housing.
6. Install and tighten the four screws that secure the reading and courtesy lamp housing to the overhead console housing. Tighten the screws to 2.2
Nm (20 in lbs).
7. With the engagement end of the overhead console wire harness connector facing the left side of the console, slide the channel on the bottom of the
connector toward the right side of the console to engage it onto the mount on the rear of the reading and courtesy lamp lens housing.
8. Install the overhead console onto the headliner. Refer to Overhead Console in the Replacement for the procedures.
9. Reconnect the battery negative cable.