
RAM 2500 Truck 4WD L6-5.9L DSL Turbo VIN C (2004)
Control Arm: Service and Repair
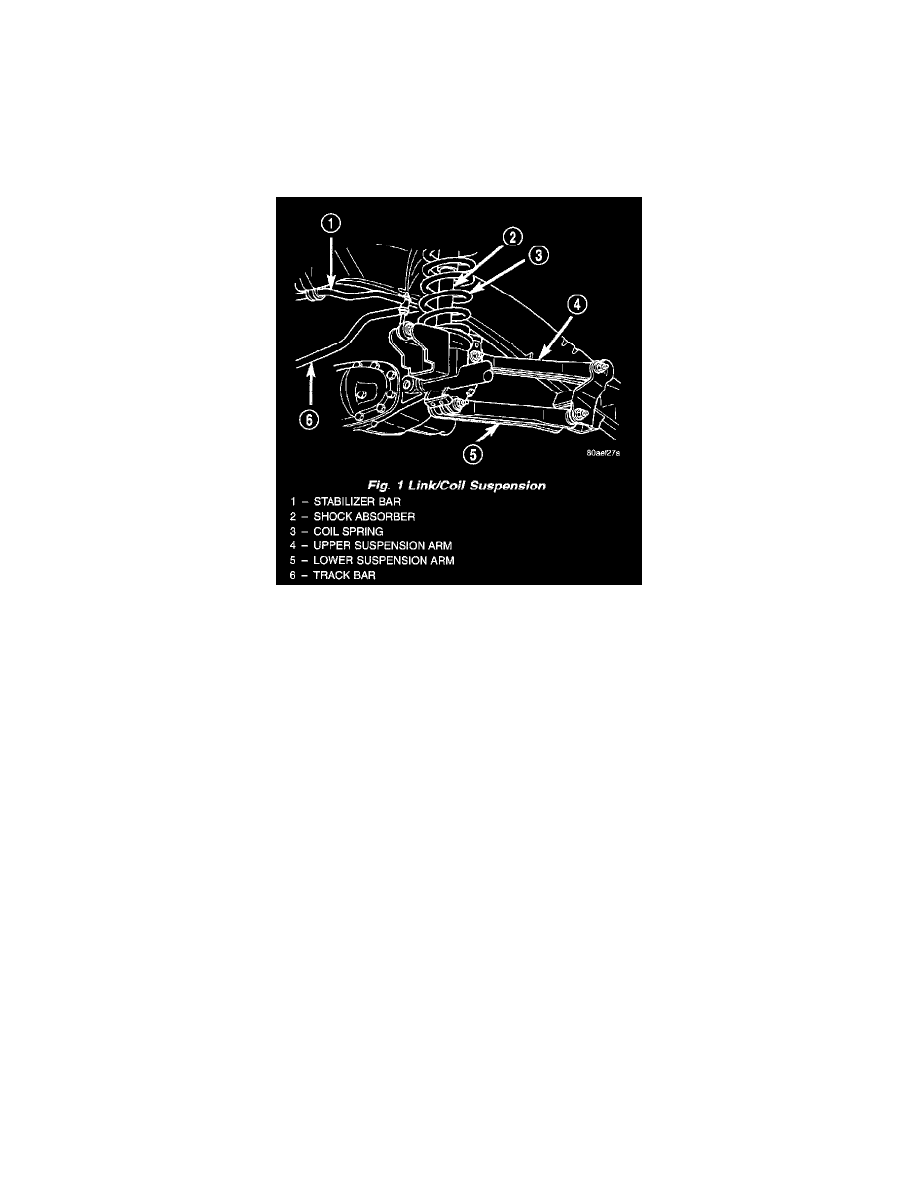
Upper Suspension Arm
Left
REMOVAL
1. Raise and support the vehicle.
2. Remove the upper suspension arm nut and bolt at the axle bracket.
3. Remove the nut and bolt at the frame rail and remove the upper suspension arm.
INSTALLATION
1. Position the upper suspension arm at the axle and frame rail.
2. Install the bolts and finger tighten the nuts.
3. Remove the supports and lower the vehicle.
4. Tighten nut at the axle bracket to 163 Nm (120 ft. lbs.). Tighten nut at frame bracket to 163 Nm (120 ft. lbs.).
Right
REMOVAL
1. Raise and support the vehicle.
2. Disconnect the exhaust system at the manifolds.
3. Disconnect the rubber exhaust mounts at the muffler.
4. Support the transmission.
5. Remove the transmission crossmember.
6. Lower the exhaust system down in order to gain access to the removal of the upper bolt.
7. Remove the nut and bolt at the frame rail and remove the upper suspension arm.
8. Remove the upper suspension arm nut and bolt at the axle bracket.
9. Remove the suspension arm from the vehicle.
INSTALLATION
1. Position the upper suspension arm at the axle and frame rail.
2. Install the bolts, then finger tighten the nuts.
3. Reconnect the rubber exhaust mounts at the muffler.
4. Reconnect the exhaust at the manifolds.
5. Install the transmission crossmember.
6. Remove the supports and lower the vehicle.
7. Tighten nut at the axle bracket to 163 Nm (120 ft. lbs.). Tighten nut at frame bracket to 163 Nm (120 ft. lbs.).