
RAM 2500 Truck 4WD L6-6.7L DSL Turbo VIN A (2007)
8. Install injector into cylinder head with male (high-pressure) connector port facing the intake manifold. Push down on fuel injector mounting flange
to engage O-ring and seat injector.
9. Tightening Sequence:
a. Install fuel injector holdown clamp (mounting flange) bolts. Be sure the clamp is perpendicular to the injector body. Do a preliminary
tightening of these bolts to 5 Nm (44 in. lbs.) torque. This preliminary tightening insures the fuel injector is seated and centered.
b. After tightening, relieve bolt torque, but leave both bolts threaded in place.
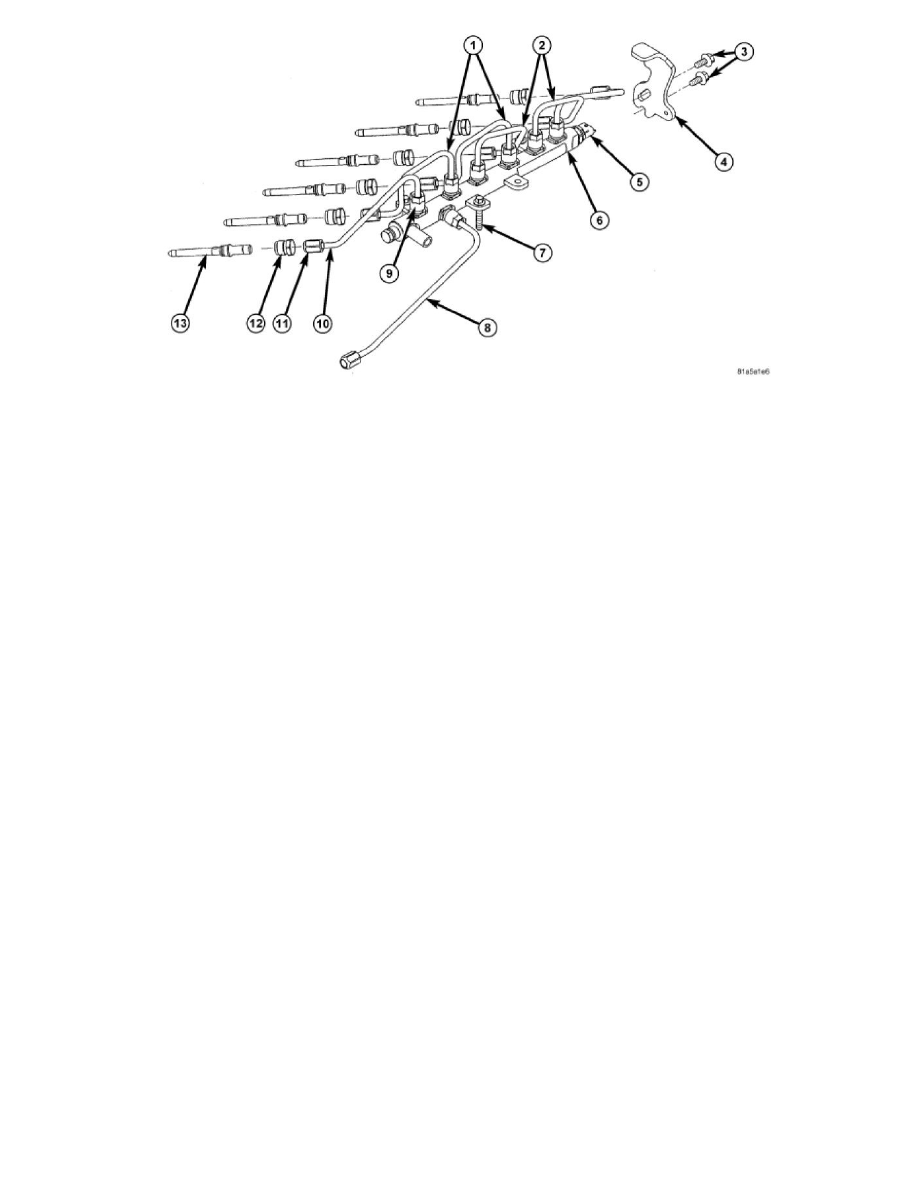
c. Install high-pressure connector (13) and retaining nut (12). Do a preliminary tightening of nut (12) to 15 Nm (11 ft. lbs.) torque.
d. Alternately tighten injector holdown bolts to 8 Nm (71 in. lbs.) torque.
e. Do a final tightening of the high-pressure connector and retaining nut (12). Tighten to 50 Nm (37 ft. lbs.) torque.
10. Install integrated gasket
11. Connect injector solenoid wires and nuts to top of injectors. Tighten connector nuts to 1.25 Nm (11 in. lbs.) torque. Be very careful not to
overtighten these nuts as damage to fuel injector will occur.
12. Install exhaust rocker arm assembly.
13. Set exhaust valve lash.
14. Install fuel connector tube nut at cylinder head and tighten to 50 Nm (37 ft. lbs.). Be sure to use a secondary back-up wrench on the connector nut
(fitting) while torquing fuel line fitting.
15. Install valve cover.
16. Install breather assembly.
FUEL INJECTOR ID CORRECTION CODES: