
RAM 2500 Truck 4WD V10-8.0L VIN W (1997)
2.
Cut one of the wires with terminal ends from package P/N 04882087 in half. This action will allow for two repairs if necessary.
3.
Remove approximately one inch of insulation from the wires that are being spliced together.
4.
Place a piece of heat shrink tubing over one of the wires. Make sure the tubing will be long enough to cover and seal the entire repair.
5.
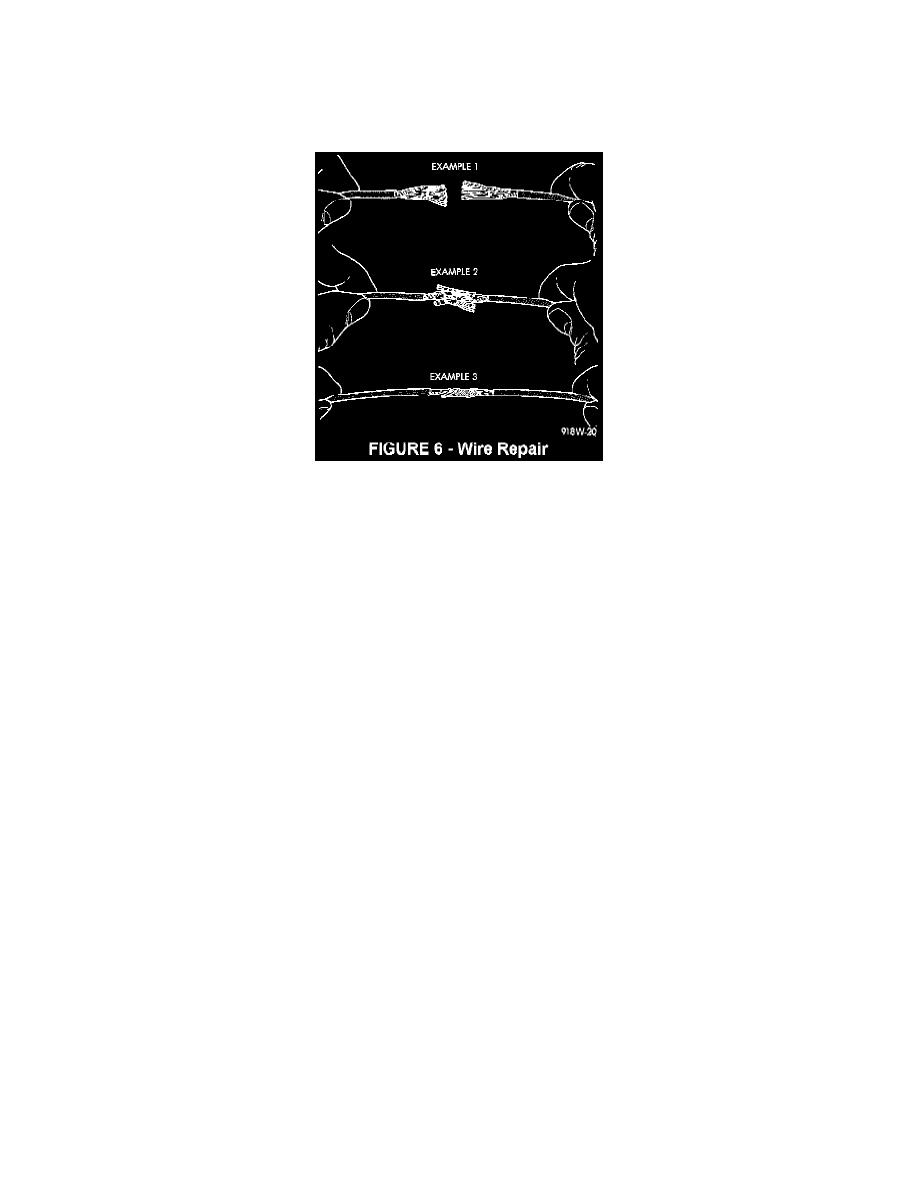
Spread the strands of the wire apart on each part of the exposed wire (Example 1) (Figure 6).
6.
Push the ends of the two wires together until the strands of wire are close to the insulation (Example 2) (Figure 6).
7.
Twist the wires together (Example 3) (Figure 6).
8.
Solder the connection together using rosin core type solder only. Do not use acid core solder.
9.
Center the heat shrink tubing over the joint and heat the tubing using a heat gun. Heat the joint until the tubing is tightly sealed and sealant comes
out of both ends of the tubing.
10.
Secure the wires to the existing harness to prevent chafing or damage to the insulation.
11.
Install the wire terminal end into the appropriate cavity of the insulator. Fully seat all terminals into the insulator.
12.
Push in the single lock tab on the side of the connector (Figure 5).
13.
Install the connector into the proper cavity of the PCM.
14.
Connect the battery negative cable (both batteries should be connected if the vehicle is equipped with a 5.9L Cummins Diesel).
15.
Reset the clock and reprogram the radio stations to the presets recorded in step 1 of the Diagnosis.
POLICY: Information Only