
RAM 2500 Truck 4WD V10-8.0L VIN W HDC (2000)
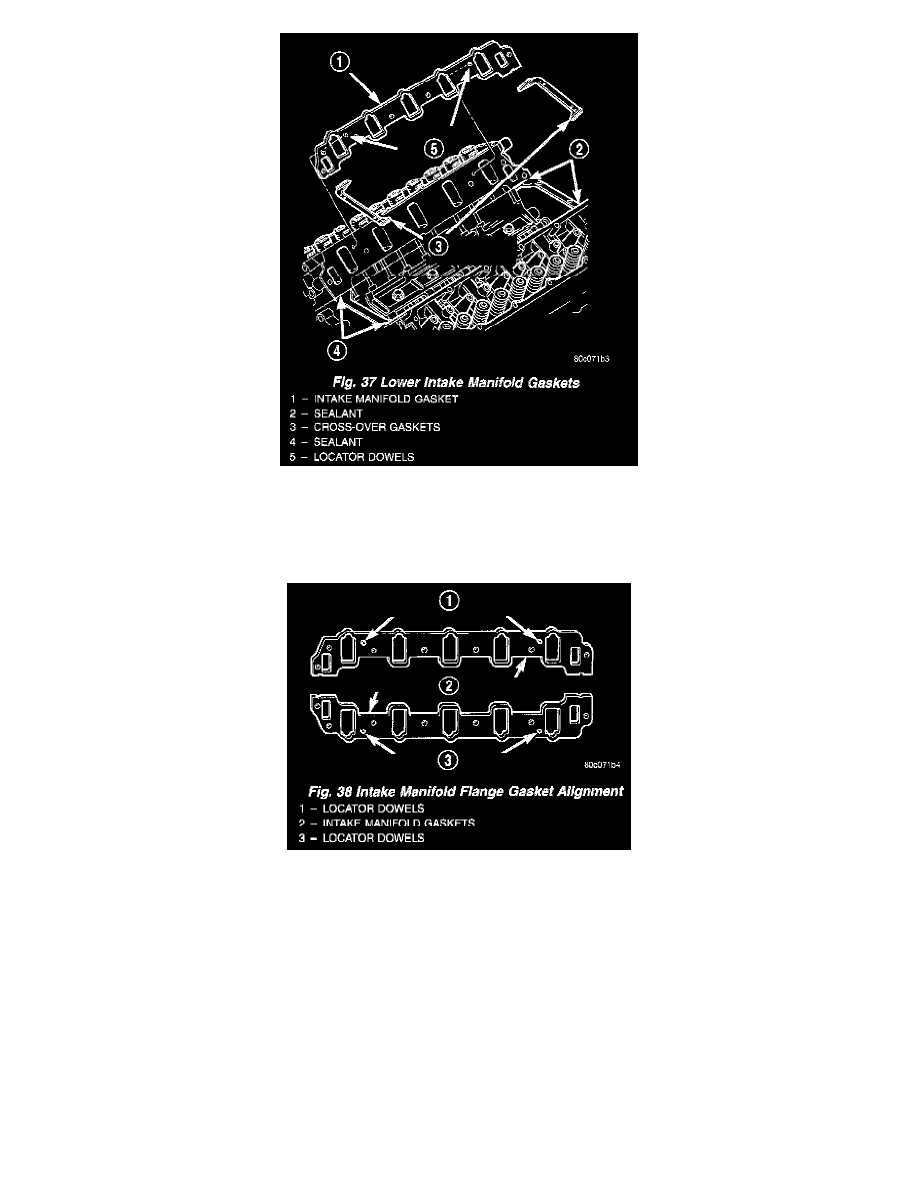
Fig. 37
17. Discard the lower intake manifold gaskets (Fig. 37).
INSTALLATION
Fig. 38
1. Install the intake manifold side gaskets. Be sure that the locator dowels are positioned in the head (Fig. 38).
2. Position the cross-over gaskets and press firmly onto the block (Fig. 37). BE SURE THE BLOCK IS OIL FREE.
3. Insert Mopar GEN II Silicone Rubber Adhesive Sealant, or equivalent, into the four corner joints an excessive amount of sealant is not required to
ensure a leak proof seal. However, an excessive amount of sealant may reduce the effectiveness of the flange gasket. The sealant should be
approximately 5 mm (0.2 in.) in diameter. (Fig. 37).
4. The lower intake manifold MUST be installed within 3 minutes of sealant application. Carefully lower intake manifold into position on the
cylinder block and heads. After intake manifold is in place, inspect to make sure seals and gaskets are in place. Finger start all the lower intake
bolts.
5. Tighten the lower intake manifold bolts in sequence to 54 Nm (40 ft. lbs.) torque (Fig. 36).
6. Using a new gasket, position the upper intake manifold onto the lower intake manifold.
7. Finger start all bolts, alternate one side to the other.
8. Tighten upper intake manifold bolts in sequence to 22 Nm (16 ft. lbs.) torque (Fig. 35).
9. Using a new gasket, install the throttle body onto the upper intake manifold. Tighten the bolts to 23 Nm (200 in. lbs.) torque.
10. Install closed crankcase ventilation and evaporation control systems.