
RAM 2500 Truck 4WD V8-5.2L VIN Y (2000)
Overhead Console Remove/Install
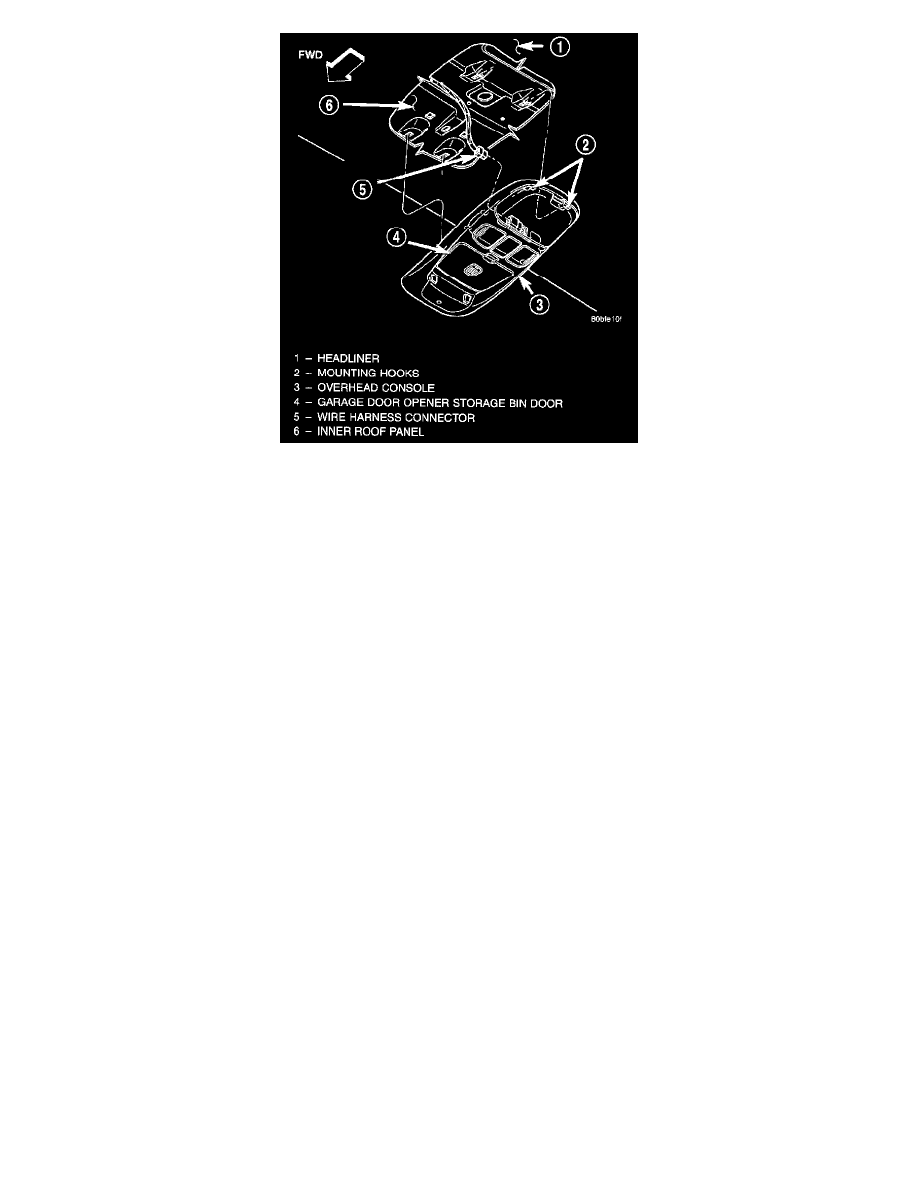
4. Slide the overhead console rearward far enough to disengage the two mounting hooks on the rear of the housing from the mounting holes in the
inner roof panel.
5. Lower the overhead console from the headliner far enough to access the wire harness connector.
6. Disconnect the roof wire harness connector from the overhead console wire harness connector.
7. Remove the overhead console from the vehicle.
INSTALLATION
1. Position the overhead console near the mounting location on the headliner in the vehicle.
2. Reconnect the roof wire harness connector to the overhead console wire harness connector.
3. Engage the two mounting hooks on the rear of the overhead console housing in the mounting holes in the inner roof panel.
4. Slide the overhead console forward far enough to align the two latches on the front of the housing with their receptacles in the inner roof panel.
5. Push upward firmly and evenly on the front of the overhead console until each of the two latches is fully engaged in its receptacle in the inner roof
panel.
6. Close the garage door opener storage bin door.
7. Reconnect the battery negative cable.
Overhead Console Reading and Courtesy Lamp Lens Replacement
REMOVAL
1. Disconnect and isolate the battery negative cable.
2. Insert a long, narrow, flat-bladed tool between the curved (outboard) edge of the reading and courtesy lamp lens and the overhead console
housing.
3. Gently pry inward and downward against the lens until the latch tab in the center of the outboard edge of the reading and courtesy lamp lens is
disengaged from the overhead console housing.
4. Pull firmly on the lens toward the outboard side of the vehicle to disengage the two pivot tabs on the inboard edge of the reading and courtesy
lamp lens are disengaged from the overhead console housing.
5. Remove the reading and courtesy lamp lens from the overhead console housing.
INSTALLATION
1. Position the reading and courtesy lamp lens onto the overhead console housing.
2. Align the two pivot tabs on the inboard edge of the reading and courtesy lamp lens with the two pivot holes in the overhead console housing.
3. Push firmly on the lens toward the inboard side of the vehicle to insert the two pivot tabs on the inboard edge of the reading and courtesy lamp lens
into the two pivot holes in the overhead console housing.
4. Pivot the lens back up into position and press upward firmly until the latch tab in the center of the outboard edge of the reading and courtesy lamp
lens snaps back into the overhead console housing.
5. Reconnect the battery negative cable.
Overhead Console Reading and Courtesy Lamp Housing
REMOVAL