
RAM 2500 Van V6-239 3.9L Magnum (1995)
Right Cowl Side & Front Wheelhouse Trim Panels
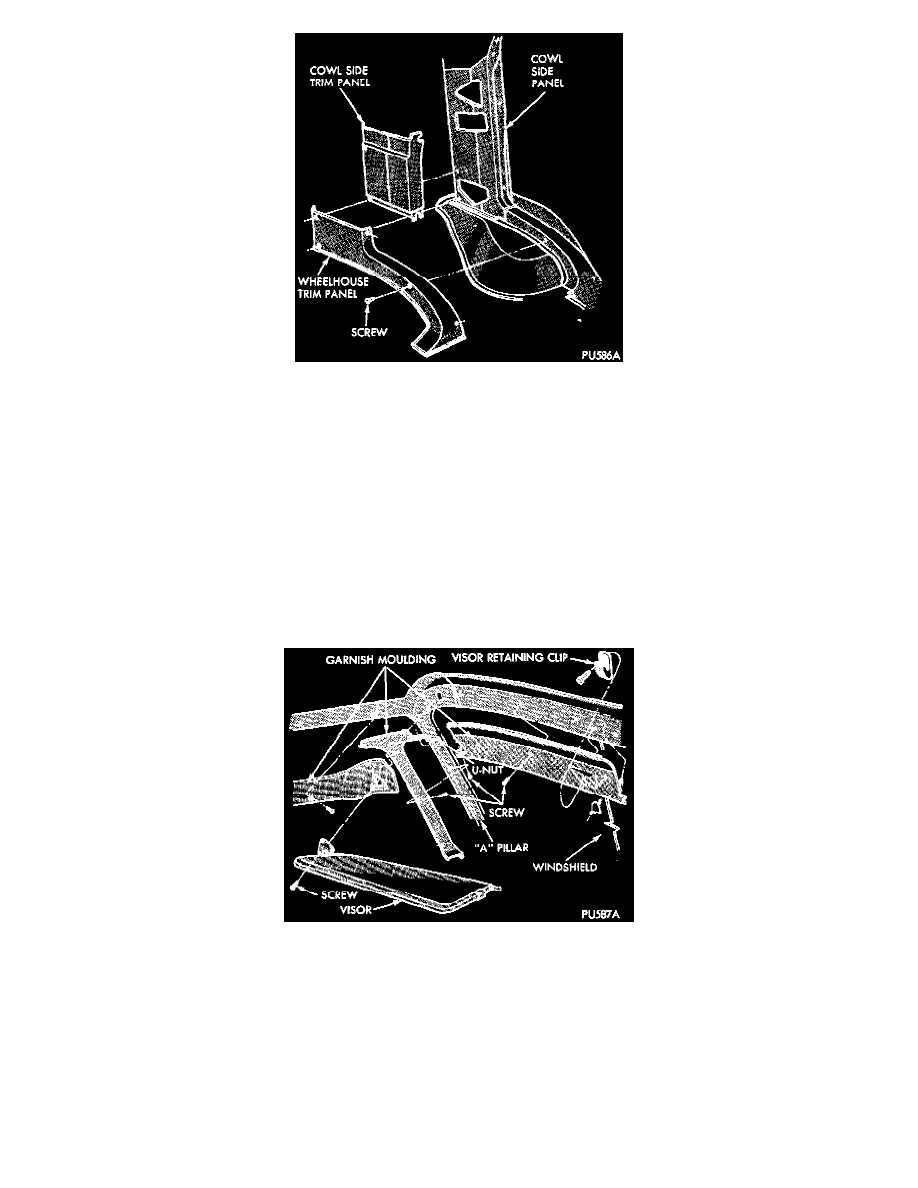
COWL SIDE TRIM PANEL REMOVAL
1. Remove the retaining screws and the front wheelhouse trim panel from the wheelhouse outer panel.
2. Remove the retaining screws and the cowl side trim panel from the cowl panel.
INSTALLATION
1. Position the cowl side trim panel at the cowl panel with the screw holes aligned.
2. Install the trim panel retaining screws in the cowl panel. Tighten the screws with 2 Nm (17 in. lbs.) torque. Avoid over-tightening the screws.
3. Position front wheelhouse trim panel at the wheelhouse outer panel with the screw holes aligned. Tighten the screws with 2 Nm (17 in. lbs.)
torque. Avoid over-tightening the screws.
WINDSHIELD HEADER, A-PILLAR AND FRONT DOOR HEADER TRIM PANELS REMOVAL
When removing an interior trim panel that is overlapped by an adjacent trim panel, remove the nearest attaching screw in the adjacent trim panel to
avoid possible damage to both trim panels.
Windshield Header, A-Pillar & Front Door Header Trim Panels
1. Remove the sunvisor and retaining clip attaching screws from the windshield header. Remove the visors and clips from the windshield header.
2. Remove the trim panel attaching screws from the body interior panels.
3. Remove the trim panels from the body interior panels.
INSTALLATION
To ensure correct alignment when installing interior trim panels, first install the attaching screws "finger-tight", align the trim panel at each end
and then tighten the screws with the specified torque. Avoid over-tightening the attaching screws because this can damage the trim panel and/or the
body panel screw holes.
1. Position the trim panels at the body interior panels with the screw holes aligned.