
RAM 2500 Van V8-5.2L Prop VIN 2 (2000)
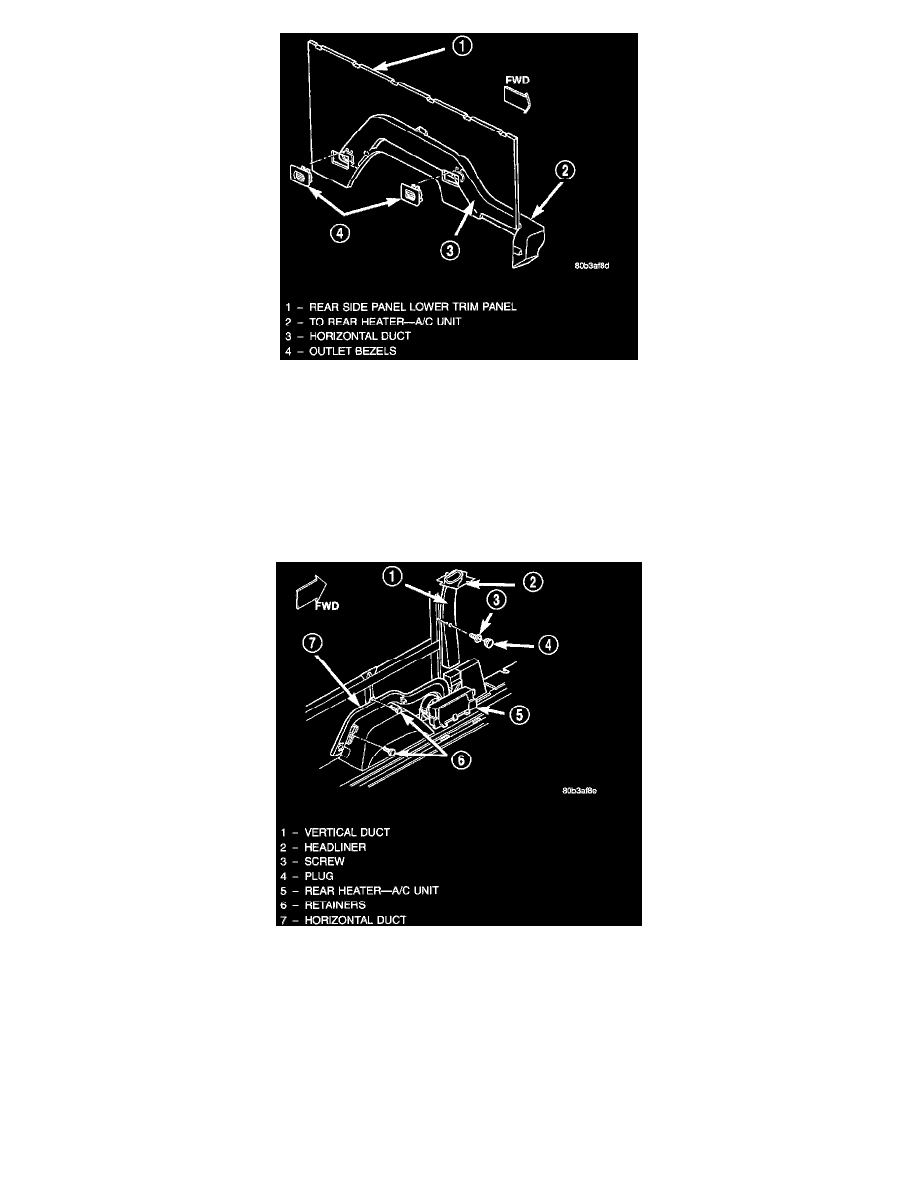
Rear Side Panel Outlet Bezels
1. Using a trim stick or another suitable wide flat-bladed tool, gently pry between the edge of the outlet bezel and the rear side panel lower trim
panel to release the snap clips that secure the bezel to the horizontal duct.
2. Remove the outlet bezel from the rear side panel lower trim panel.
3. To install the outlet bezel, position the bezel to the holes on the horizontal duct and press inward firmly and evenly on both sides of the bezel
until the retaining clips snap into place.
Vertical Duct
The vertical duct is only used on models equipped with the optional rear heater-A/C unit.
Rear Heater-A/C Unit Ducts Remove/Install
1. Using a trim stick or another suitable wide flat-bladed tool, gently pry out the plug that covers the vertical duct mounting screw.
2. Loosen but do not remove the screw that secures the vertical duct to the rear side panel strainer. Only loosen the screw far enough to disengage
the vertical duct from the side panel. Gently pull the vertical duct away from the rear side panel while loosening the screw so that it can be
determined when the screw is disengaged from the side panel.
3. Grasp the top of the vertical duct firmly with one hand and press upward on the inboard side of the duct opening in the headliner with the other
hand. Pull the top of the duct downward and inboard until it unsnaps from the headliner duct opening.
4. Lift the vertical duct off of the rear heater-A/C unit duct outlet.
5. Reverse the removal procedures to install. Tighten the mounting screw to 2.2 Nm (20 in. lbs.).
Horizontal Duct