
RAM 2500 Van V8-5.2L Prop VIN 2 (2000)
Expansion Valve: Service and Repair
Rear
The rear expansion valve is used only on models with the optional rear heater-A/C unit. The expansion valve can be removed without removing the rear
heater-A/C unit from the vehicle.
REMOVAL
1. Disconnect and isolate the battery negative cable.
2. Recover the refrigerant from the refrigerant system.
3. Remove the cover from the rear heater-A/C unit.
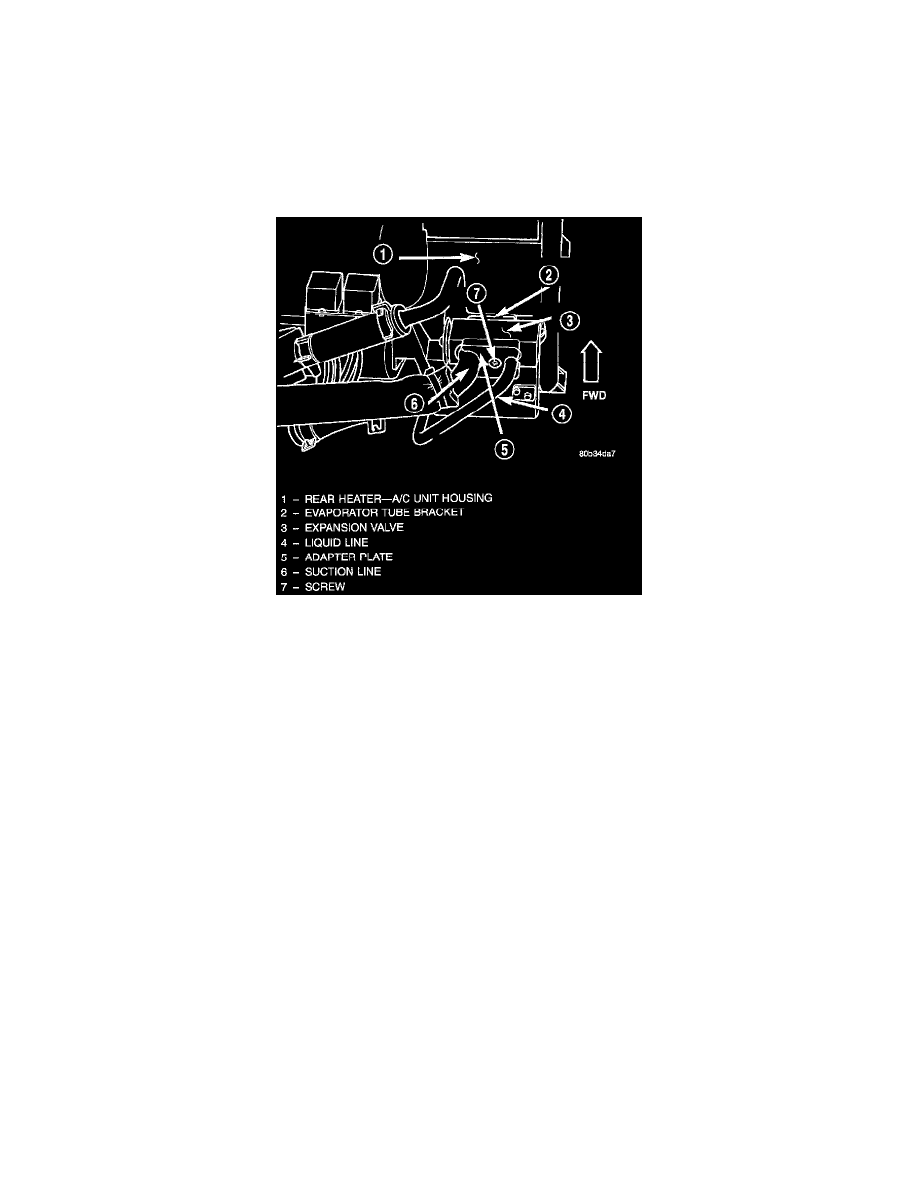
Rear Expansion Valve Remove/Install
4. Remove the screw from the adapter plate that secures the rear heater-A/C unit liquid and suction lines to the expansion valve.
5. Separate the rear heater-A/C unit liquid and suction lines from the expansion valve. Install plugs in, or tape over all of the opened refrigerant line
fittings.
6. Remove the two screws that secure the expansion valve to the rear heater-A/C unit combination coil evaporator tube bracket. Install plugs in, or
tape over all of the opened refrigerant line fittings.
7. Remove the expansion valve from the rear heater-A/C unit.
INSTALLATION
1. Remove the tape or plugs from the combination coil evaporator tube bracket and the evaporator side of the expansion valve. Position the
expansion valve to the tube bracket and secure the connection with two screws. Tighten the mounting screws to 11.4 Nm (100 in. lbs.).
2. Remove the tape or plugs from the rear heater-A/C unit suction and liquid lines and from the expansion valve. Position the suction and liquid lines
to the expansion valve and secure the connection with the adapter plate and mounting screw. Tighten the mounting screw to 22 Nm (200 in. lbs.).
3. Reinstall the cover to the rear heater-A/C unit.
4. Connect the battery negative cable.
5. Evacuate the refrigerant system.
6. Charge the refrigerant system.