
RAM 2500 Van V8-5.2L Prop VIN 2 (2000)
2. Position the windshield molding and position the replacement windshield in the windshield opening. Center the glass in the opening against the
support spacers. Mark the glass at the support spacers with a grease pencil or masking tape and ink pen to use as a reference for installation (Fig.
2). Remove the replacement windshield from the opening.
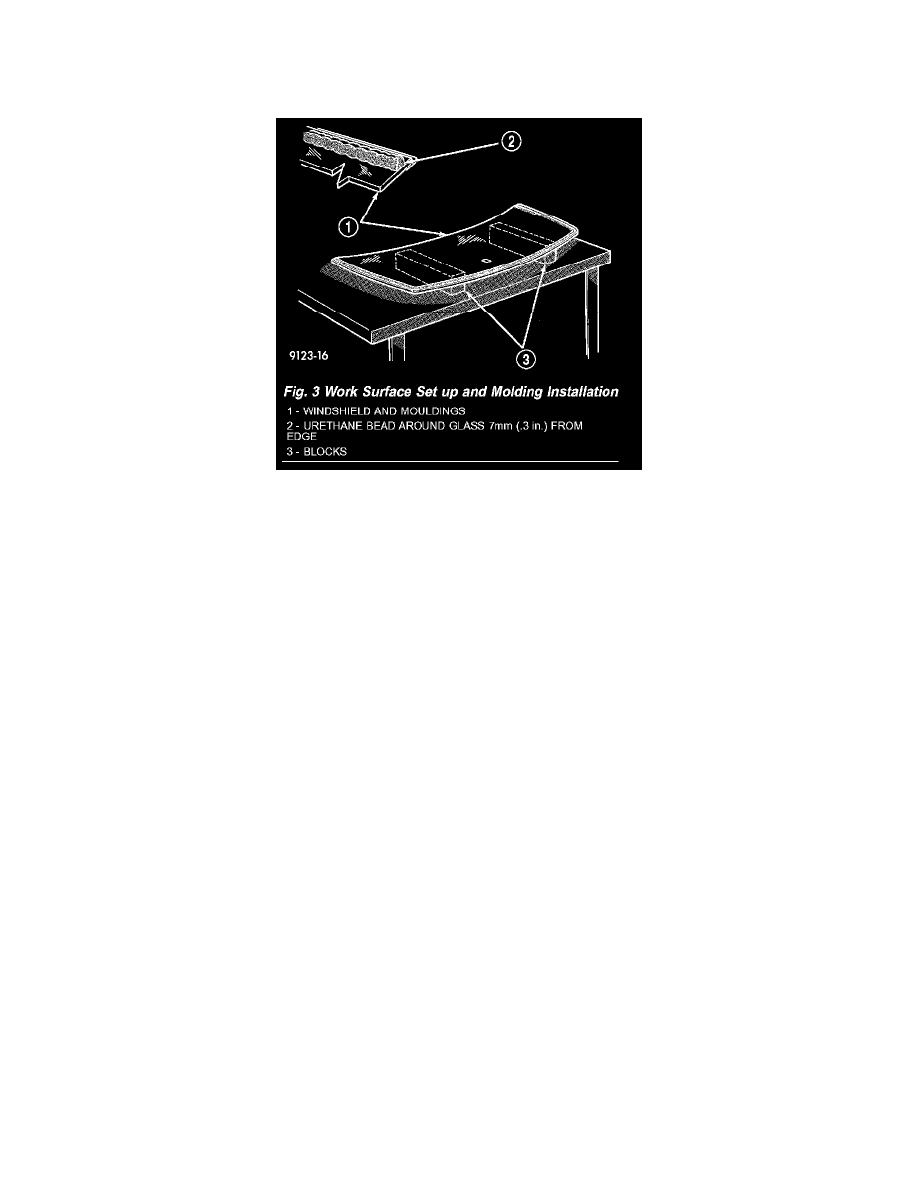
Fig. 3
3. Position the windshield inside up on a suitable work surface with two padded, wood 10 cm by 10 cm by 50 cm (4 in. by 4 in. by 20 in.) blocks,
placed parallel 75 cm (2.5 ft.) apart (Fig. 3).
WARNING: DO NOT USE SOLVENT BASED GLASS CLEANER TO CLEAN WINDSHIELD BEFORE APPLYING GLASS PREP
AND PRIMER. POOR ADHESION CAN RESULT.
4. Clean inside of windshield with ammonia based glass cleaner and lint-free cloth.
5. Apply molding to perimeter of windshield.
6. Apply Glass Prep adhesion promoter 25 mm (1 in.) wide around perimeter of windshield and wipe with clean/dry lint-free cloth until no streaks
are visible.
7. Apply Glass Primer 25 mm (1 in.) wide around perimeter of windshield. Allow at least three minutes drying time.
8. Apply Pinchweld primer 15 mm (.75 in.) wide around the windshield fence. Allow at least three minutes drying time.