
RAM 2500 Van V8-5.2L VIN Y (1998)
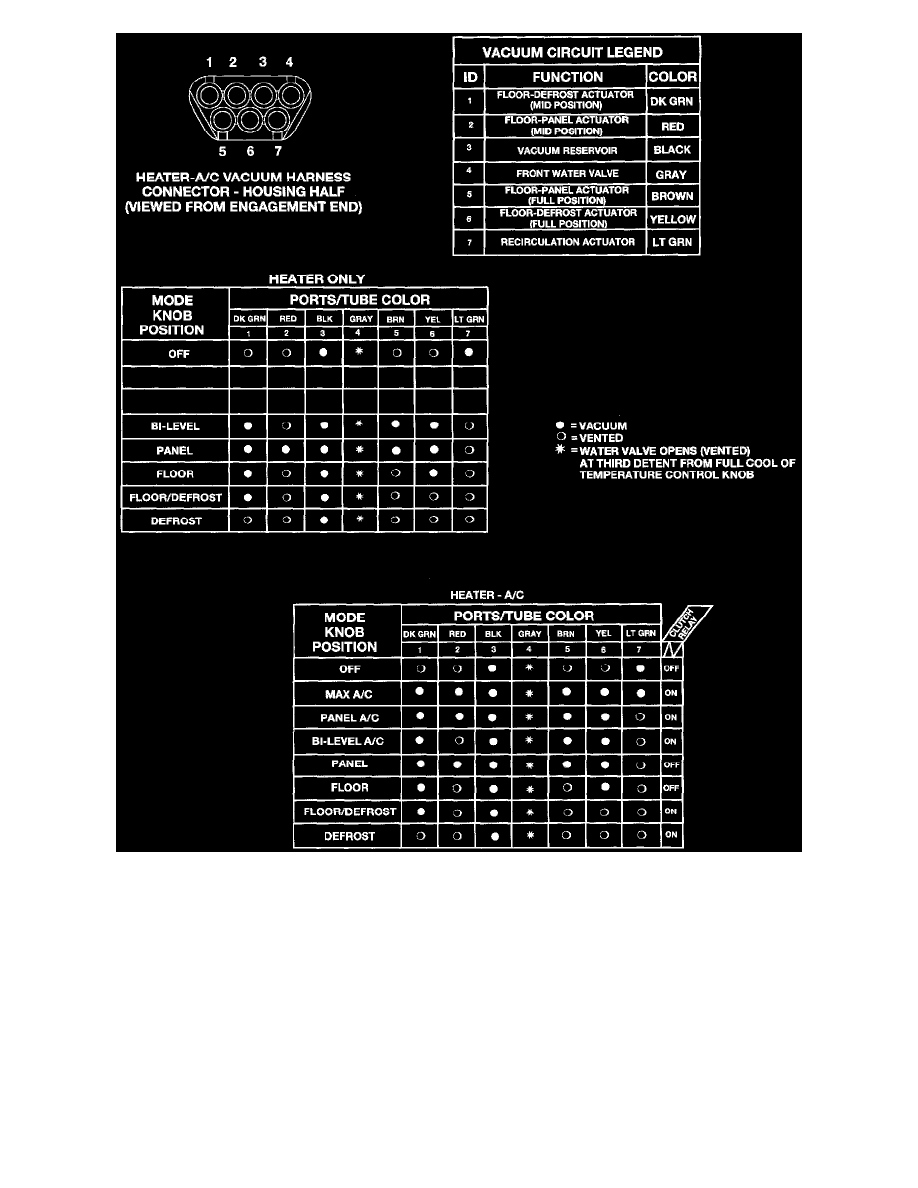
Vacuum Circuits
Locating Vacuum Leaks
WARNING: ON VEHICLES EQUIPPED WITH AIRBAGS, REFER TO AIRBAGS BEFORE ATTEMPTING ANY STEERING WHEEL,
STEERING COLUMN, OR INSTRUMENT PANEL COMPONENT DIAGNOSIS OR SERVICE. FAILURE TO TAKE THE PROPER
PRECAUTIONS COULD RESULT IN ACCIDENTAL AIRBAG DEPLOYMENT AND POSSIBLE PERSONAL INJURY.
1. Disconnect the vacuum harness connector on the back of the heater-A/C mode control switch on the instrument panel.
2. Connect the test set vacuum hose probe to each p0rt in the vacuum harness connector, one port at a time, and pause after each connection. The test
set gauge should return to the 27 kPa (8 in. Hg.) setting shortly after each connection is made. if OK, replace the faulty heater-A/C control. if not
OK, go to Step 4.
3. Determine the vacuum line color of the vacuum circuit that is leaking. To determine the vacuum line colors, see the Vacuum Circuits chart.
4. Disconnect and plug the vacuum line from the component (fitting, actuator, valve, switch, or reservoir) on the other end of the leaking circuit.
instrument panel disassembly or removal may be necessary to gain access to some components.
5. Connect the test set hose or probe to the open end of the leaking circuit. The test set gauge should return to the 27 kPa (8 in. Hg.) setting shortly