
RAM 2500 Van V8-5.2L VIN Y (1998)
Multi-Function Switch Remove/Install
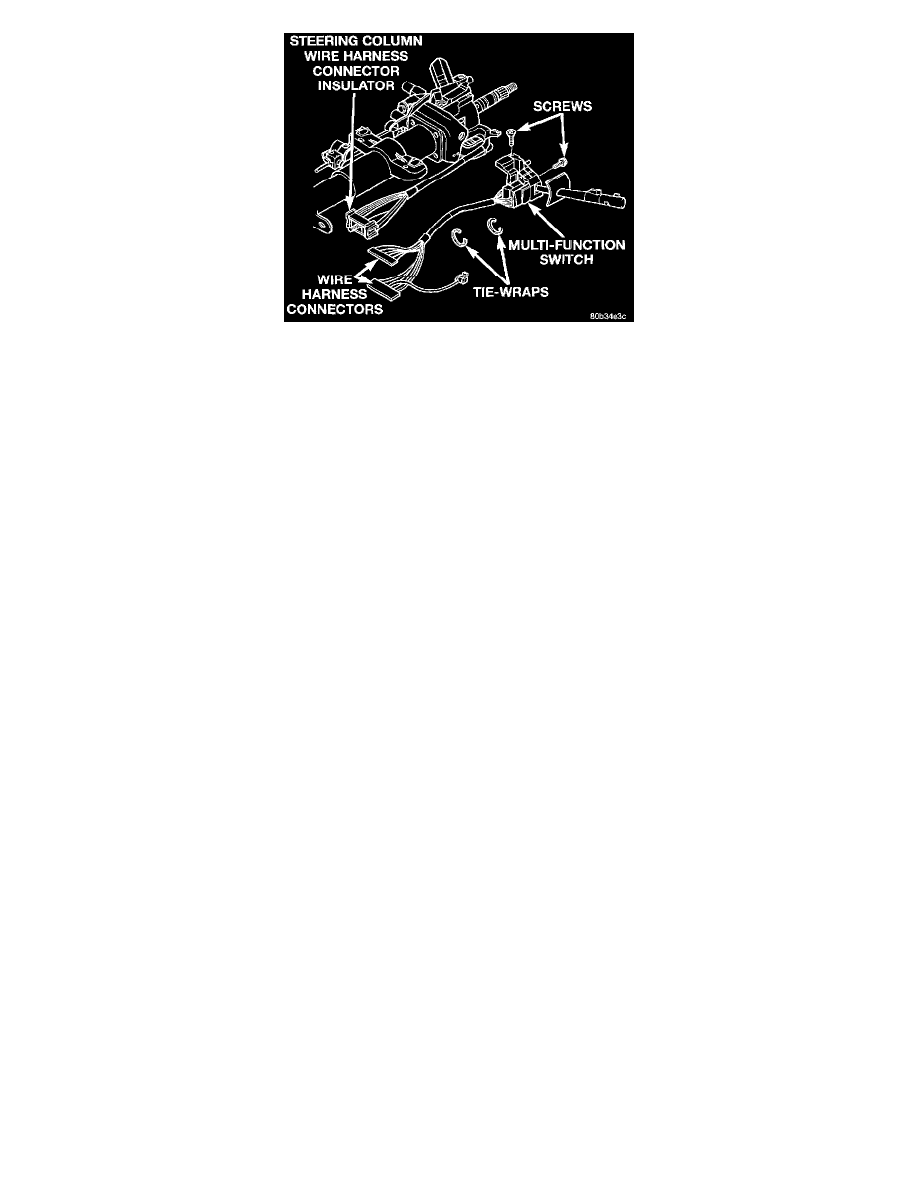
16. Remove the two screws that secure the multi-function switch to the steering column.
17. Remove the multi-function switch from the steering column.
18. Reverse the removal procedures to install. During installation, check that the following procedures are accomplished:
-
Tighten the multi-function switch mounting screws to 6 N.m (53 in. lbs.).
-
Be certain that the new wire harness tie-wraps are installed in the same positions as those that were removed.
-
Be certain that the steering column wire harnesses are routed so that they will not be pinched or stretched.
-
Be certain that the upper shroud spacer mounting stud is fully seated to the mounting boss on the inside of the shroud.
-
Tighten the upper shroud mounting screws to 1.4 N.m (12 in. lbs.).
-
Tighten the lower shroud mounting screws to 3.4 N.m (30 in. lbs.).
-
Be certain to index the alignment splines in the hub of the steering wheel with the splines on the upper steering column shaft.
-
Be certain to route the wire harnesses from the clockspring between the steering wheel back trim cover and the steering wheel armature.
-
Tighten the steering wheel nut to 61 N.m (45 ft. lbs.).