
RAM 2500 Van V8-5.2L VIN Y (1998)
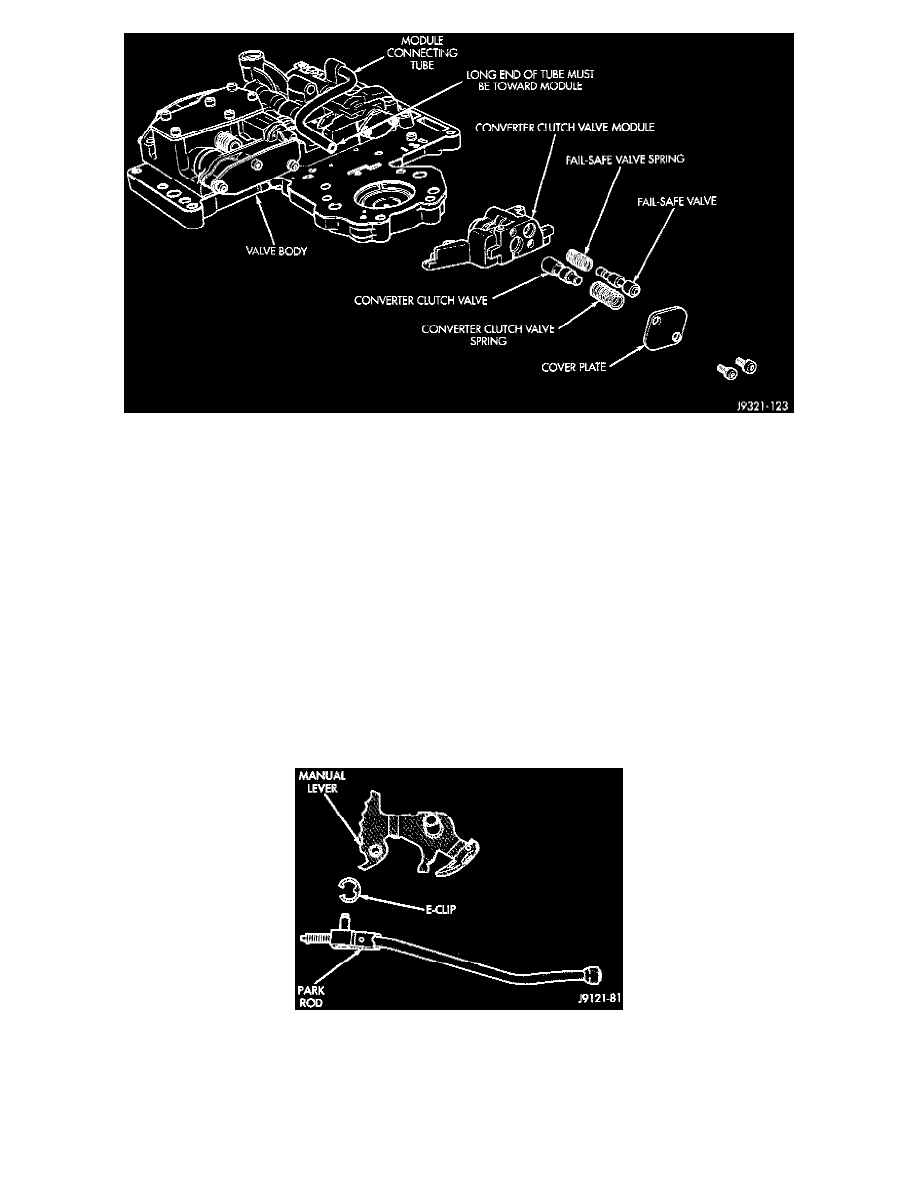
Converter Clutch Module Components
8. Assemble and install lockup module and components on valve body.
9. Assemble regulator valve line pressure plug, sleeve, throttle plug and spring. insert assembly in valve body and install end plate. Tighten end plate
screws to 4 Nm (35 inch lbs.) torque.
10. Install 1-2 and 2-3 shift valves and springs.
11. Install 1-2 shift control valve and spring.
12. Install shuttle valve as follows:
a. Insert shuttle valve in bore.
b. Insert plastic guides in shuttle valve secondary spring.
c. Install spring on end of valve.
d. Hold shuttle valve in place. Then compress secondary spring and install E-clip in groove at end of valve.
e. Verify that spring and E-clip are properly seated before proceeding.
13. Install shuttle valve cover plate. Tighten end plate screws to 4 Nm (35 inch lbs.) torque.
14. Install 1-2 and 2-3 valve governor plugs in valve body. Then install shuttle valve primary spring and throttle plug.
15. Align and install governor plug end plate on valve body and install end plate screws. Tighten screws to 4 Nm (35 inch lbs.) torque.
16. Install manual valve.
17. Install throttle valve and spring. Then install kickdown valve and detent.
18. Install pressure regulator valve and switch valve in valve body.
Park Rod Install
19. Install manual lever detent spring in housing. Place detent ball on end of spring and push ball and spring into housing. Secure ball and spring with
Detent Retainer 6583.
20. Insert line pressure adjusting screw in adjusting screw bracket.
21. Install spring on end of line pressure regulator valve.
22. Install switch valve spring on tang at end of adjusting screw bracket.