
RAM 2500 Van V8-5.9L VIN Z (1997)
Glove Box Lamp: Service and Repair
Glove Box Lock
REMOVAL AND INSTALLATION
1. Open the glove box door and manually the glove box latch pawl in the latched position.
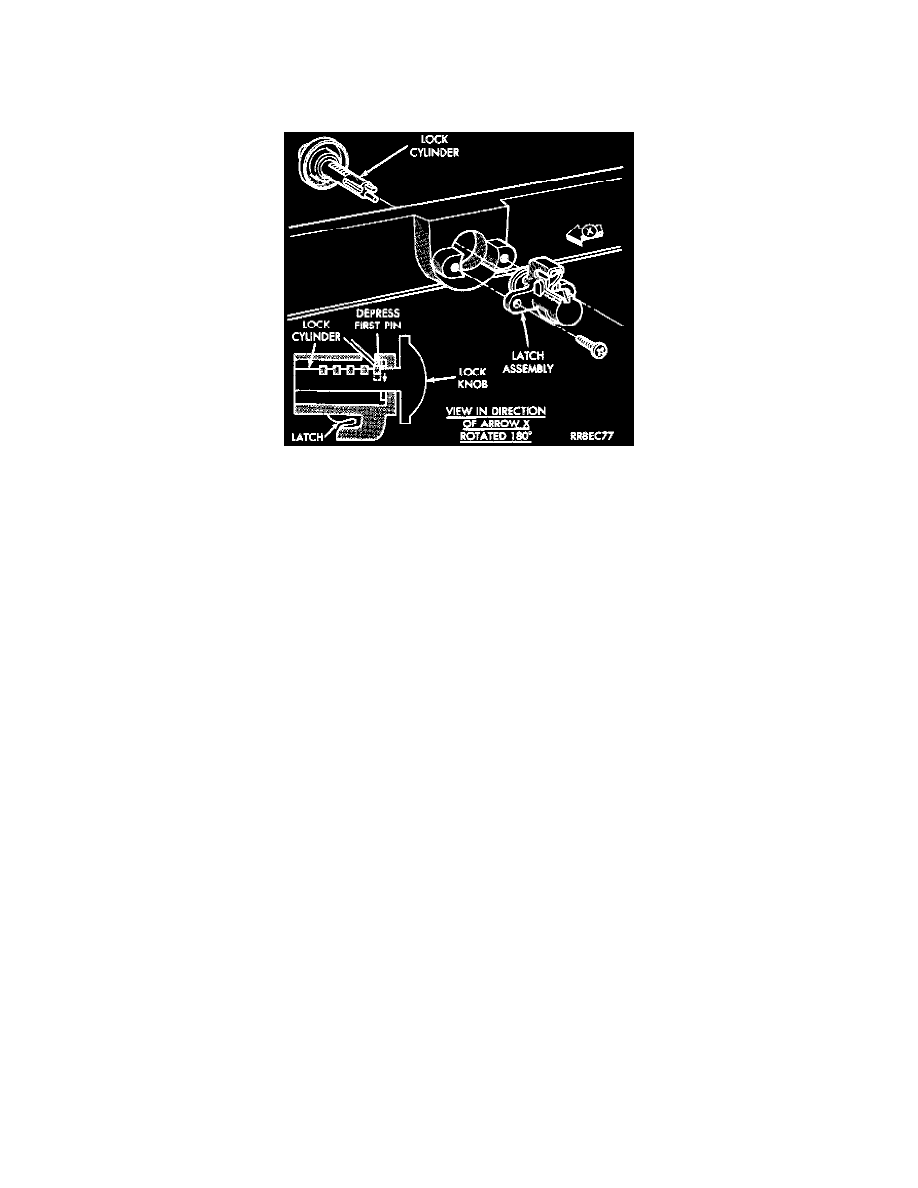
Glove Box Lock Remove/Install
2. Remove the screws that secure the latch to the inside of the glove box door.
3. Rotate the latch housing 180 so that angular access window in the latch housing upward.
4. Insert a stiff wire through the access in the latch housing and depress the retaining tumbler (first pin) into the lock cylinder. The tumbler (first pin)
is slightly rearward of ti window and is not visible through the wind proceed as follows:
a. For lock cylinders with a key: Insert the key while depressing the retaining tumbler and pull outward on the lock cylinder to remove it from the
latch.
b. For lock cylinders without a key: Pull outward on the lock cylinder while depressing the retaining tumbler.
5. To install:
a. For lock cylinders with a key: Insert the key while depressing the retaining tumbler Insert the lock cylinder into the latch housing with the
retaining tumbler opposite the latch pawl. Remove the key.
b. For lock cylinders without a key: Insert a stiff wire into the hole in the center of the knob while depressing the retaining tumbler. Insert the lock
cylinder into the latch housing with the retaining tumbler opposite the latch pawl. Remove the stiff wire.
6. Reverse the remaining removal procedures to complete the installation.