
RAM 2500 Van V8-5.9L VIN Z LDC (2000)
Amplifier: Service and Repair
WARNING: ON VEHICLES EQUIPPED WITH AIRBAGS, REFER TO AIRBAGS AND SEAT BELTS/AIRBAGS BEFORE
ATTEMPTING ANY STEERING WHEEL, STEERING COLUMN, OR INSTRUMENT PANEL COMPONENT DIAGNOSIS OR SERVICE.
FAILURE TO TAKE THE PROPER PRECAUTIONS COULD RESULT IN ACCIDENTAL AIRBAG DEPLOYMENT AND POSSIBLE
PERSONAL INJURY.
REMOVAL
1. Disconnect and isolate the battery negative cable.
2. Remove the end cap from the passenger side end of the instrument panel.
3. Roll down the glove box from the instrument panel.
4. Reach through the outboard side of the glove box opening to access and disconnect the two instrument panel wire harness connectors from the
connector receptacles on the lower end of the power amplifier.
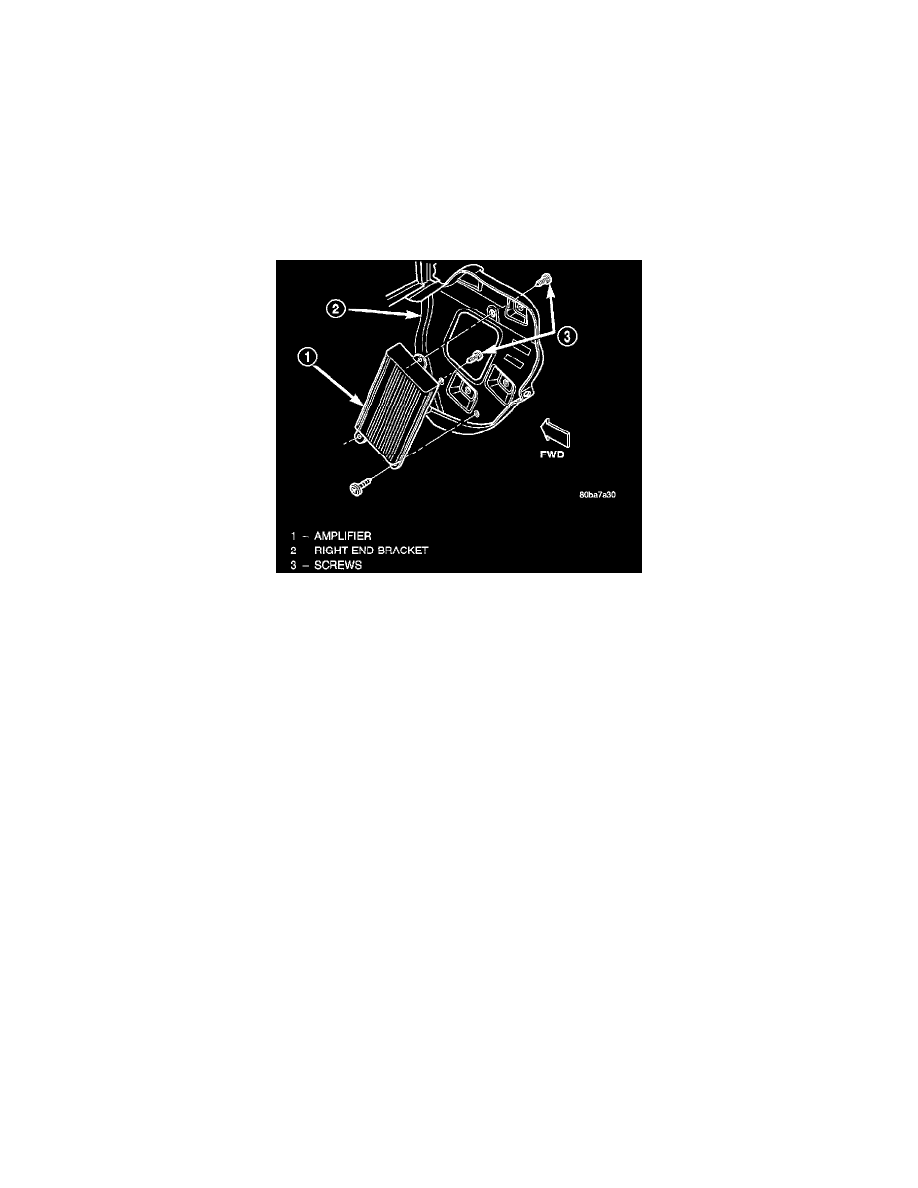
Power Amplifier Remove/Install
5. Reach through the outboard side of the glove box opening to access and remove the one screw that secures the power amplifier to the inboard side
of the right instrument panel end bracket.
6. Reach through the outboard side of the glove box opening to support the power amplifier with one hand, while using the other hand to remove the
two screws that secure the power amplifier to the outboard side of the right instrument panel end bracket.
7. Remove the power amplifier from the right instrument panel end bracket through the instrument panel glove box opening.
INSTALLATION
1. Position the power amplifier onto the right instrument panel end bracket through the instrument panel glove box opening.
2. Reach through the outboard side of the glove box opening to support the power amplifier with one hand, while using the other hand to install and
tighten the two screws that secure the power amplifier to the outboard side of the right instrument panel end bracket. Tighten the screws to 3.3 Nm
(30 m. lbs.).
3. Reach through the outboard side of the glove box opening to install and tighten the one screw that secures the power amplifier to the inboard side
of the right instrument panel end bracket. Tighten the screw to 3.3 Nm (30 in. lbs.).
4. Reach through the outboard side of the glove box opening to access and reconnect the two instrument panel wire harness connectors to the
connector receptacles on the lower end of the power amplifier.
5. Roll up the glove box into the instrument panel.
6. Install the end cap onto the passenger side end of the instrument panel.
7. Reconnect the battery negative cable.