
RAM 3500 Truck 2WD L6-359 5.9L DSL Turbo VIN D FI (1998)
Rocker Arm Assembly: Service and Repair
Rocker Arm Replacement
REMOVAL
1. Remove the EGR tube and gaskets.
2. Remove the valve covers.
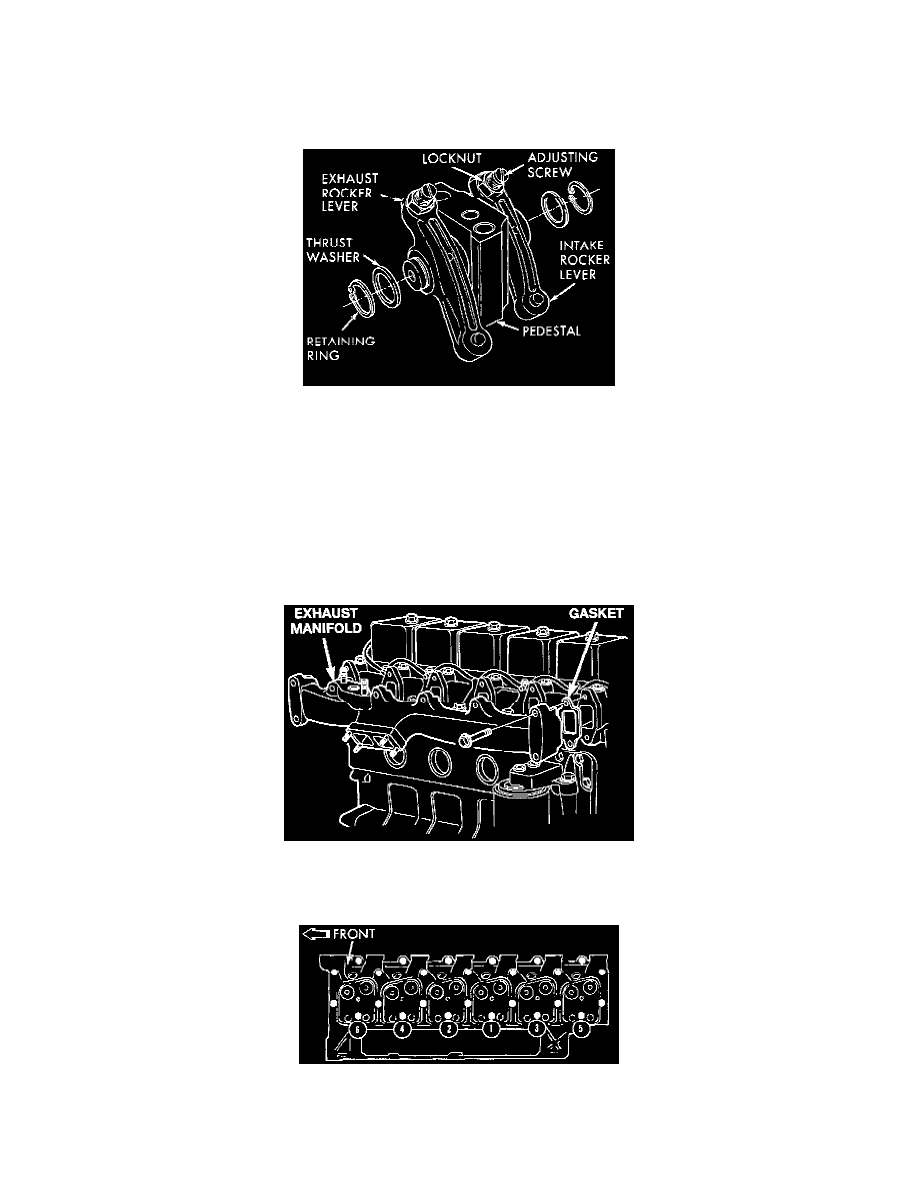
Location Of Rocker Lever Components
3. Loosen the adjusting screw locknuts. Loosen the adjusting screws until they stop.
4. Remove the bolts from the rocker lever pedestals. Remove the pedestals and rocker lever assemblies.
5. Remove the push rods. The rear two push rods must be raised through holes in cab overhang.
INSTALLATION
1. Make sure the dowel rings in the pedestals are installed into the dowel bores in the cylinder head.
2. If the push rod is holding pedestal off- head, bar the engine until the pedestal will set on the head surface without interference.
3. Use clean engine oil to lubricate the cylinder head bolt threads and under the bolt heads.
4. Install the long bolts (12 mm) into the rocker lever pedestals. Tighten the bolts as follows:
Exhaust Manifold
-
Step 1-Tighten the bolts, in sequence, to 90 Nm (66 ft. lbs.) torque. Check the torque. If lower than 90 Nm (66 ft. lbs.), tighten to this torque.
Rocker Lever (Head Bolts) Tightening Sequence
-
Step 2-Tighten the bolts, in sequence, to 120 Nm (89 ft. lbs.) torque. Check the torque. If lower than 120 Nm (89 ft. lbs.), tighten to this
torque.