
RAM 3500 Truck 2WD L6-5.9L DSL Turbo (2008)
NOTE: Typical A/C compressor and clutch assembly shown in illustrations.
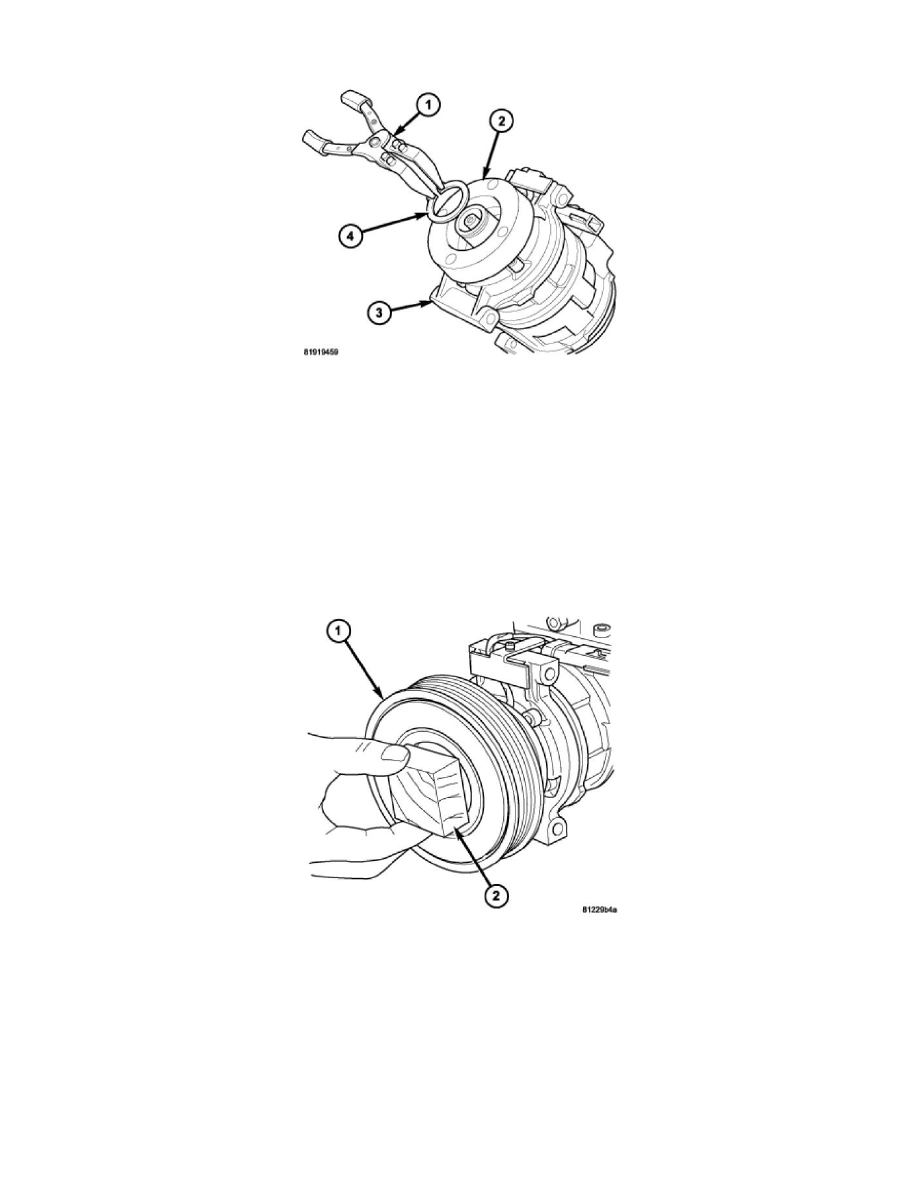
1. Align the dowel pin on the back of the compressor clutch field coil (2) with the hole in the front of the A/C compressor (3) and position the field
coil onto the compressor. Be certain that the compressor clutch field coil wire lead is properly routed so that it is not pinched between the A/C
compressor and the field coil.
CAUTION: The snap ring must be fully and properly seated in the groove or it will vibrate out, resulting in a clutch failure and severe
damage to the A/C compressor.
NOTE: A new snap ring must be used to secure the compressor clutch field coil to the A/C compressor. The bevel side of the snap ring must
face outward and both snap ring eyelets must be oriented to the right or to the left of the field coil dowel pin location on the A/C compressor.
2. Using Snap Ring Pliers 9764 or equivalent (1), install the snap ring (4) that secures the compressor clutch field coil to the front of the A/C
compressor. Be certain that the snap ring is fully and properly seated in the groove and oriented correctly.
CAUTION: Be certain to position the compressor clutch field coil wire lead so that it is not damaged during A/C compressor pulley and
bearing installation.
CAUTION: When installing the pulley and bearing assembly, DO NOT mar the friction surfaces of the pulley or premature failure of the
clutch will result.
3. Install the pulley and bearing assembly (1) onto the front of the A/C compressor. If necessary, tap the pulley gently with a block of wood (2)
placed on the pulley friction surface.