
RAM 3500 Truck 2WD L6-5.9L DSL Turbo (2008)
SWITCHES AND SOLENOIDS
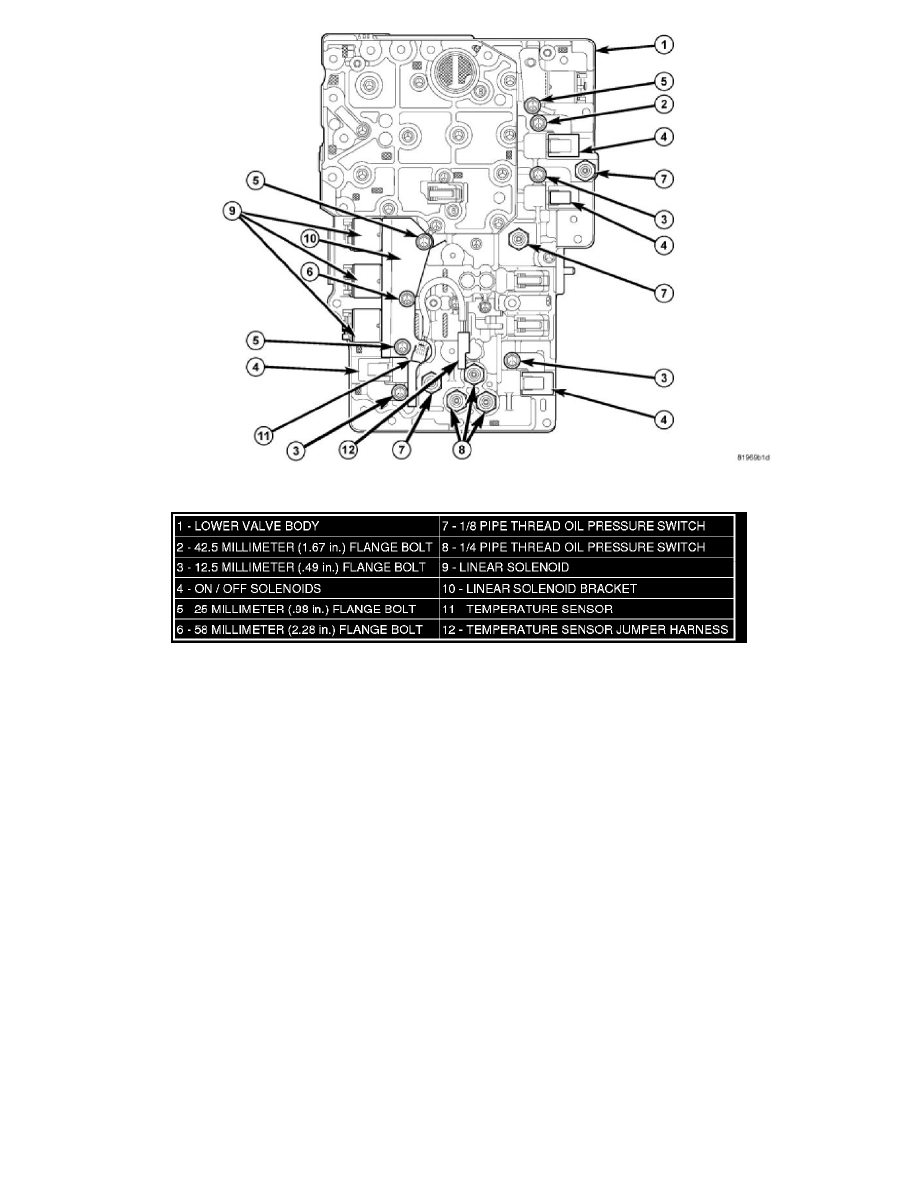
NOTE: Tighten all bolts in order specified.
8. Install the upper valve body onto the lower valve body.
9. Install the valve body bolts and tighten in a crisscross manner to 5.5 Nm ( 49 in.lbs.).
10. Install oil pressure switch (7) and (8) in the correct positions.
11. Tighten oil pressure switch (7) to 4.4 Nm (39 in.lbs.).
12. Tighten oil pressure switch (8) to 8.5 Nm (75 in.lbs.).
13. Install temperature sensor (11).
14. Install temperature sensor jumper harness (12) onto temperature sensor (11) and secure to valve body.
15. Lubricate o-rings (if equipped) with MOPAR(R) AS68RC ATF and install on/off solenoids (4).
16. Install on/off solenoid bolts (2) and (3).
17. Tighten bolts (2) to 5.5 Nm (49 in.lbs.) and (3) to 10 Nm ( 88 in.lbs.).
18. Lubricate o-rings with MOPAR(R) AS68RC ATF and install linear solenoids (9).
19. Install linear solenoid bracket (10).
20. Install linear solenoid bracket bolts (5) and (6).
21. Tighten linear solenoid bracket bolt (5) to 10 Nm (88 in.lbs.).
22. Tighten linear solenoid bracket bolt (6) to 10 Nm (88 in.lbs.).