
RAM 3500 Truck 2WD L6-5.9L DSL Turbo (2008)
Clutch Release Fork: Service and Repair
Installation
INSTALLATION
1. Position cylinders and connecting line in vehicle engine compartment. Position clutch hydraulic line against the dash panel and behind all engine
hoses and wiring.
2. Apply a light coating of grease to the inside diameter of the master cylinder push rod eye.
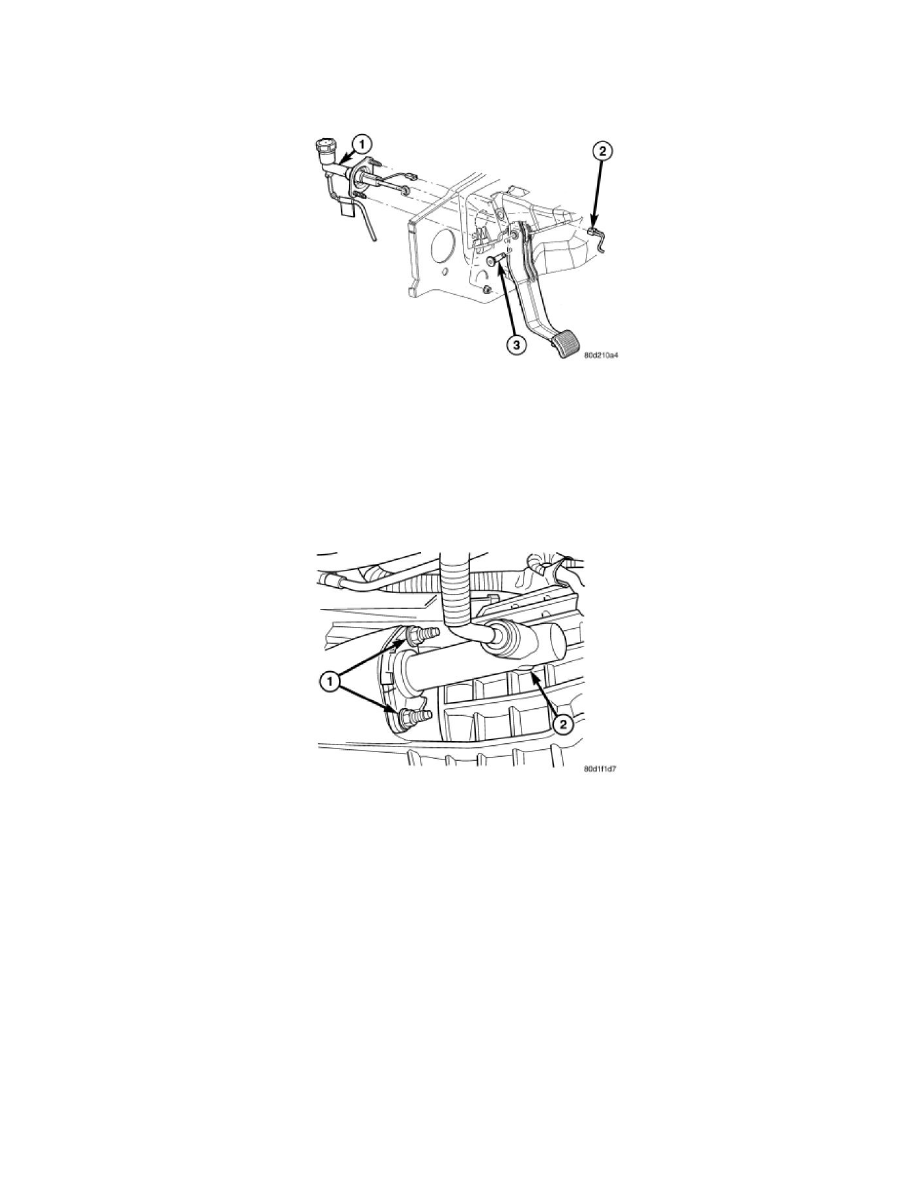
3. Install clutch master cylinder (1) on dash panel and tighten clutch master cylinder nuts to 28 Nm (21 ft. lbs.).
4. Install clutch master cylinder push rod pin (3).
5. Connect clutch pedal position interlock switch connector (2).
6. Install plastic clip securing hydraulic line to the dash panel into the lower dash panel flange.
7. Install plastic clip securing hydraulic line to the dash panel onto the upper dash panel stud.
8. Raise vehicle.
9. Install slave cylinder (2) and verify cylinder rod is properly seated in release lever.
10. Install and tighten slave cylinder nuts (1) to 23 Nm (17 ft. lbs.).
11. If new clutch linkage is being installed, connect the clutch hydraulic line to the clutch slave cylinder.
CAUTION: Once the clutch hydraulic line is connected to the slave cylinder, it should never be disconnected.
12. Install heat shield over hydraulic line.
13. Operate linkage several times to verify proper operation.