
RAM 3500 Truck 2WD L6-5.9L DSL Turbo VIN 7 (2002)
Low Pressure Sensor / Switch: Service and Repair
A/C Low Pressure Switch Replacement
REMOVAL
1. Disconnect and isolate the battery negative cable.
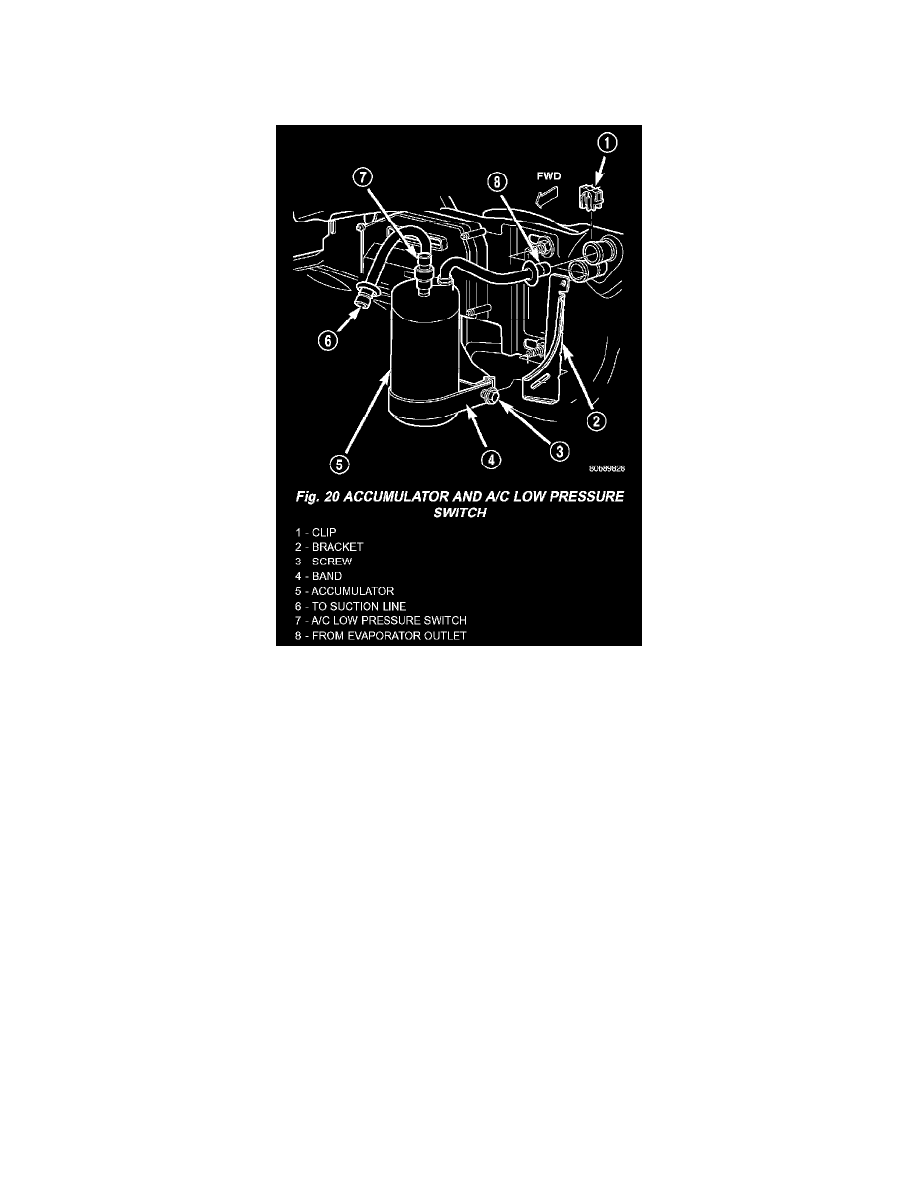
Fig. 20 Accumulator And A/C Low Pressure Switch
2. Unplug the wire harness connector from the a/c low pressure switch on the top of the accumulator.
3. Unscrew the a/c low pressure switch from the fitting on the top of the accumulator.
4. Remove the O-ring seal from the accumulator fitting and discard.
INSTALLATION
1. Lubricate a new O-ring seal with clean refrigerant oil and install it on the accumulator fitting. Use only the specified O-rings as they are made of a
special material for the R-134a system. Use only refrigerant oil of the type recommended for the compressor in the vehicle. (Refer to
REFRIGERANT OIL - DESCRIPTION See: Heating and Air Conditioning/Refrigerant Oil)
2. Install and tighten the a/c low pressure switch on the accumulator fitting. The switch should be hand-tightened onto the accumulator fitting.
3. Plug the wire harness connector into the a/c low pressure switch.