
RAM 3500 Truck 2WD L6-5.9L DSL Turbo VIN C (2003)
Exhaust Manifold: Service and Repair
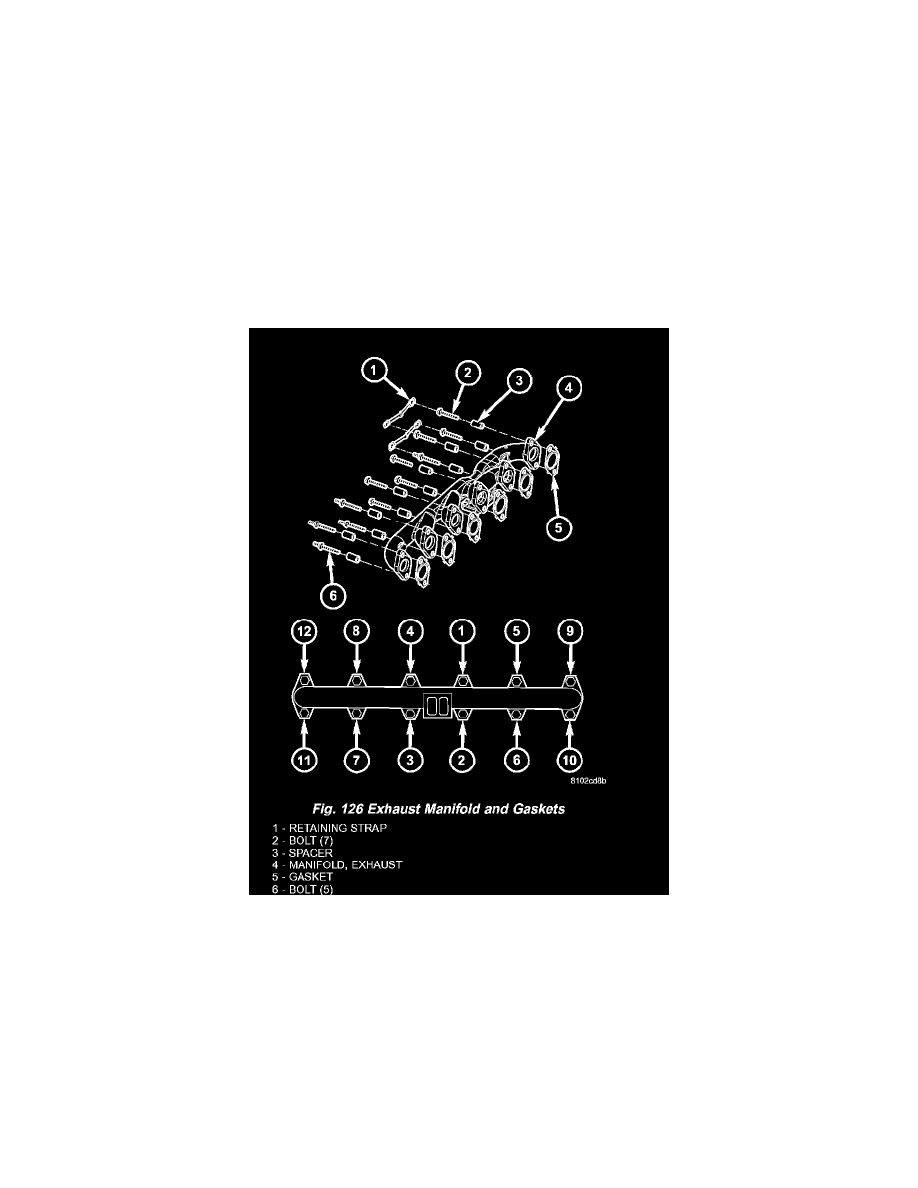
EXHAUST MANIFOLD
REMOVAL
1. Disconnect the battery negative cables.
2. Raise vehicle on hoist.
3. Disconnect the exhaust pipe from the turbocharger elbow.
4. Lower vehicle.
5. Disconnect the turbocharger air inlet hose.
6. Remove air cleaner assembly.
7. Disconnect the turbocharger oil supply line and the oil drain tube from the turbocharger.
8. Disconnect the charge air cooler inlet pipe from the turbocharger.
9. Remove the turbocharger and gasket from the exhaust manifold.
10. Remove the cab heater return pipe nuts from the exhaust manifold stud. Position the tube out of the way.
11. Remove heat shield.
12. Remove exhaust manifold bolt lockplates.
13. Remove the exhaust manifold-to-cylinder head bolts and spacers.
14. Remove the exhaust manifold and gaskets .
CLEANING
Clean the cylinder head and exhaust manifold sealing surfaces with a suitable scraper. Use a Scotch-Brite (TM) pad or equivalent.
INSPECTION
Inspect the exhaust manifold for cracks. Measure the exhaust manifold for flatness. Place a ruler over all of the exhaust ports and insert a feeler gauge
between the port flange and the ruler. Maximum deviation from flat is 0.20 mm (0.008 in.).
INSTALLATION
1. Using new gaskets, install the exhaust manifold and gaskets. Install the bolts and spacers and tighten the bolts in the sequence shown in to 43 Nm
(32 ft. lbs.) torque.
2. Retorque the four center bolts.