
RAM 3500 Truck 2WD L6-5.9L DSL Turbo VIN C (2003)
6.
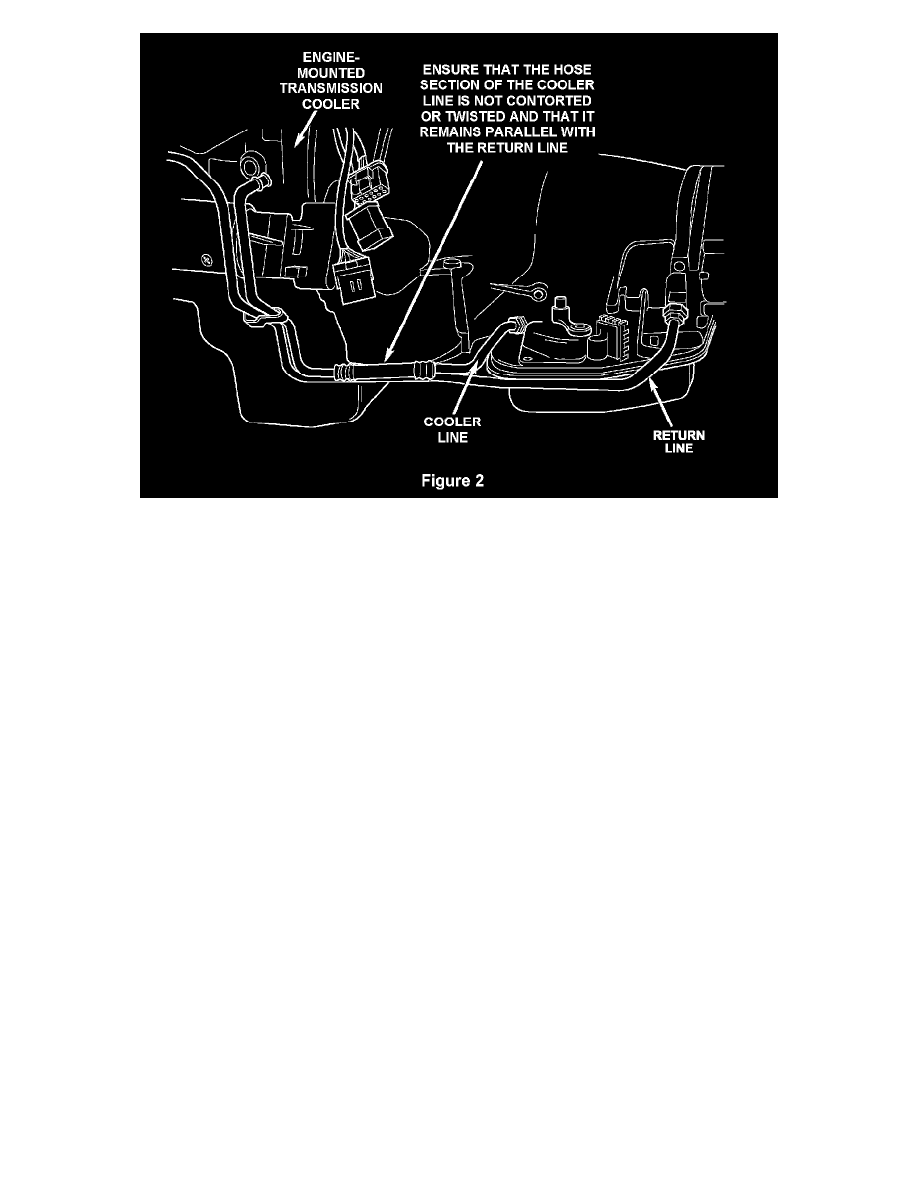
Check the alignment of the new cooler line (Figure 2). Make sure that the hose portion of the line is not contorted or twisted as this can cause the
hose to fail.
7.
Keeping the cooler line aligned properly, tighten the cooler line-to-transmission fitting to 280 in-lbs (32 N.m).
8.
Keeping the cooler line aligned properly, tighten the cooler line-to-cooler fitting to 280 in-lbs (32 N.m).
9.
Check the alignment of the new cooler line. Make sure that the hose portion of the line is not contorted or twisted. If the hose portion is twisted or
contorted, loosen both cooler line fittings and repeat Steps 6-8.
10.
Lower the vehicle, start the engine and ensure that there are no cooler line leaks.
11.
Check the transmission fluid level and adjust if necessary.
12.
Return the vehicle to the customer.
C. Replace Engine-Mounted Trans. Cooler & Cooler Line
NOTE:
The following procedure is only required if the engine-mounted transmission cooler requires replacement per the inspection in Section "A."
Very few vehicles are expected to require transmission cooler replacement
1.
Disconnect the negative battery cable from each battery.
2.
Open the radiator drain plug and drain the coolant from the radiator into an appropriate container. Save the coolant for later re-use.
WARNING:
Do not loosen the radiator drain plug with the system hot and under pressure. Serious burns from coolant can occur.
3.
If the engine coolant is contaminated with transmission fluid, the cooling system must be flushed to remove the contamination. Follow the
procedure in Section 7 - Cooling in the 2004 DR Service Manual to flush the cooling system.
4.
Raise the vehicle on an appropriate hoist.