
RAM 3500 Truck 2WD L6-5.9L DSL Turbo VIN C (2003)
12.
Disconnect the transmission cooler line from the engine-mounted transmission cooler (Figure 4).
13.
Disconnect the transmission cooler outlet line from the engine-mounted transmission cooler (Figure 4).
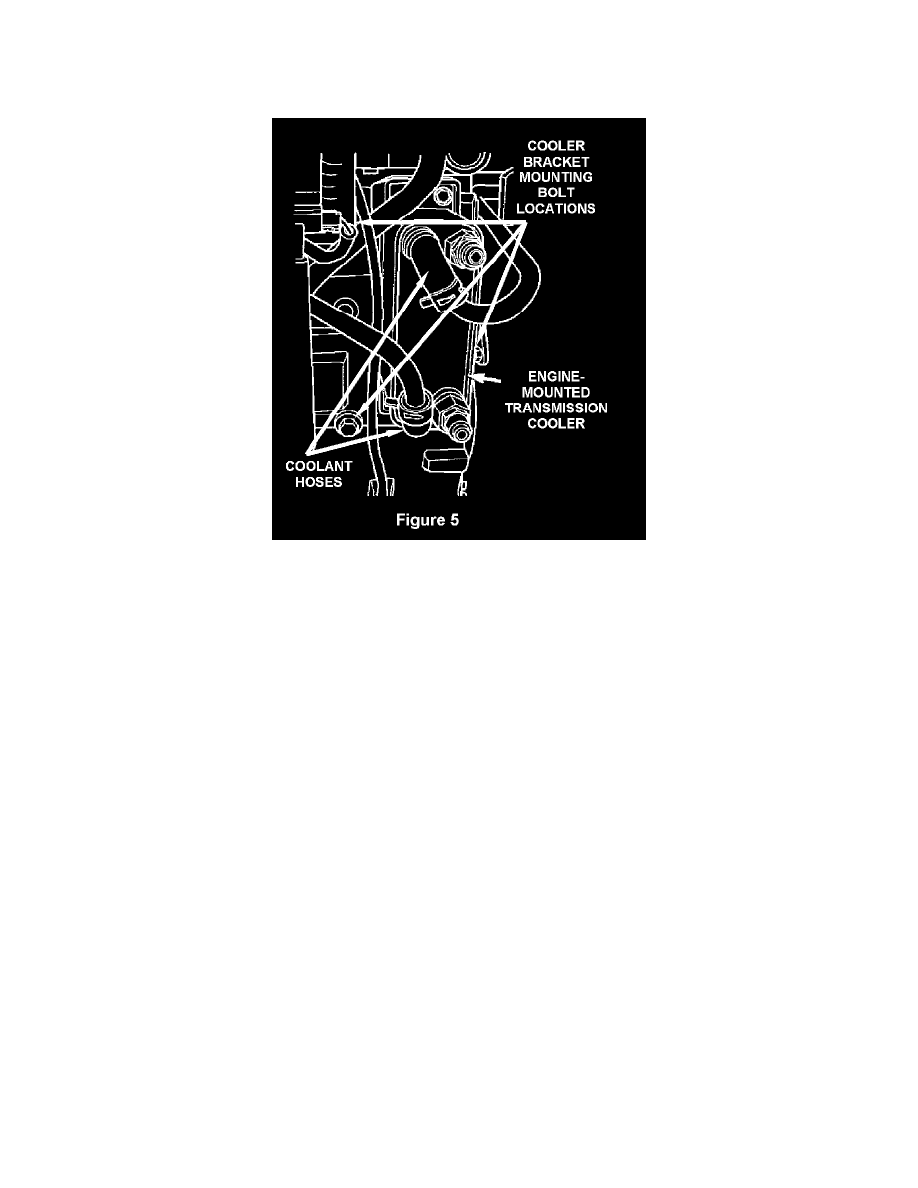
14.
Disconnect the coolant inlet and outlet hoses from the engine-mounted transmission cooler (Figure 5).
15.
Remove the wiring harness clip from the cooler bracket.
16.
Remove the three (3) transmission cooler bracket fasteners (Figure 5) and then remove the cooler and bracket from the engine as an assembly.
17.
Install the new transmission cooler and bracket assembly (Figure 5). Hand start the three (3) mounting fasteners only.
18.
Tighten the lower cooler bracket-to-cylinder block mounting bolt to 57 ft-lbs (77 N.m).
19.
Tighten the upper cooler bracket-to-cylinder block mounting bolt to 18 ft-lbs (24 N.m).
20.
Tighten the lower cooler bracket-to-transmission adapter mounting bolt to 18 ft-lbs (24 N.m).
21.
Connect the coolant inlet and outlet hoses to the transmission cooler. Make sure that the hose clamps are installed inboard of the upset bead.
22
Connect the transmission cooler outlet line to the transmission cooler. Tighten the fitting to 280 in-lbs (32 N.m).
23.
Connect the wiring harness clip to the cooler bracket.
24.
Install the left front inner fender shield.
25.
Install the left front wheel and tire assembly. Tighten the lug nuts to 135 ft-lbs (180 Nm).
26.
Raise the vehicle fully.