
RAM 3500 Truck 2WD L6-5.9L DSL Turbo VIN C (2003)
6.
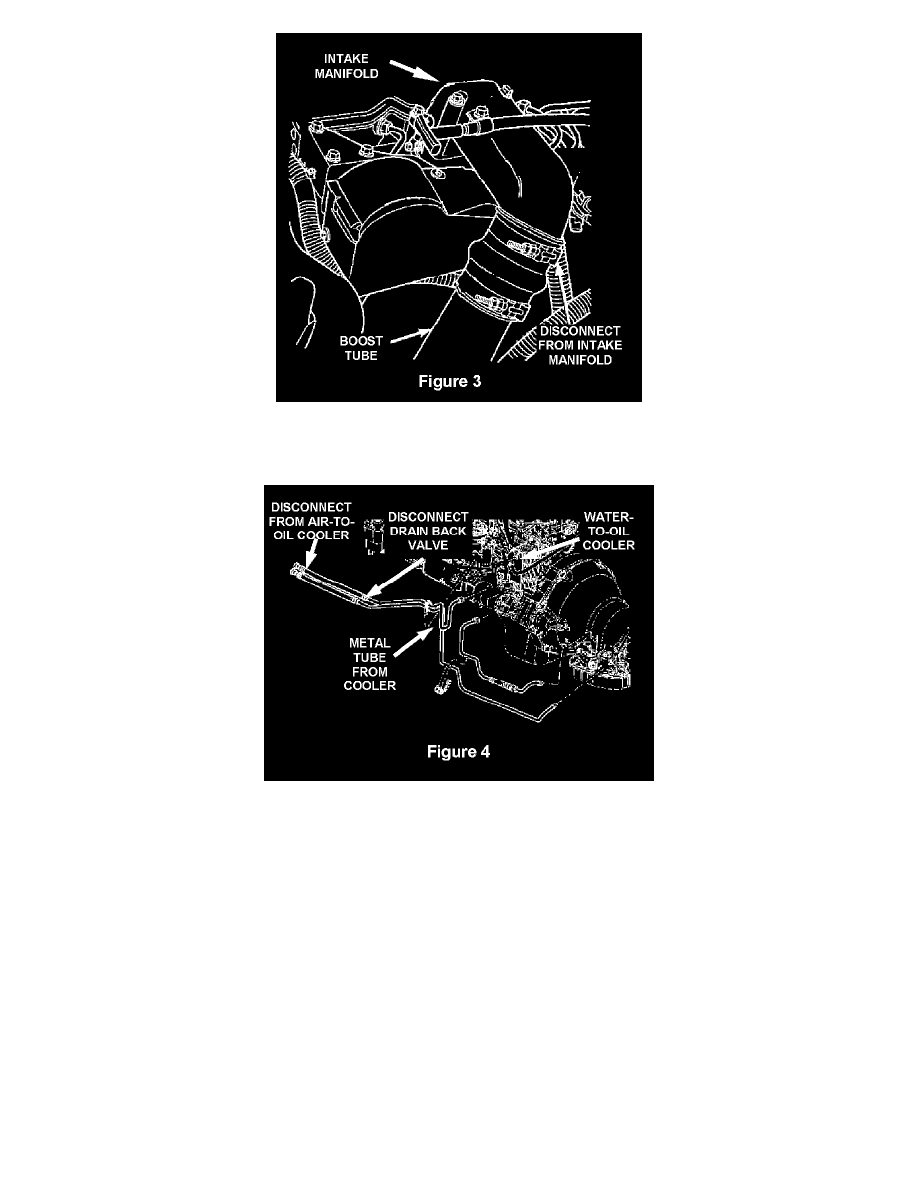
Loosen the boost tube clamp at the intake manifold (Figure 3).
7.
Remove the boost tube and set it aside.
8.
Using Miller Special Tool # 8218, disconnect the transmission cooler line quick-connect fitting from the air-to-oil cooler at the lower driver's side
of the radiator (Figure 4).
9.
Disconnect the torque converter drain back valve and hose assembly from the metal cooler line coming from the water-to-oil cooler. The
water-to-oil cooler is located above the starter on the rear driver's side of the engine (Figure 4).
10.
Discard the drain back valve and hose assembly.
11.
Connect the new drain back valve and hose assembly to the metal cooler line coming from the water-to-oil cooler (Figure 4). Tighten the valve to
275 in-lbs (31 N.m).
12.
Connect the quick connect fitting on the drain back valve assembly to the air-to-oil cooler (Figure 4). Pull back on the fitting to ensure that it is
fully connected.
13.
Install the boost tube assembly.
14.
Tighten the boost tube clamp at the intake manifold connection to 95 in-lbs (11 Nm) (Figure 3).
15.
Tighten the boost tube clamp at the charge air cooler connection to 95 in-lbs (11 Nm) (Figure 2).