
RAM 3500 Truck 2WD L6-6.7L DSL Turbo (2010)
19. Install the two remaining DVD screws.
20. Seat the sunroof trim ring if equipped.
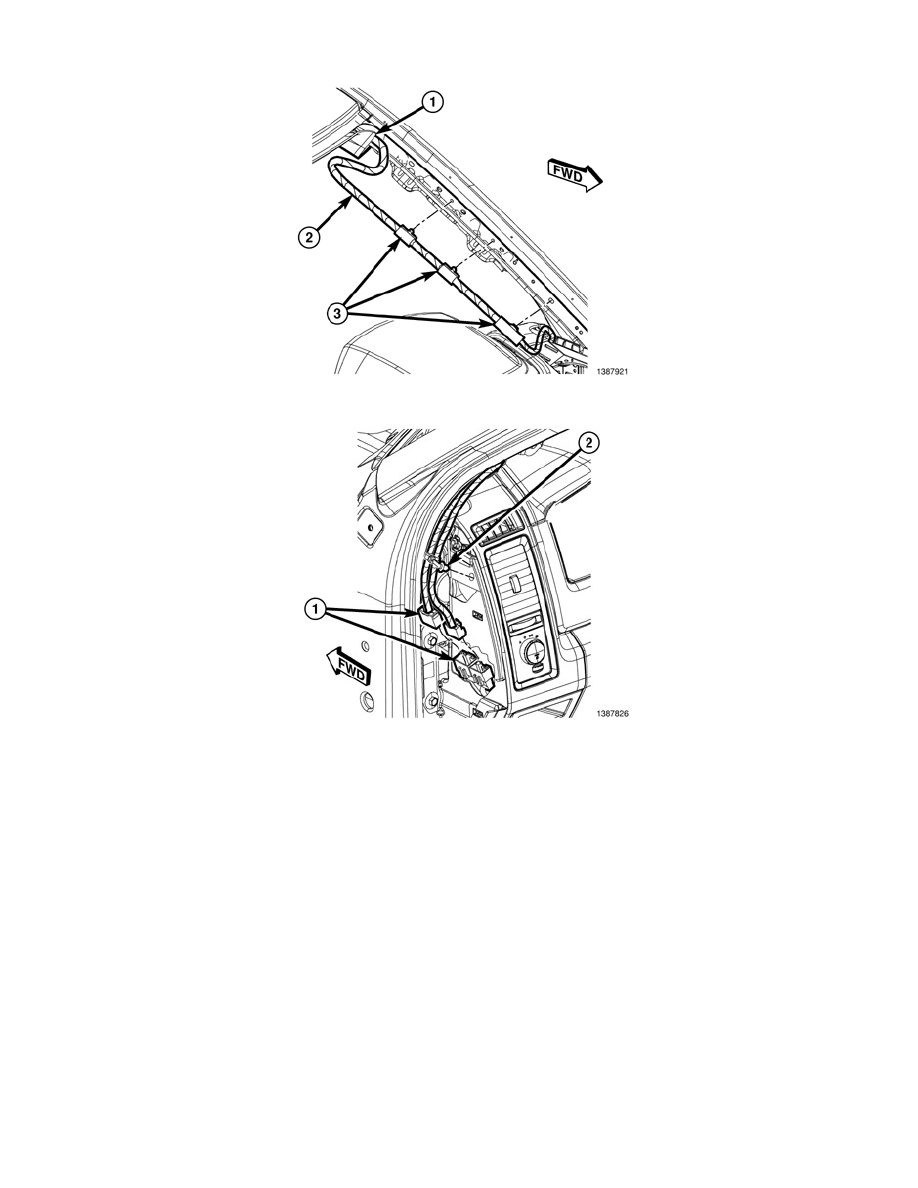
Position the wire harness on the A-pillar and seat the support clips (3) fully.
21. Connect the electrical connectors (1) and seat the support clip (2) fully.
22. Position the instrument panel side covers onto the instrument panel and seat fully.
23. Install the floor console. See: Console/Service and Repair/Floor Console - Installation
NOTE: Keep the bulb portion of the seal assembly toward the operator while installing and always compress the seal assembly back toward
the starting point. Avoid stretching and puckering the seal assembly especially around the corners - corners are critical
24. Install the door seals.
a. Align the paint dot on the seal assembly to the upper B-pillar corner.
b. Insert the seal at A-pillar corner or curved area, without stretching the part.
c. Push the seal assembly onto the side aperture sheet metal edge working down along the B-pillar and forward along the bottom of the door
opening
d. Return to the starting point and push the seal assembly onto side aperture sheet metal edge working forward along the to edge of door opening
header and part way down along the A-pillar. Match the ends of the seal assembly, seat the joint, and finish working forward along the bottom
of the door opening and up along the A-pillar.
e. Seat the seal assembly firmly at the corners and around the entire perimeter using hand pressure only.
25. Install the upper C-pillar trim. See: Trim Panel/Service and Repair/Pillar Trim/C-Pillar Trim Panel - Installation
26. Install the upper B-pillar trim. See: Trim Panel/Service and Repair/Pillar Trim/B-Pillar Trim Panel - Installation
27. Install the A-pillar trim. See: Trim Panel/Service and Repair/Pillar Trim/A-Pillar Trim Panel - Installation