
RAM 3500 Truck 2WD L6-6.7L DSL Turbo (2010)
Pedal Assembly
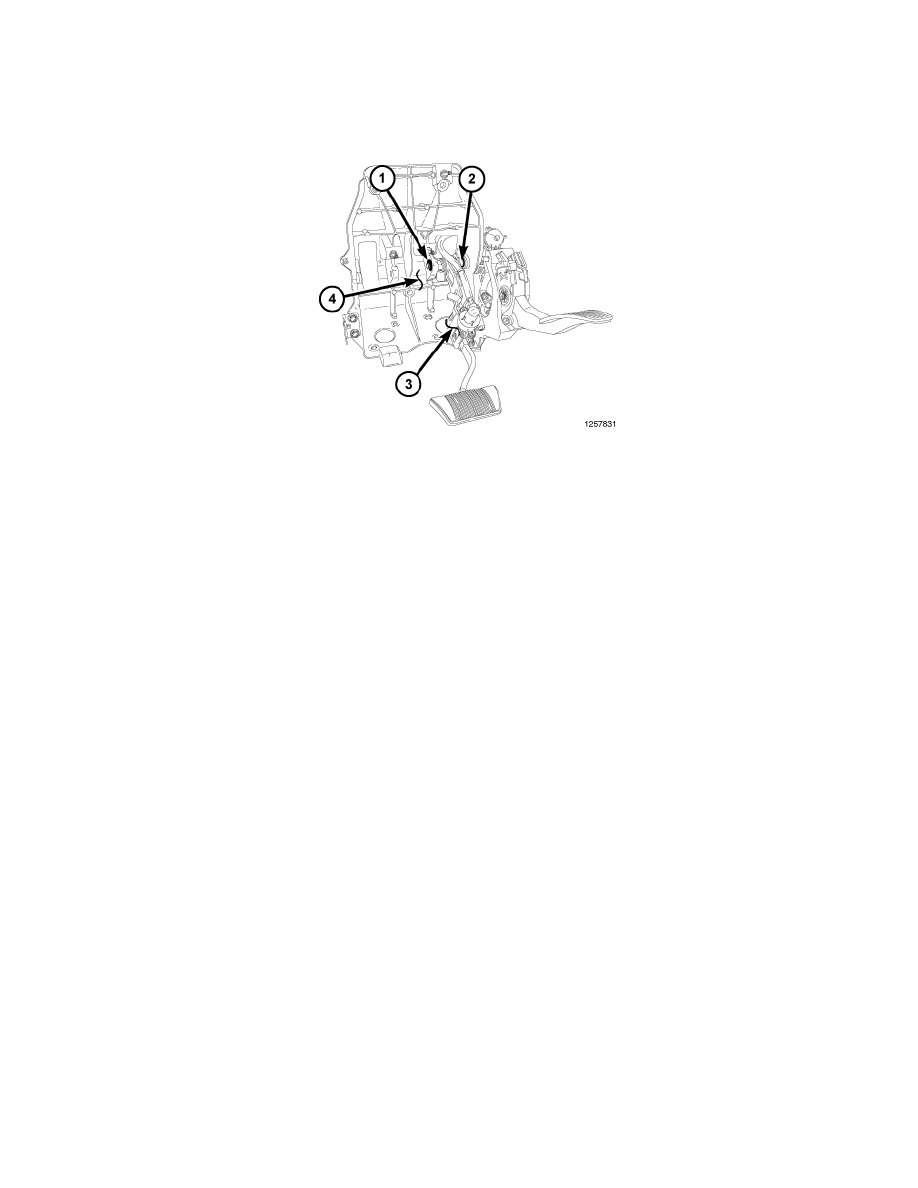
PEDAL ASSEMBLY
NOTE: The views in this procedure are with adjustable pedals. Without adjustable pedals are similar.
NOTE: Ensure that the cables and wiring harness is not pinched.
1. Position the pedal assembly (4) and install the three mounting bolts (to instrument panel). Do not tighten at this time.
2. Install the four brake booster mounting nuts and tighten to 28 Nm (20.5 ft. lbs.).
3. Tighten the pedal assembly mounting bolts (to instrument panel) to 31 Nm (23 ft. lbs.).
4. Install the brake booster rod to the brake pedal and install a new retainer clip.
5. If equipped with a manual transmission, install the clutch master cylinder to clutch pedal clip and pin.
NOTE: If equipped with an automatic transmission a clutch master cylinder block out plate is used in place of the master cylinder and the
retaining nuts will still be used.
6. Install the two clutch master cylinder nuts and tighten to 28 Nm (20.5 ft. lbs.).
7. Connect the electrical connectors.
8. Install the steering column See: Steering and Suspension/Steering/Steering Column/Service and Repair/Steering Column - Installation.
9. Install the brake lamp switch See: Lighting and Horns/Brake Light Switch/Service and Repair/Stop Lamp Switch - Installation.
10. Install the steering column opening cover See: Body and Frame/Interior Moulding / Trim/Dashboard / Instrument Panel/Service and
Repair/Steering Column Opening Cover - Installation.
11. Reconnect the negative battery cable.