
RAM 3500 Truck 2WD V10-8.0L VIN W (1997)
Valve Guide Seal: Service and Repair
Cylinder Head On
NOTE: This procedure is done with the cylinder head installed.
1. Disconnect the negative cable from the battery.
2. Set engine basic timing to Top Dead Center (TDC) and remove air cleaner.
3. Remove cylinder head covers and spark plugs.
4. Using suitable socket and flex handle at crankshaft retaining bolt, turn engine so the No.1 piston is at TDC on the compression stroke.
5. Remove rocker arms.
6. With air hose attached to an adapter installed in No.1 spark plug hole, apply 620 - 689 kPa (90 - 100 psi) air pressure.
7. Using Valve Spring Compressor Tool MD-998772A with adapter 6716A, or equivalents compress valve spring and remove retainer valve locks and
valve spring.
8. Install seals on the exhaust valve stem and position down against valve guides. The exhaust valve stem seal is brown.
9. The black intake valve stem seals should be pushed firmly and squarely over the valve guide using the valve stem as a guide. DO NOT force seal
against top of guide. When installing the valve retainer locks, compress the spring only enough to install the locks.
10. Follow the same procedure on the remaining 9 cylinders using the firing sequence 1-10-9-4-3-6-5-87-2. Make sure piston in cylinder is at TDC on
the valve spring that is being removed.
11. Remove adapter from the No.1 spark plug hole.
12. Install rocker arms.
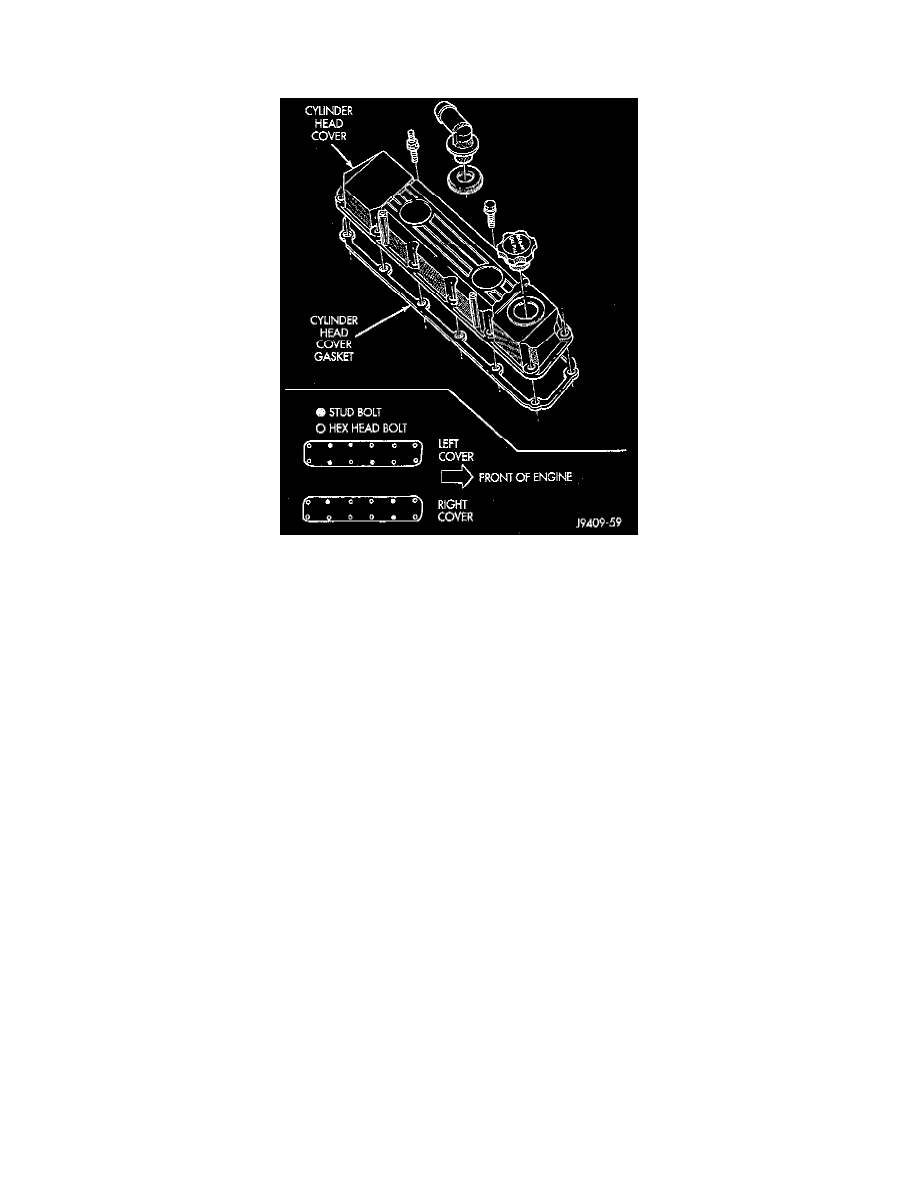
13. The cylinder head cover gasket can be used again. Install the gasket onto the head rail. For the left side the number tab is at the front of engine with
the number up. For the right side the number tab is at the rear of engine with the number up.
CAUTION: The cylinder head cover fasteners have a special plating. DO NOT use alternative fasteners.
14. Position the cylinder head cover onto the gasket. Install the stud bolts and hex head bolts in the proper positions. Tighten the stud bolts and the bolts
to 16 Nm (144 inch lbs.) torque.
15. Install closed crankcase ventilation system.
16. Connect the evaporation control system.
17. Install air cleaner.
18. Connect the negative cable to the battery.
19. Road test vehicle and check for leaks.