
RAM 3500 Truck 2WD V10-8.0L VIN W HDC (2000)
Camshaft Sensor O-ring
5. Check condition of sensor O-ring.
INSTALLATION
When installing a used Camshaft Position Sensor, the sensor depth must be adjusted to prevent contact with the camshaft gear (sprocket).
1. Observe the face of the sensor. If any of the original rib material remains, it must be cut down flush to the face of the sensor with a razor knife.
Remove only enough of the rib material until the face of the sensor is flat. Do not remove more material than necessary as damage to sensor may
result. Due to a high magnetic field and possible electrical damage to the sensor, never use an electric grinder to remove material from sensor.
2. From the parts department, obtain a peel-and-stick paper spacer. These special paper spacers are of a certain thickness and are to be used as a tool
to set sensor depth.
3. Clean the face of sensor and apply paper spacer.
4. Apply a small amount of engine oil to the sensor O-ring.
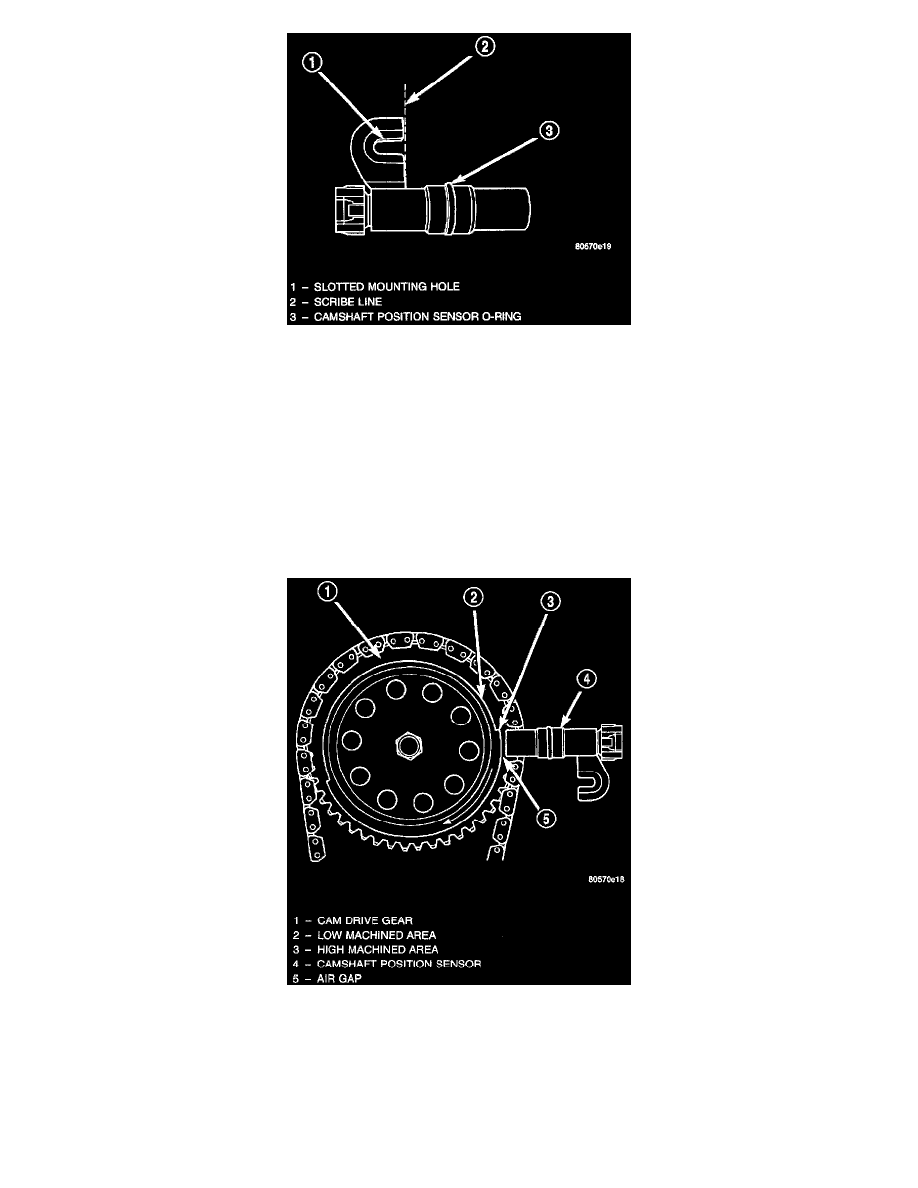
Sensor Operation
A low and high area are machined into the camshaft drive gear. The sensor is positioned in the timing gear cover so that a small air gap exists
between the face of sensor and the high machined area of cam gear.
Before the sensor is installed, the cam gear may have to be rotated. This is to allow the high machined area on the gear to be directly in front of the
sensor mounting hole opening on the timing gear cover,