
RAM 3500 Truck 2WD V8-5.7L (2008)
Radiator - Installation
3.7L/4.7L/5.7L ENGINE
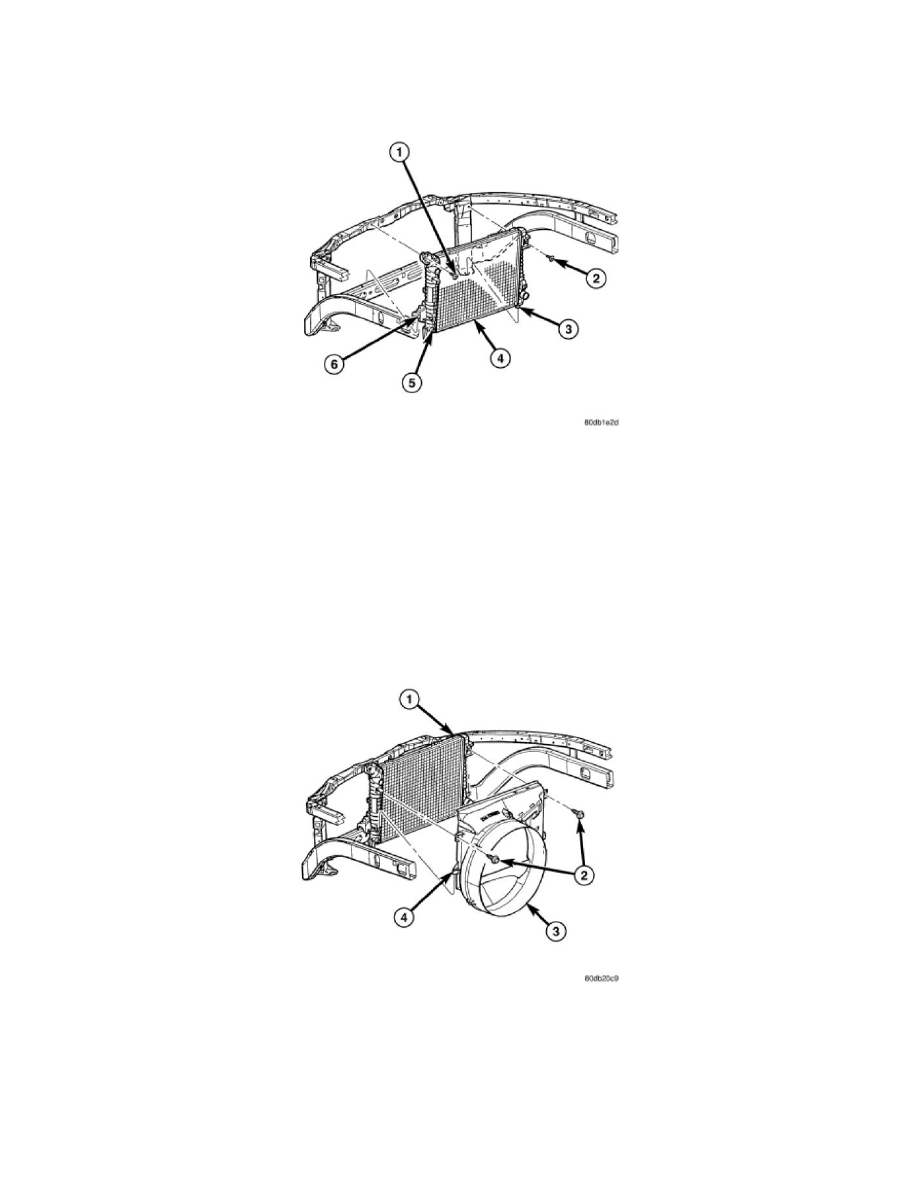
NOTE: The radiator is equipped with one alignment dowel on the bottom of the outlet tank and one retaining bracket on the front side of the
inlet tank. Both features have rubber insulators attached to them that must be present. The alignment dowel fits into a hole at the bottom of the
front end sheet metal vertical support post and the support bracket rests on top of the lower radiator closure tube.
1. Position the fan shroud over the fan blades rearward towards engine.
2. Install the rubber insulators to the lower radiator mounting features (alignment dowel and support bracket at the lower part of the radiator).
3. Lower the radiator into position while guiding the alignment dowel into the vertical post bracket. Position and seat the lower radiator support
bracket onto the lower radiator closure tube.
4. Install the upper radiator mounting bolts. Tighten bolts to 10 Nm (90 in. lbs.).
5. Connect the lower radiator hose and install the clamp in the proper position.
6. Connect the power steering hoses to the power steering oil cooler and install the clamps.
7. Connect the transmission oil cooler lines to the transmission oil cooler and install the secondary latches.
8. Position the fan shroud into the mounting clips on the radiator tanks and secure with bolts. Tighten the bolts to 8 Nm (75 in. lbs.).
9. Secure the power steering hoses into the clip on the lower fan shroud.
10. Install the windshield washer reservoir tank and connect the hose and electrical connector.
11. Install coolant reserve/overflow container hose(s) to radiator filler neck and secure properly with clamps.
12. Install coolant reserve/overflow container or degas container to fan shroud and tighten the bolts to 8 Nm (75 in. lbs.).
13. Connect upper radiator hose and install clamp.
14. Install battery negative cable.
15. Fill cooling system with coolant See: Service and Repair .