
RAM 3500 Truck 4WD L6-5.9L DSL Turbo VIN 6 (1998)
Intercooler: Service and Repair
REMOVAL
WARNING: If the engine was just turned off, the intake and outlet ducts may be hot.
1. Remove the front bumper.
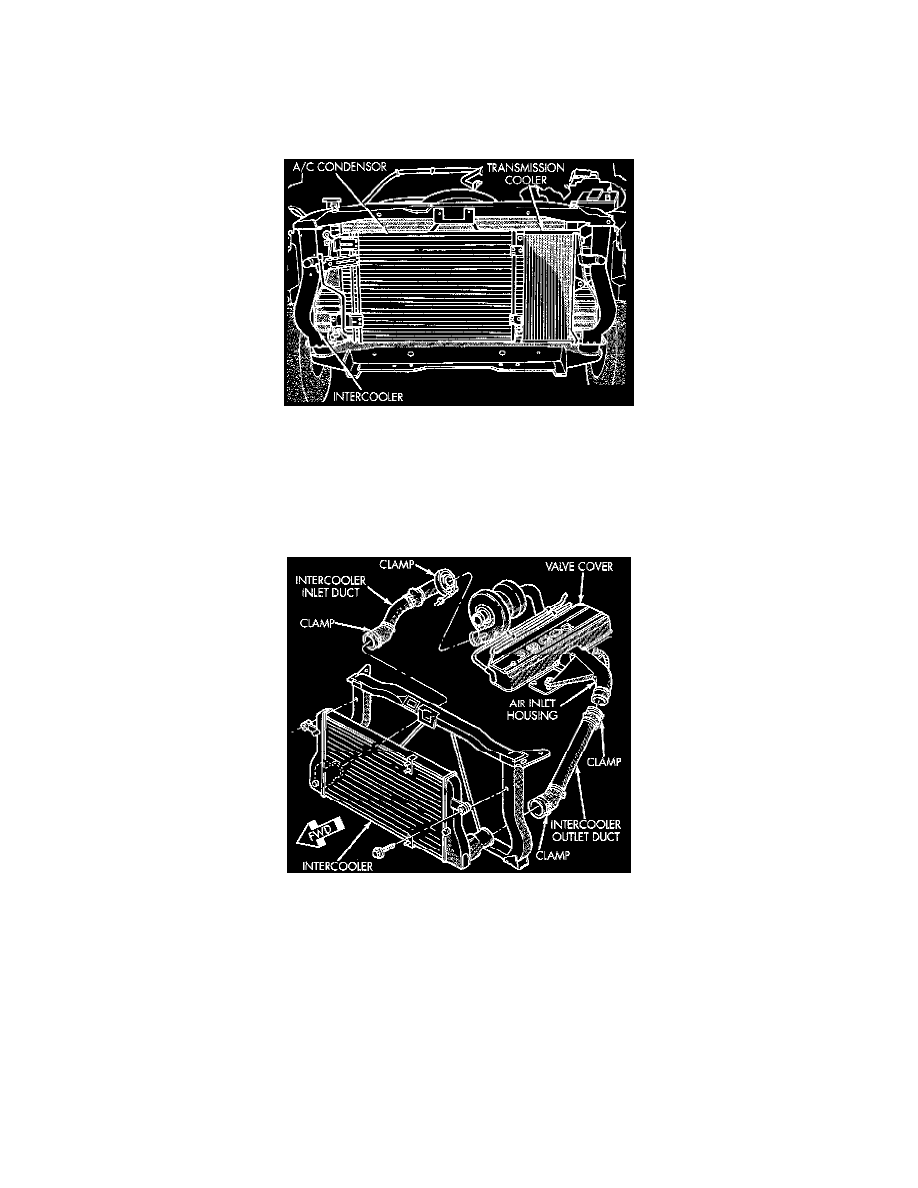
Condenser And Charge Air Cooler-Intercooler
2. Remove the front support bracket.
3. If the vehicle is equipped with air conditioning, remove the condenser as follows:
(a) Discharge the air conditioning system.
(b) Remove the bolt from the sealing plate.
(c) Remove the nuts holding the condenser to the charge air cooler. Lift the condenser and sealing plate assembly away from the charge air cooler.
Charge Air Cooler Intercooler Ducts
4. Remove the inlet and outlet ducts from the charge air cooler.
5. Remove the charge air cooler bolts. Pivot the charge air cooler forward and up to remove.
INSTALLATION
1. Position the charge air cooler. Install the bolts and tighten to 2 Nm (17 inch lbs.) torque.
2. Install the inlet and outlet ducts to the charge air cooler. With the clamps in position, tighten the clamp nut to 8 Nm (72 inch lbs.) torque.
3. If the vehicle is equipped with air conditioning, install the condenser as follows:
(a) Position the condenser and sealing plate assembly onto the charge air cooler studs. Install the nuts and tighten.
(b) Connect the halves of the sealing plate.
Install the bolt and tighten.
(c) Charge the air conditioning system.