
RAM 3500 Truck 4WD L6-5.9L DSL Turbo VIN C (2002)
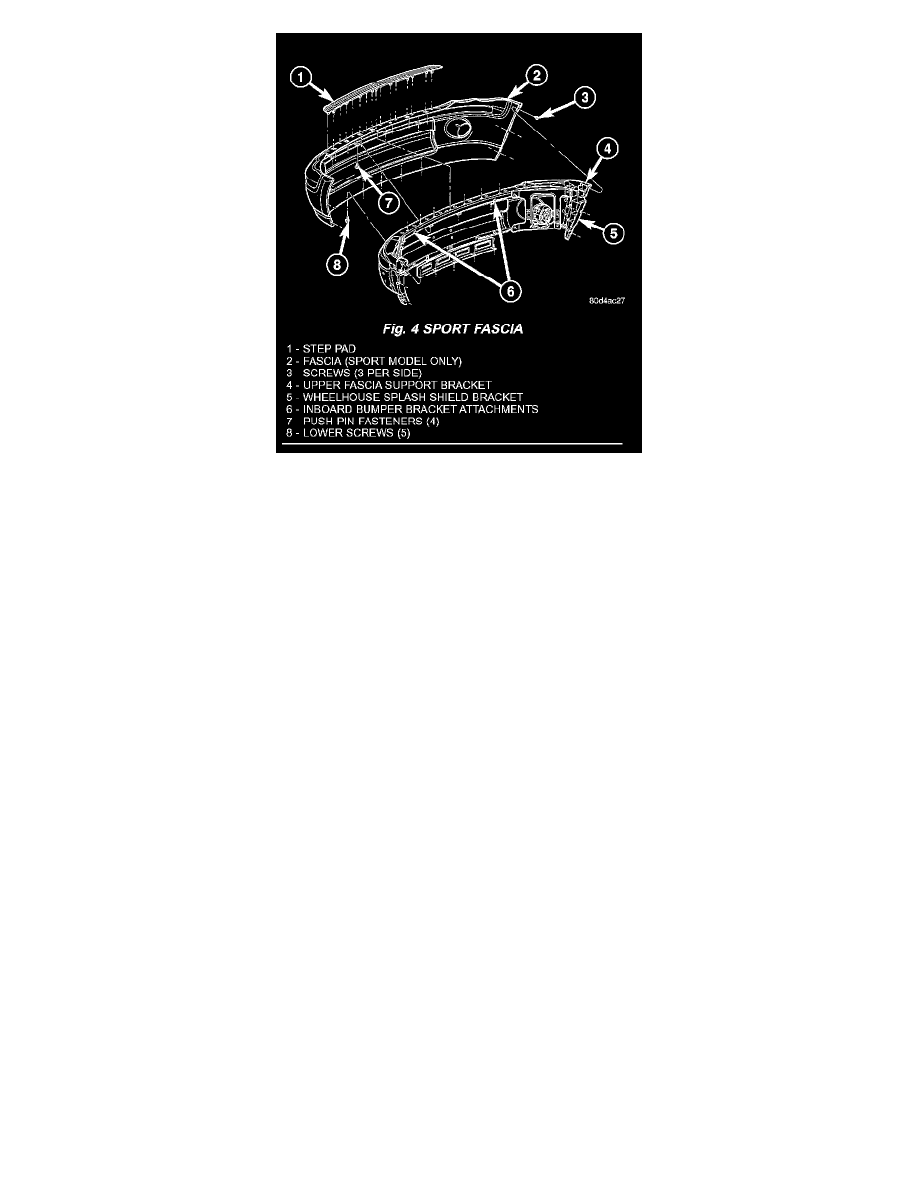
Fig. 4
2. Remove the three screws at each trailing edge of the fascia. (Fig. 4)
3. Remove the five lower screws.
4. Remove and discard the four upper push pins.
5. Using a trim stick C-4755 or equivalent, carefully release the six lower clips and remove the close out panel.
6. Using a trim stick C-4755 or equivalent, carefully remove the step pad.
7. Spread the fascia out at the wheels and remove from the vehicle.
INSTALLATION
NOTE: The left and right inboard bumper to bracket attachments must be secured before installing the fascia and step pad.
ST/SLT/SLT+ FASCIA INSTALLATION
1. Install the fascia.
2. Position the close out panel and seat the 6 lower clips fully.
3. Install four new upper push pin fasteners.
4. Position the step pad onto the fascia and fully seat the attachment clips.
5. Align the fascia to the fender with a 19 mm (0.75 inch) gap and install the two screws at each trailing edge of the fascia.
SPORT FASCIA INSTALLATION
1. Position the fascia onto the bumper.
2. Position the step pad onto the fascia and fully seat the attachment clips.
3. Install four new upper push pin fasteners.
4. Install the five lower screws.
5. Install the three screws at each trailing edge of the fascia.