
RAM 3500 Truck 4WD L6-5.9L DSL Turbo VIN C (2002)
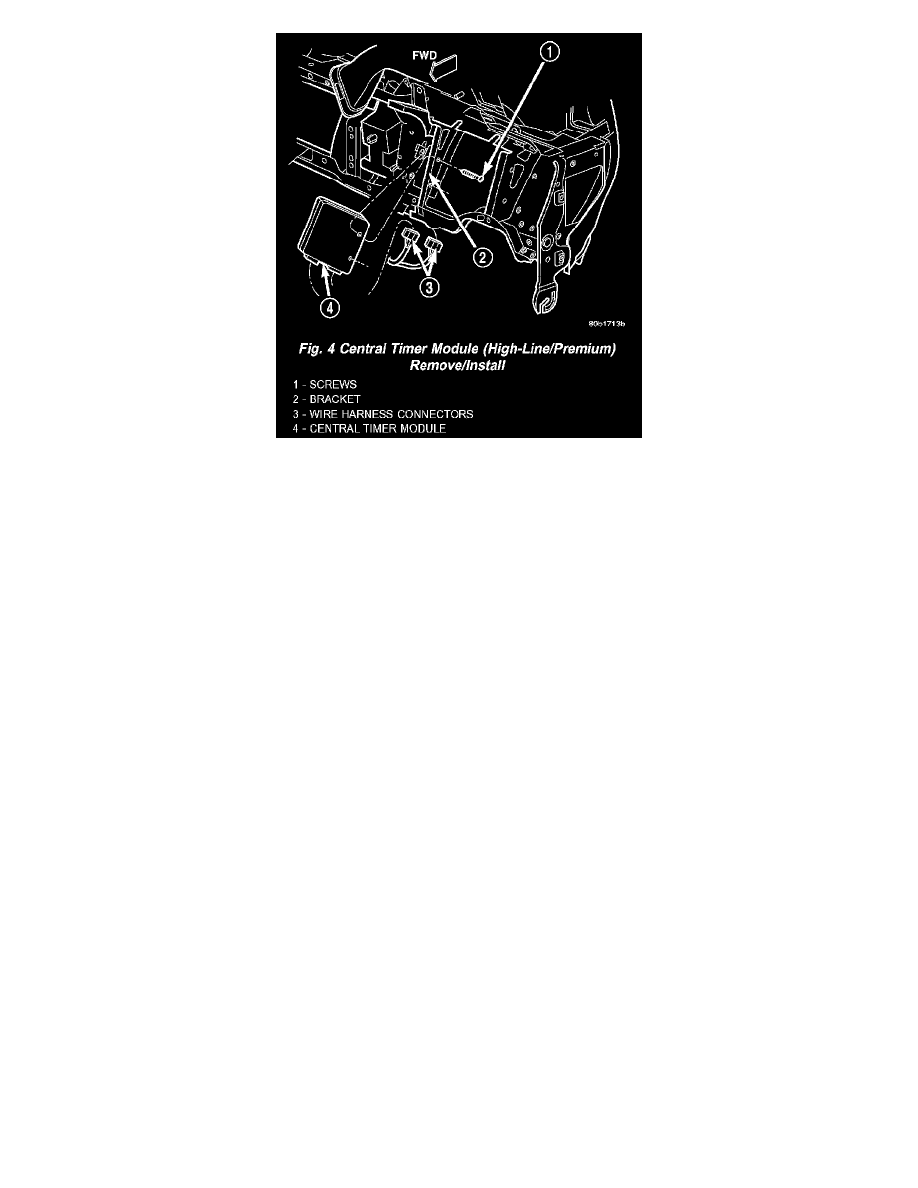
Fig. 4 Central Timer Module (High-Line/Premium) Remove/Install
3. Remove the two screws that secure the Central Timer Module (CTM) to the bracket on the inboard side of the instrument panel steering column
opening or.
4. Pull the CTM into the instrument panel steering column opening far enough to access the instrument panel wire harness connector(s).
5. Disconnect the instrument panel wire harness connector(s) (one connector for the base version CTM, two connectors for the high-line/premium
version) from the CTM connector receptacle(s).
6. Remove the CTM from the instrument panel.
INSTALLATION
1. Position the CTM to the inboard side of the instrument panel steering column opening.
2. Reconnect the instrument panel wire harness connector(s) for the CTM (one connector for the base version CTM, two connectors for the
high-line/premium version) to the CTM connector receptacle(s) or.
3. Position the CTM to the bracket on the inboard side of the instrument panel steering column opening.
4. Install and tighten the two screws that secure the CTM to the bracket on the inboard side of instrument panel steering column opening. Tighten the
screws to 1.6 Nm (15 in. lbs.).
5. Reinstall the steering column opening cover onto the instrument panel.
6. Reconnect the battery negative cable.