
RAM 3500 Truck 4WD L6-5.9L DSL Turbo VIN C (2002)
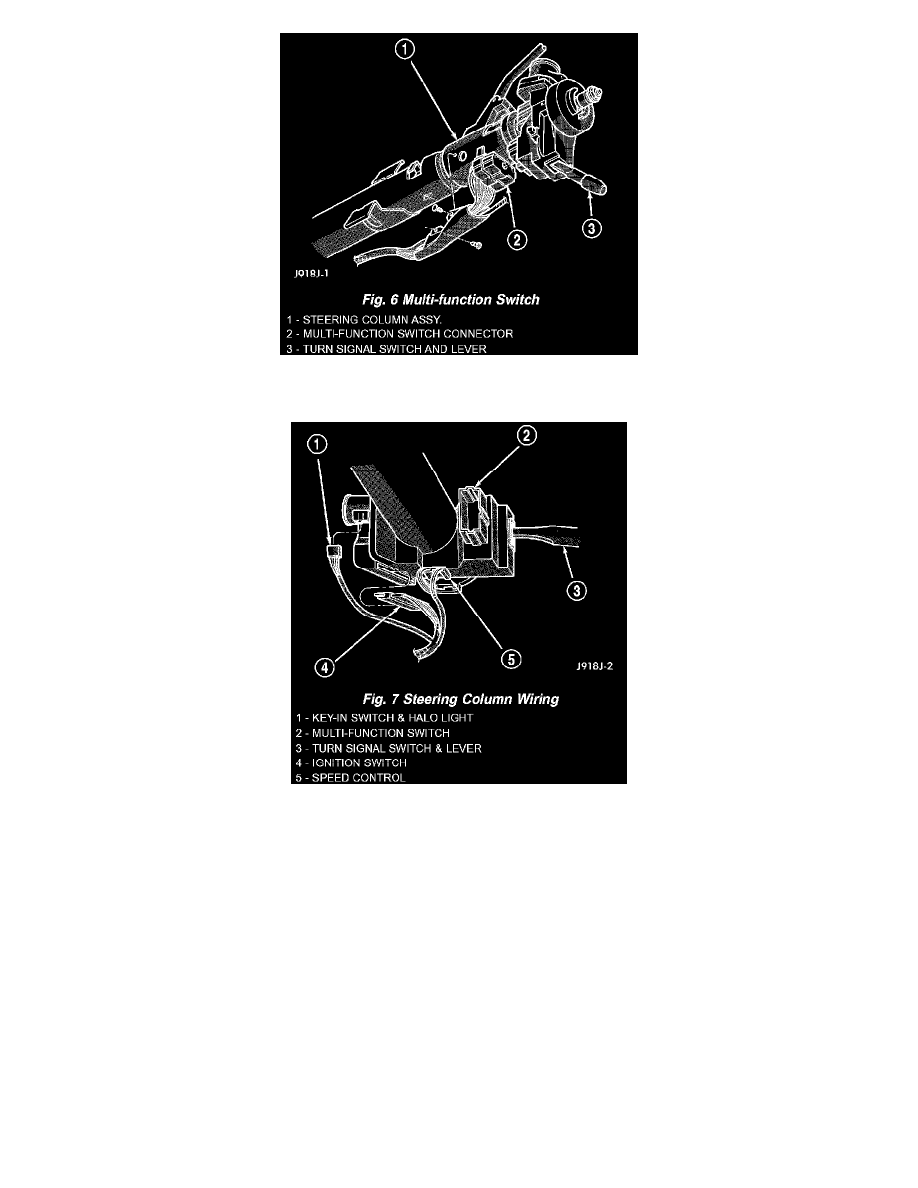
11. Remove the turn signal multi-function switch connector with a 7 mm socket.
12. Loosen the upper Support Bracket nuts to allow some slack. This will aid in removal of the upper fixed shroud.
13. Remove the electrical connections from Key-in light, Ignition Switch, Horn, Overdrive Switch and Clock Spring (Speed Control).
14. Remove the wiring harness from the column by prying out the plastic retainer buttons.
15. Remove the toe plate fasteners.
16. Remove the column from vehicle.
17. Remove the Ignition and Multi-Function Switch, then remove the Clock Spring and tape the Clock Spring to prevent it from turning.
INSTALLATION
1. Install the clock spring and switches.
NOTE: Turn the Ignition Switch to the on position and verify the gear shifter moves. If the shifter does not move ensure the Ignition Switch is
installed properly.
2. Column shift vehicles, install a new grommet. Use multi-purpose lubricant, or equivalent, to aid installation of the grommet.
NOTE: A new grommet should be used when ever the rod is disconnected from the lever.
3. Remove the shipping lock pin if necessary.
4. Install the column through the floor pan.
5. Position the column bracket breakaway capsules on the mounting studs. Install, but loose assemble the two upper bracket nuts.
6. With the front wheels in the straight-ahead position. Align steering column shaft to the coupler. Install a new pinch bolt and tighten to 49 Nm (36