
RAM 3500 Truck 4WD L6-6.7L DSL Turbo (2008)
Front Crankshaft Seal: Service and Repair
Installation
INSTALLATION
CAUTION: The seal lip and the sealing surface on the crankshaft must be free of all oil residue, to prevent leaks. The crankshaft and seal
surface must be completely dry when the seal is installed.
1. Clean cover and housing gasket mating surfaces. Use a suitable scraper and be careful not to damage the gear housing surface. Remove any old
sealer from the oil seal bore. Thoroughly clean the front seal area of the crankshaft. Do not sand this surface. The seal lip and the sealing surface
on the crankshaft must be free from all oil residue to prevent seal leaks.
2. Inspect the gear housing and cover for cracks and replace if necessary. Carefully straighten any bends or imperfections in the gear cover with a
ball-peen hammer on a flat surface. Inspect the crankshaft front journal for any grooves or nicks that would affect the integrity of the new seal.
3. Apply a bead of Mopar(R) Stud & Bearing Mount to the outside diameter of the seal. Do not lubricate the inside diameter of the new seal.
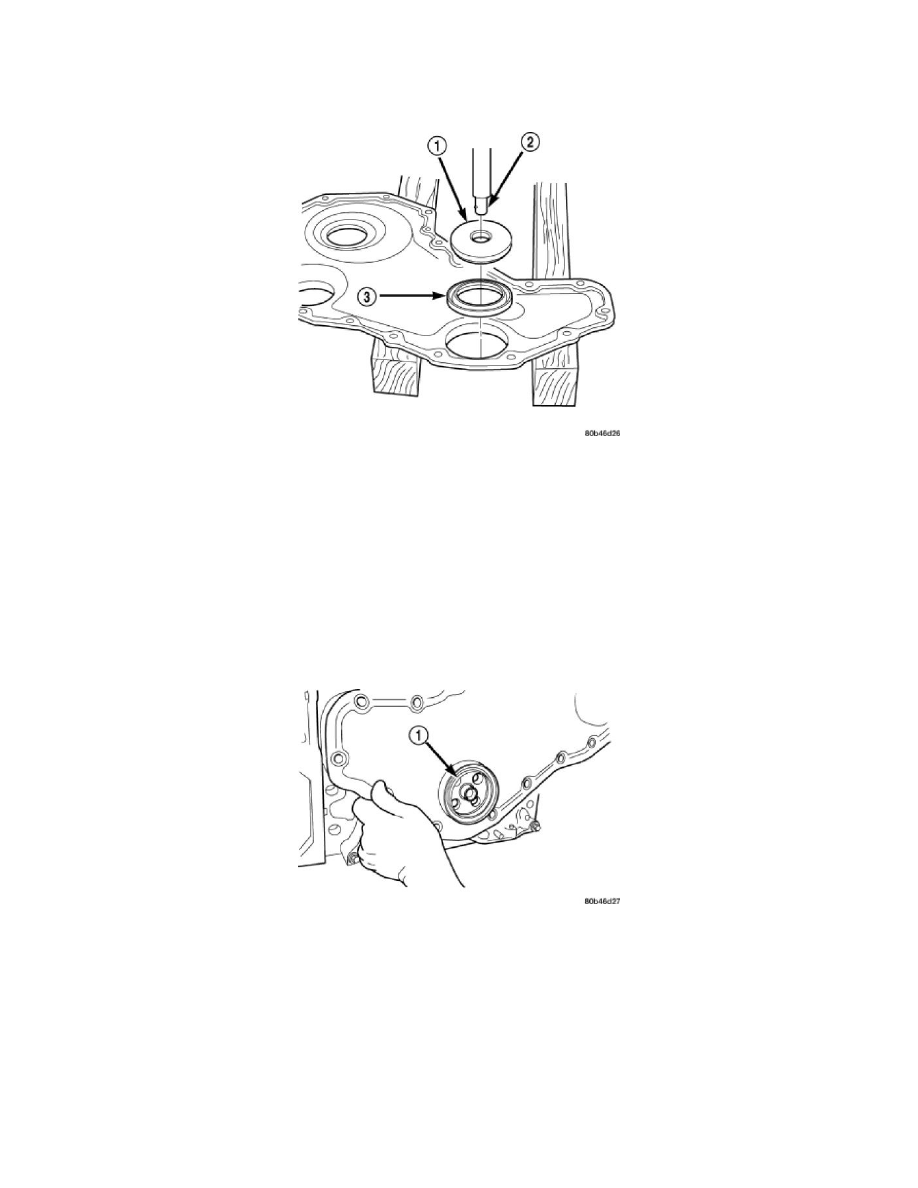
4. With the cover supported by wood blocks, install the seal into the rear of the cover using crankshaft seal installer Special Tool 8281 and driver
handle C-4171. Strike the driver handle until the installation tool bottoms out on the inside of the cover.
CAUTION: Do not distort or damage seal.
5. Install the plastic seal pilot (provided with seal kit) into the crankshaft seal.
6. Apply a bead of Mopar(R) Silicone Rubber Adhesive Sealant or equivalent to the gear housing cover sealing surface.
7. Install the cover to the gear housing, aligning the seal pilot with the nose of the crankshaft.
NOTE: Failure to follow the cover installation procedure can result in misalignment of the crankshaft seal to the crankshaft, causing an
oil leak.
8. Install the cover bolts and hand snug 2 capscrews at the 3 o'clock and 9 o'clock position, to keep the cover from moving when the first capscrew is
torqued. Torque to 24 Nm (18 ft. lbs.) torque. Remove pilot tool.
9. Install dust shield over nose of crankshaft.
10. Install the crankshaft damper. Torque the bolts to 40 Nm (30 ft. lbs.). Then rotate an additional 60°. Use the engine barring tool to keep the engine
from rotating during tightening operation.
11. Install the fan support/hub assembly and torque bolts to 32 Nm (24 ft. lbs.).