
RAM 3500 Truck 4WD L6-6.7L DSL Turbo (2008)
Evaporative Emission Control Canister: Service and Repair
Installation
INSTALLATION
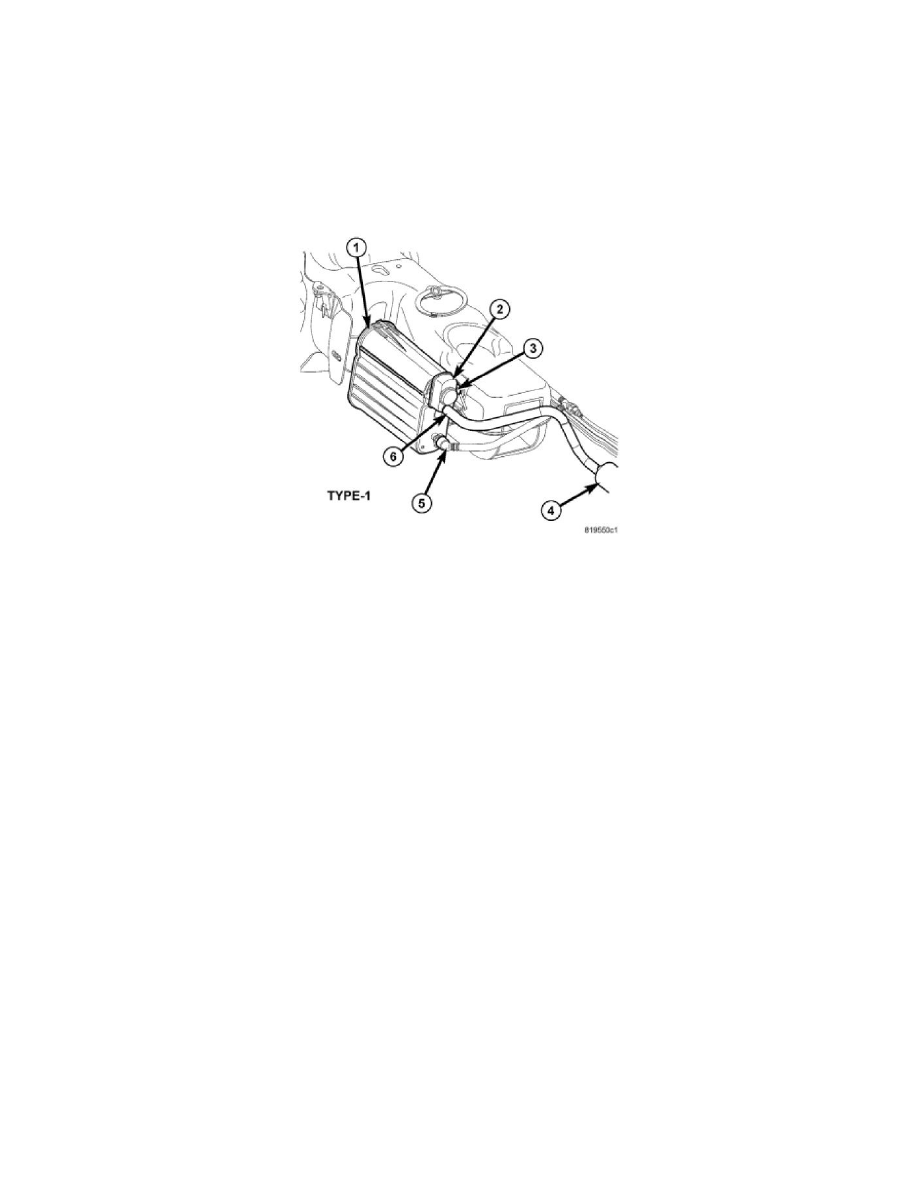
Type-1 Canisters
CAUTION: After installing any EVAP canister or ESIM switch, the electrical connector on the switch MUST be in the 3 O'clock position (as
viewed from front). This step must be done for proper ESIM switch operation.
A single, vertically mounted EVAP canister (1) is used with Type 1. The ESIM (Emission System Integrity Monitor) switch (3) is mounted to the
canister.
1. Two locating pins are located at rear of canister. Push these two pins into canister mounting bracket.
2. Install canister mounting bracket bolt. This is located below and near the ESIM switch.
3. Connect quick-connect vapor line (5) to canister.
4. Connect vapor line (6) to ESIM switch.
5. Connect electrical wiring connector to ESIM switch (3).
6. If equipped, install necessary skid plates.
7. All vapor/vacuum lines and hoses must be firmly connected. Also check the vapor/vacuum lines at the EVAP canister purge solenoid for
damage or leaks. If a leak is present, a Diagnostic Trouble Code (DTC) may be set.
8. Lower vehicle.
Type-2 Canisters
CAUTION: After installing any EVAP canister or ESIM switch, the electrical connector on the switch MUST be in the 3 O'clock position (as
viewed from front). This step must be done for proper ESIM switch operation.