
RAM 3500 Truck 4WD V10-8.0L VIN W (1997)
10. Remove seal retainer from secondary piston. Then remove front and rear seals from piston. Discard seals, spring, and retainer after these parts are
not reusable.
CLEANING AND INSPECTION
Clean the cylinder body and reservoir with Mopar brake cleaner only. Do not use any other type of cleaning solvent. Dry the cylinder parts with
compressed air. The reservoir can be air dried or wiped dry with lint-free shop towels. Inspect the cylinder bore. A light discoloration of the bore
surface is normal and acceptable. However, replace the cylinder body if the bore is scored, pitted, or corroded. Inspect the cylinder cover and
diaphragm seal. Replace the seal if torn or distorted. Replace the cover if warped, cracked or the snap fasteners are damaged. Inspect the reservoir,
a slight discoloration of the reservoir surface is normal. Replace the reservoir if distorted, cracked or otherwise damaged. Inspect the take up valve
in the cylinder body. The valve should move freely and not be stuck or seized. The valve is not serviceable, it will be necessary to replace the
cylinder body if the valve is faulty. Inspect condition of the secondary piston. Replace the piston if it is scored, corroded or doubt exists about its
condition.
Assembly
ASSEMBLY
1. Coat cylinder body bore, piston components and reservoir grommets with fresh, clean brake fluid.
2. Mount cylinder body in vise. Clamp one cylinder mounting ear in vise jaws.
3. Assemble secondary piston components. Be careful when installing seals. Avoid distorting them during installation.
CAUTION: Do not use any kind of metal tool to ease piston seal installation in the cylinder bore. Metal tools will cut the seals and scratch the
bore. If a tool is needed, use a small flexible item made from nylon, rubber or plastic only.
4. Install secondary piston assembly (spring end first), in cylinder bore. Do not force piston into bore. Work it into place with a twisting/turning
motion.
5. Install primary piston in cylinder bore (spring end first). Do not force piston into bore. Work it into place with a twisting/turning motion.
6. Insert piston retaining snap ring in cylinder body. Then push pistons inward with wood dowel and seat snap ring.
CAUTION: Be very sure the piston retaining snap ring is fully seated. Recheck snap ring installation before proceeding.
7. Install new grommets on cylinder body.
8. Remove cylinder body from vise.
9. Position reservoir on clean work surface with fluid inlet necks facing upward. Padding work surface with clean shop towels will keep reservoir in
place during installation. It will also keep dirt out as well.
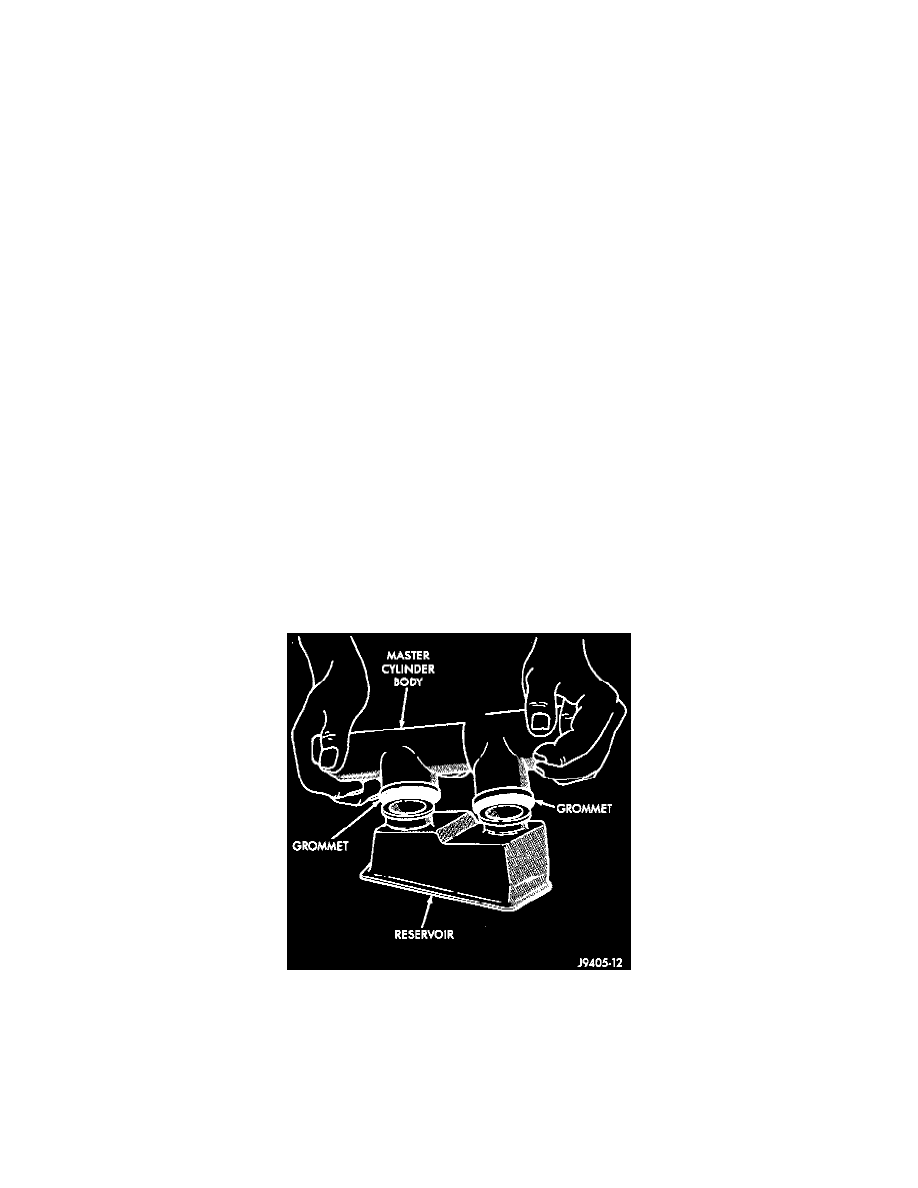
Assembling Reservoir
10. Install cylinder body on reservoir by rocking the cylinder onto the reservoir necks.
11. Verify that reservoir is properly seated and that grommets have not slipped out of place.
12. Bleed master cylinder on bench before installing it in vehicle. See: Brake Bleeding/Service and Repair