
RAM 3500 Truck 4WD V8-5.9L VIN Z LDC (2000)
Transmission Cooler: Service and Repair
Removal and Installation
REMOVAL
1. Disconnect battery negative cable.
2. Recover refrigerant and remove the a/c condenser (if equipped). Refer to Heating and Air Conditioning for the correct procedure.
3. Place a drain pan under the oil cooler lines.
4. Disconnect the transmission oil cooler line quick-connect fitting at the cooler outlet using the quick connect release tool 6935. Loosen clamp from
inlet connection and slide hose off of nipple. Plug cooler lines to prevent oil leakage.
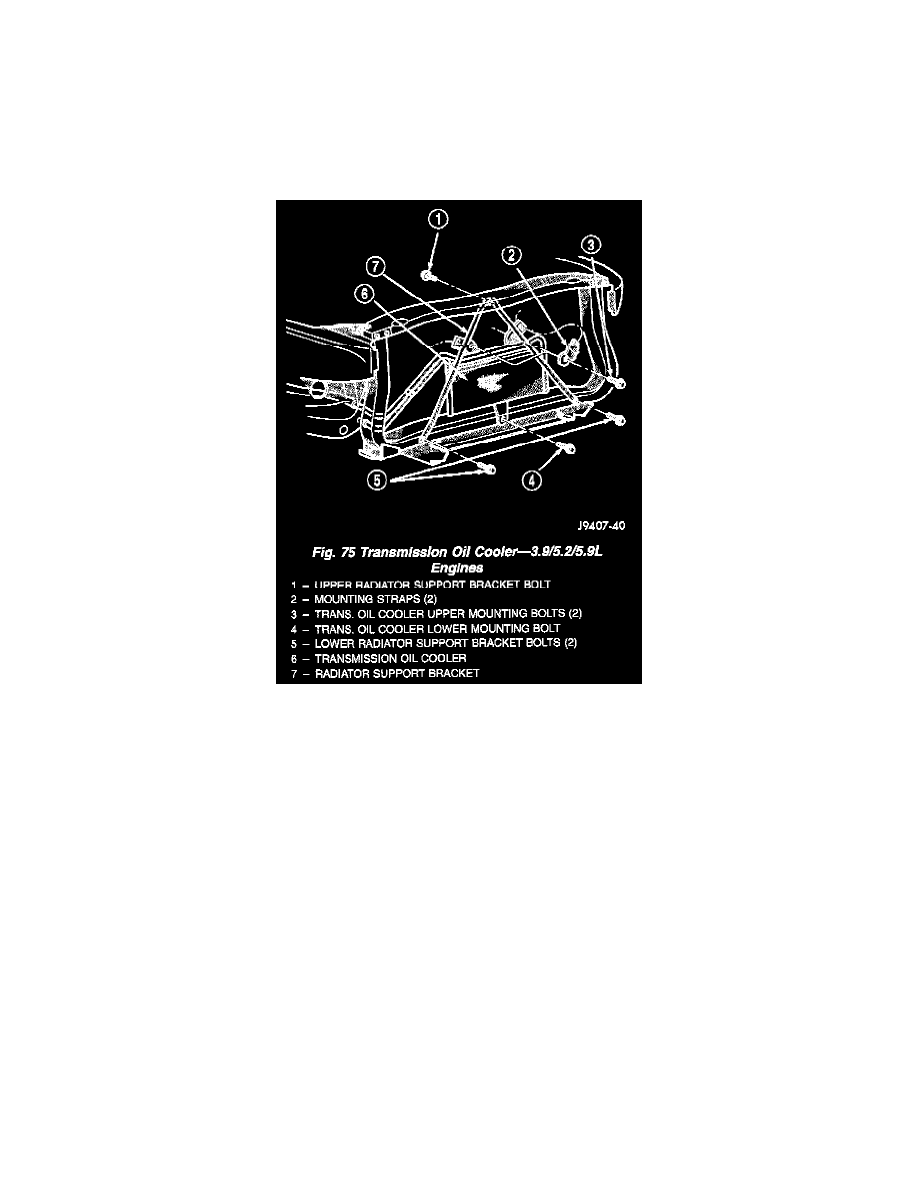
Fig. 75
5. Remove the oil cooler lower mounting bolt (oil cooler-to-vehicle body) (Fig. 75).
6. Remove three bolts (radiator support bracket-to-body). Remove this A-shaped support bracket and the transmission oil cooler as an assembly from
the vehicle. Take care not to damage the radiator core or A/C condenser fins with the cooling lines when removing.
7. Remove oil cooler from A-shaped support bracket by removing two upper mounting strap bolts and mounting straps at support bracket (Fig. 75).
8. Remove oil cooler from the A-shaped radiator support bracket.
INSTALLATION
1. Install the oil cooler assembly to the A-shaped radiator support bracket using the two upper mounting bolts and mounting straps. Install the bolts
but do not tighten at this time.
2. Install the radiator support bracket and oil cooler (as an assembly) to the vehicle.
3. Install the two lower radiator A-shaped support bracket bolts. Do not tighten bolts at this time.
4. Slide and position the oil cooler on the A-shaped bracket until its lower mounting hole lines up with the bolt hole on the vehicle body. Tighten the
oil cooler mounting strap bolts to 6 Nm (50 in. lbs.) torque.
5. Install the upper radiator A-shaped support bracket bolt. Tighten all three radiator support bracket mounting bolts to 11 Nm (95 in. lbs.) torque.
6. Inspect quick connect fitting for debris and install the quick-connect fitting on the cooler cutler tube until an audible "click" is heard. Pull apart to
verify connection.
7. Connect battery negative cable.
8. Start the engine and check all fittings for leaks.
9. Check the fluid level in the automatic transmission.