
RAM 3500 Chassis Cab Truck 2WD L6-6.7L DSL Turbo (2010)
Marker Lamp Bulb: Service and Repair
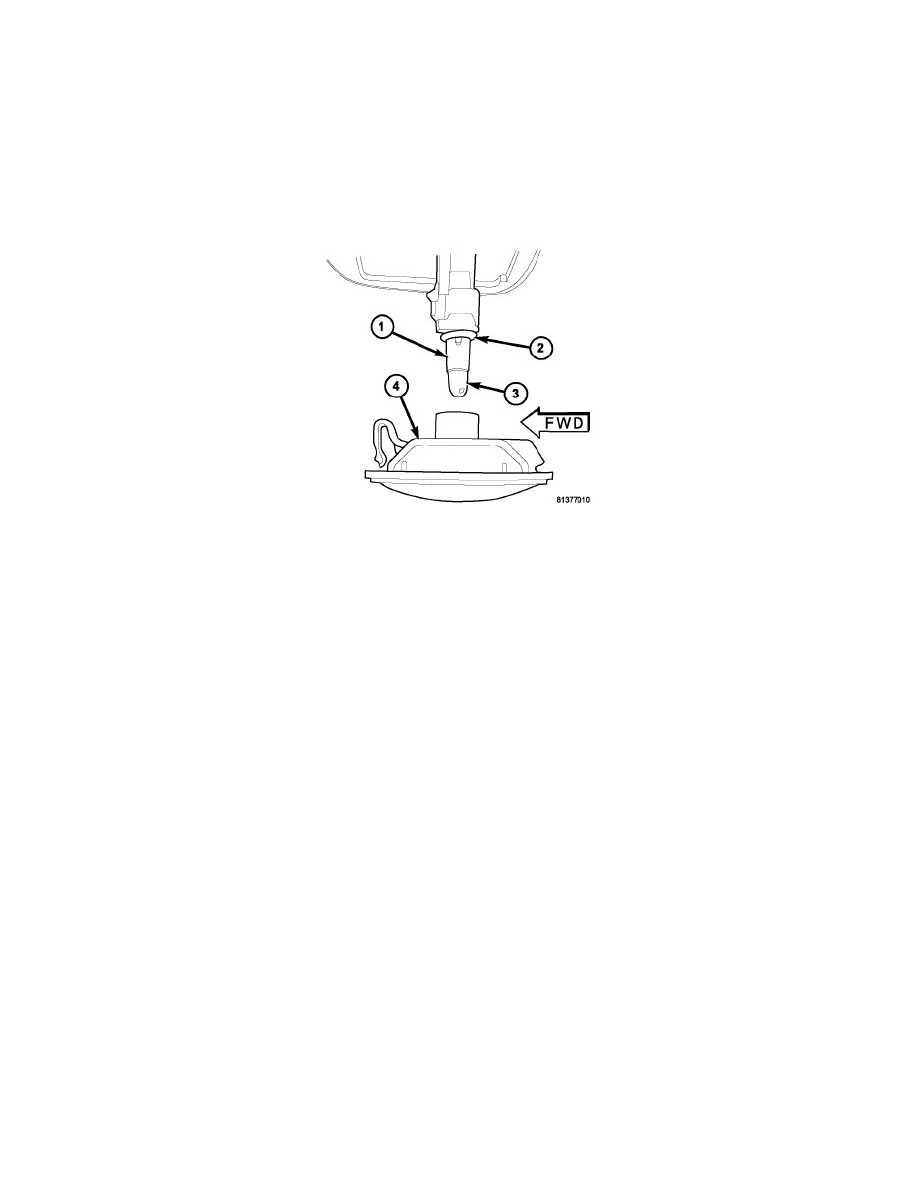
Side Marker Lamp Bulb - Installation
Rear Fender
BULB - REAR FENDER
CAUTION: Always use the correct bulb size and type for replacement. An incorrect bulb size or type may overheat and cause damage to the
lamp, the socket or the lamp wiring.
NOTE: These lamps are used on vehicles with a pick-up bed and dual rear wheels only. A lamp with an amber lens is located on the rear
fender ahead of each rear wheel opening, and a lamp with a red lens is located on the rear fender behind each rear wheel opening.
The bulb types and service procedures are identical for all four of these lamps.
1. Align the base of the bulb (3) with the socket (1).
2. Push the bulb straight into the socket until the base is firmly seated.
3. Be certain that a rubber O-ring seal (2) is properly installed and in good condition around the base of the bulb socket.
4. Align the socket and bulb with the keyed opening on the back of the rear fender marker lamp lens/housing (4).
5. Insert the socket and bulb into the housing until the socket is firmly seated.
6. Rotate the socket clockwise about 30 degrees to lock it into place.
7. Engage the front edge of the marker lamp into the front edge of the mounting hole in the rear fender.
8. Using hand pressure, press the rear edge of the marker lamp lens/housing toward the front of the vehicle against the spring pressure of the retaining
clip, then push the rear edge of the lamp into the rear of the mounting hole in the rear fender.
9. Reconnect the battery negative cable.
Tailgate
BULB - TAILGATE
CAUTION: Always use the correct bulb size and type for replacement. An incorrect bulb size or type may overheat and cause damage to the
lamp, the socket or the lamp wiring.