
RAM 3500 Chassis Cab Truck 2WD L6-6.7L DSL Turbo (2010)
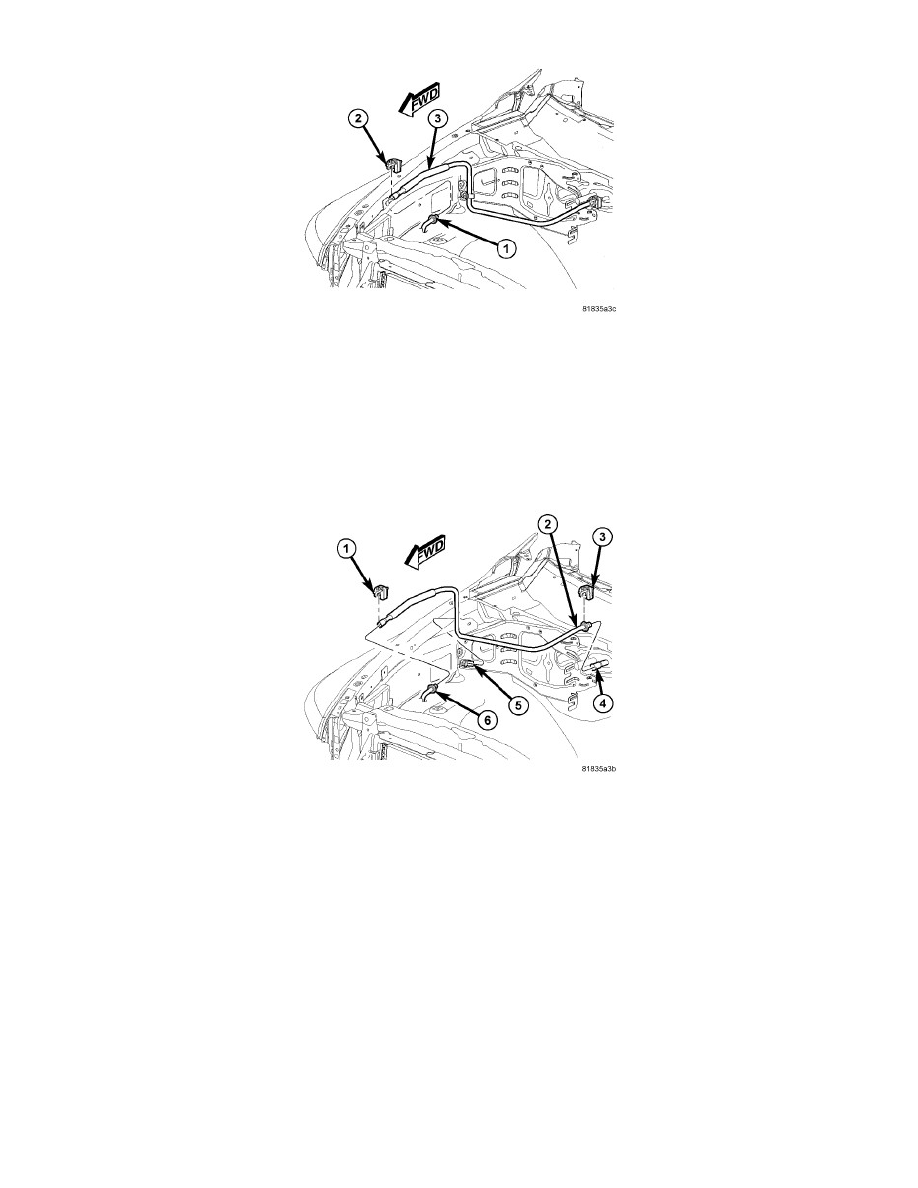
8. Remove the secondary retaining clip (2) from the spring-lock coupler that secures the front section of the A/C liquid line (1) to the rear section of
the liquid line (3).
9. Using A/C Line Disconnect Tools 7193 or equivalent, disconnect the front section of the A/C liquid line from the rear section of the liquid line and
remove and discard the O-ring seals See: Heating and Air Conditioning/Coupler HVAC/Service and Repair/Refrigerant Line Coupler - Removal.
10. Install plugs in, or tape over the opened ends of the A/C liquid lines and the condenser port.
11. Remove the front section of the A/C liquid line from the engine compartment.
REAR SECTION
1. Disconnect and isolate the negative battery cable.
2. Recover the refrigerant from the refrigerant system See: Heating and Air Conditioning/Service and Repair/Refrigerant System Recovery.
3. Remove the passenger side battery See: Starting and Charging/Battery/Service and Repair/Removal and Replacement/Battery - Removal.
4. Disengage the rear section of the A/C liquid line (2) from the body retaining clip (5).
5. Remove the secondary retaining clip (1) from the spring-lock coupler that secures the front section of the A/C liquid line (6) to the rear section of
the A/C liquid line.
6. Using A/C Line Disconnect Tools 7193 or equivalent, disconnect the front section of the A/C liquid line from the rear section of the liquid line and
remove and discard the O-ring seals See: Heating and Air Conditioning/Coupler HVAC/Service and Repair/Refrigerant Line Coupler - Removal.
7. Remove the secondary retaining clip (3) from the spring-lock coupler that secures the rear section of the A/C liquid line to the evaporator tube (4).
8. Using A/C Line Disconnect Tools 7193 or equivalent, disconnect the A/C liquid line from the evaporator tube and remove and discard the O-ring
seals See: Heating and Air Conditioning/Coupler HVAC/Service and Repair/Refrigerant Line Coupler - Removal.
9. Install plugs in, or tape over the opened ends of the A/C liquid lines and the evaporator tube,
10. Remove the rear section of the A/C liquid line from the engine compartment.