
RAM 3500 HD Truck 2WD L6-6.7L DSL Turbo (2008)
Ball Joint: Service and Repair
Front Lower Ball Joint - Installation
4X2 (LD) - Independent Front Suspension
4X2 (LD)
NOTE: Extreme pressure lubrication must be used on the threaded portions of the tool. This will increase the longevity of the tool and insure
proper operation during the removal and installation process.
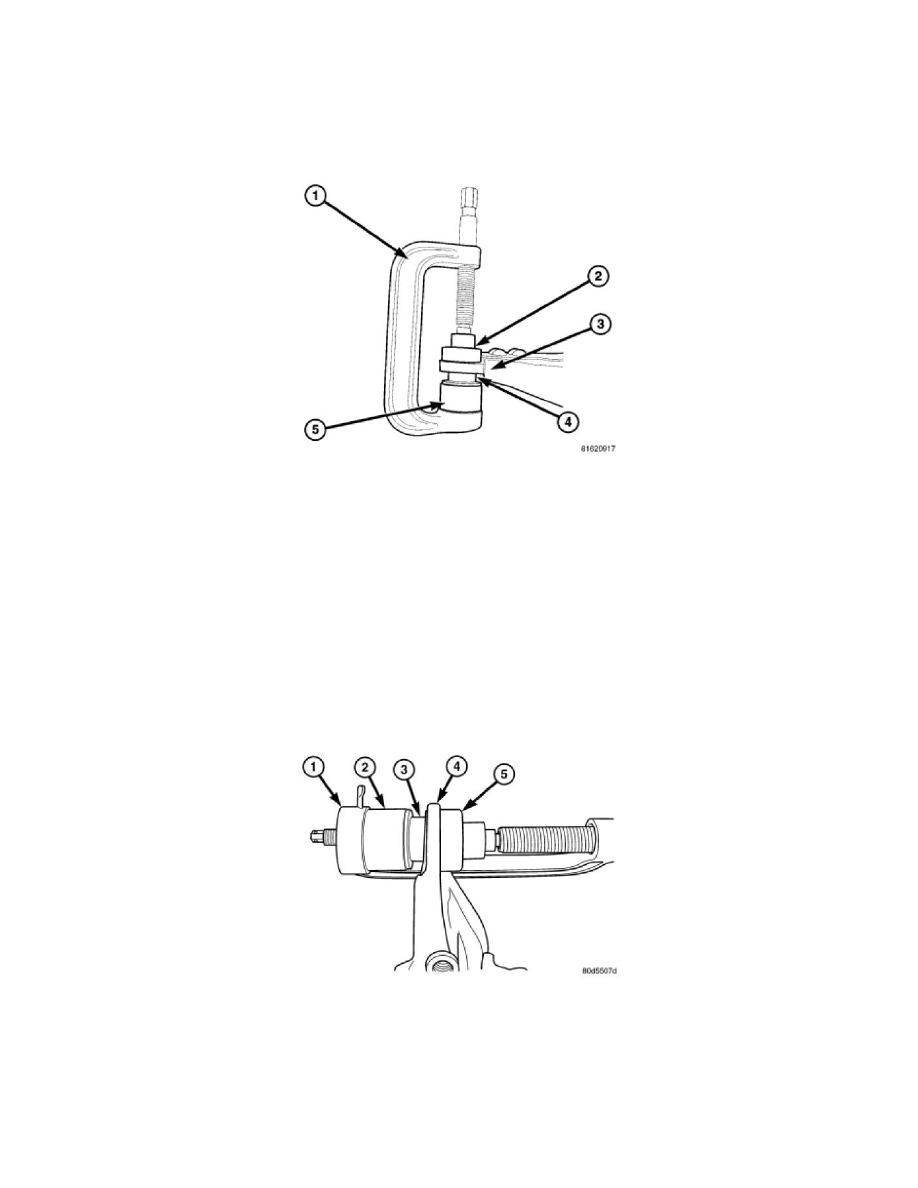
1. Install the ball joint (4) into the control arm (3) and press in using special tools C-4212-F (press) (1), 8698-1 (driver) (2) and 8698-3 (receiver) (5).
2. Stake the ball joint flange in four evenly spaced places around the ball joint flange, using a punch and hammer.
3. Install the steering knuckle See: Front Steering Knuckle/Service and Repair/Front Steering Knuckle - Installation .
4. Install the tie rod end into the steering knuckle See: Steering/Tie Rod/Tie Rod End/Service and Repair/Tie Rod End - Installation .
5. Install the brake caliper and rotor See: Brakes and Traction Control/Disc Brake System/Brake Rotor/Disc/Service and Repair/Removal and
Replacement/Brake Rotor - Installation .
6. Install the tire and wheel assembly See: Wheels and Tires/Service and Repair/Removal and Replacement .
7. Check the vehicle ride height See: Alignment/Service and Repair .
8. Perform a wheel alignment See: Alignment/Service and Repair .
4X2 (HD) - Independent Front Suspension
4X2 (HD)
NOTE: Extreme pressure lubrication must be used on the threaded portions of the tool. This will increase the longevity of the tool and insure
proper operation during the removal and installation process.
1. Install the ball joint (3) into the control arm (4) and press in using special tools C-4212-F (press) (1), 9776-1 (driver) (2) and 8698-3 (receiver) (5).