RAM 3500 HD Truck 2WD L6-6.7L DSL Turbo (2008)

Ball Joint: Testing and Inspection
Front Lower Ball Joint
Diagnosis and Testing - Independent Front Suspension
LOWER BALL JOINT
1. Raise the front of the vehicle. Place safety floor stands under both lower control arms as far outboard as possible. Lower the vehicle to allow the
stands to support some or all of the vehicle weight.
2. Mount a dial indicator solidly to the top side of the lower control arm and then zero the dial indicator.
3. Position the indicator plunger against the bottom surface of the steering knuckle.
NOTE: The dial indicator plunger must be perpendicular to the machined surface of the steering knuckle.
4. Position a pry bar under the tire assembly. Pry upwards on the tire assembly.
5. If the travel exceeds 0.5 mm (0.020 in.), replace the lower ball joint See: Service and Repair/Front Lower Ball Joint - Removal .
Diagnosis and Testing - Link/Coil
LOWER BALL JOINT
To properly diagnose the lower ball joint two readings from the dial indicator are necessary, The two readings must be added together to find a total ball
joint movement as identified in the steps below.
1. Raise and support the vehicle.
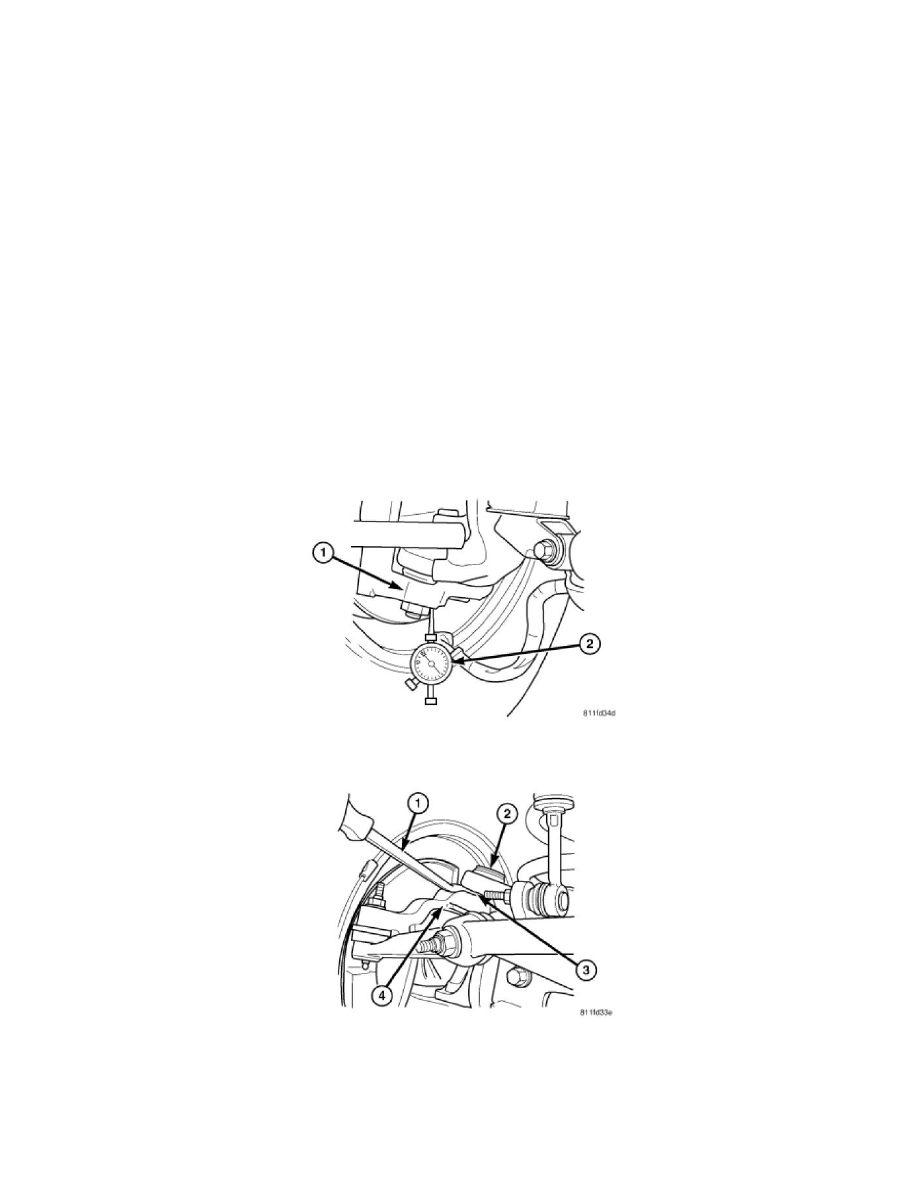
2. Attach a dial indicator (2) with the indicator resting on the flat part of the steering knuckle (1) by the lower ball stud.
3. Set the dial indicator (2) to zero.
NOTE: Use care not to damage the upper ball joint grease seal (3).
4. Pry between the knuckle (4) and the axle tube yoke next to the upper ball joint (2), Record the reading on the dial indicator. This will be the first
reading.
