RAM 3500 HD Truck 2WD L6-6.7L DSL Turbo (2008)

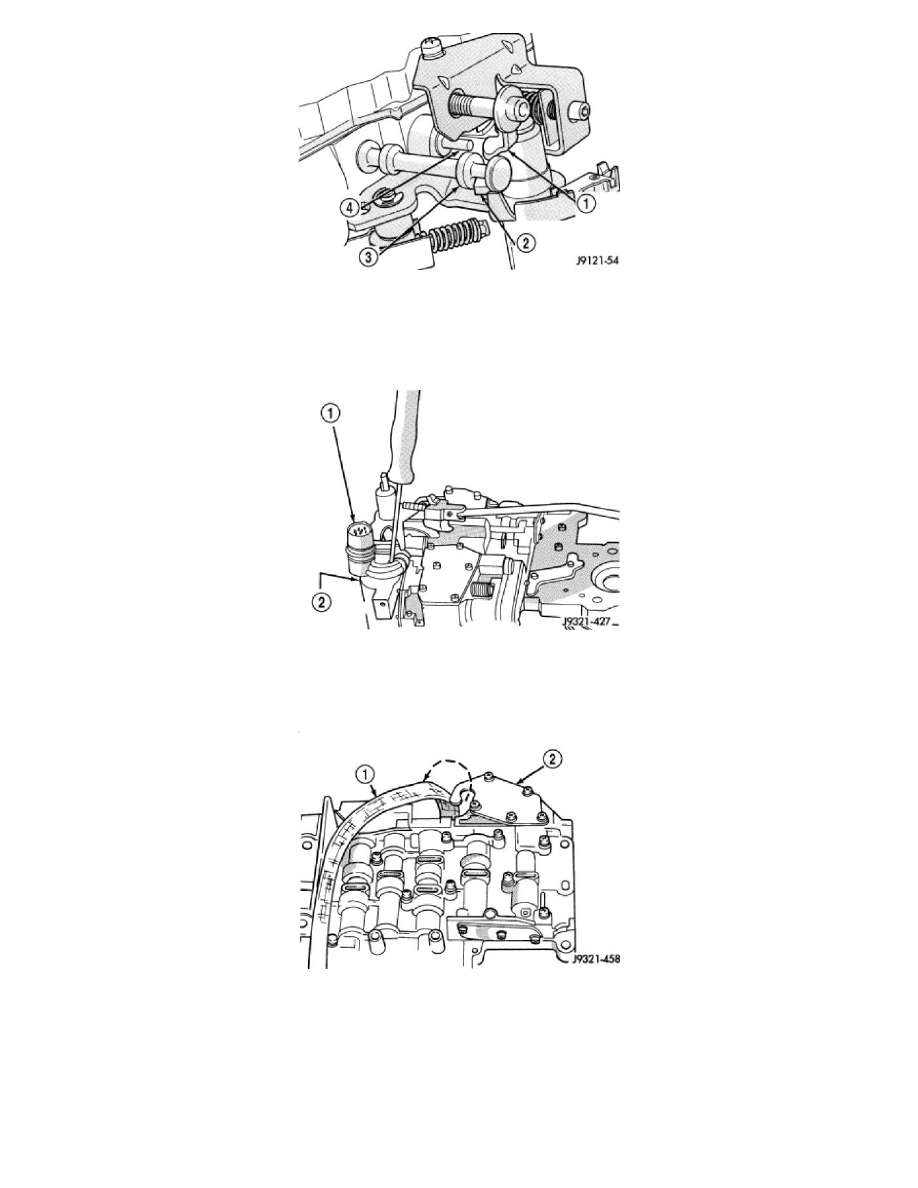
3. Install throttle lever (1) in upper housing. Then install manual lever (2) over throttle lever and start manual lever into housing.
4. Align manual lever with detent ball and manual valve (3). Hold throttle lever upward. Then press down on manual lever until fully seated. Remove
detent ball retainer tool after lever is seated.
5. Then install manual lever seal, washer and E-clip.
6. Verify that throttle lever is aligned with end of kickdown valve (4) stem and that manual lever arm is engaged in manual valve.
7. Lubricate solenoid case connector (1) O-rings and shaft of manual lever with light coat of petroleum jelly.
8. Attach solenoid case connector to 3-4 accumulator with shoulder-type screw. Connector has small locating tang that fits in dimple at top of
accumulator housing (2). Seat tang in dimple before tightening connector screw.
9. Install solenoid assembly and gasket. Tighten solenoid attaching screws to 8 Nm (72 in. lbs.) torque.
10. Verify that solenoid wire harness is properly routed. Solenoid harness must be clear of manual lever and park rod and not be pinched between
accumulator housing and cover.
11. Position line pressure adjusting screw in adjusting screw bracket.
12. Install switch valve spring on tang at end of adjusting screw bracket.
13. Position adjusting screw bracket on valve body. Align valve springs and press bracket into place. Install short, upper bracket screws first and long
bottom screw last. Verify that valve springs and bracket are properly aligned. Then tighten all three bracket screws to 4 Nm (35 in. lbs.) torque.
14. Perform Line Pressure and Throttle Pressure adjustments. See: Adjustments/Valve Body
GOVERNOR BODY, SENSOR AND SOLENOID
