
RAM 3500 HD Truck 2WD L6-6.7L DSL Turbo VIN A (2007)
1. Install rubber insulators to alignment dowels at lower part of radiator.
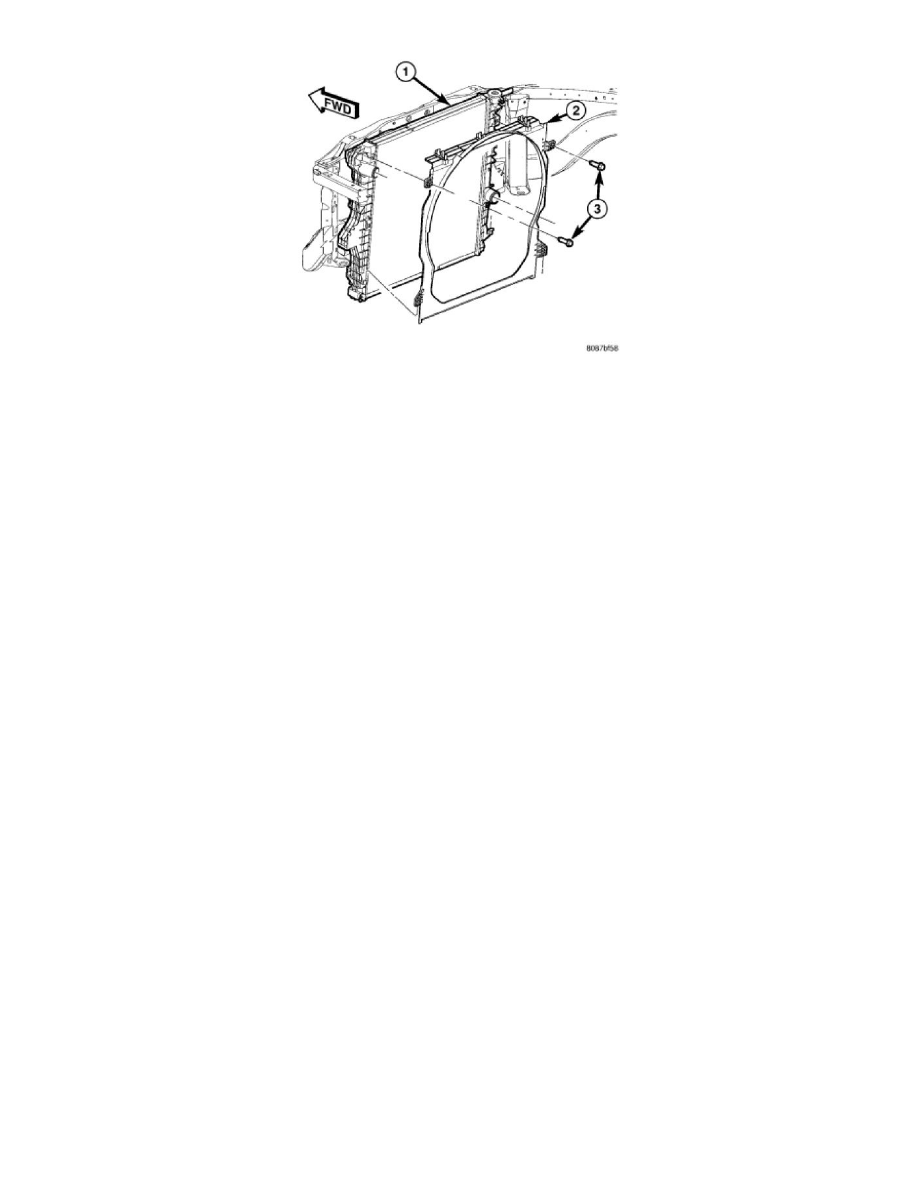
2. Lower the radiator into position while guiding the two alignment dowels into lower radiator support. Different alignment holes are provided in the
lower radiator support for each engine application.
3. Install two upper radiator mounting bolts. Tighten bolts to 12 Nm (105 in. lbs.) torque.
4. Connect both radiator hoses and install hose clamps.
5. If equipped, connect transmission cooler lines to transmission cooler. Inspect quick connect fittings for debris and install until an audible "click" is
heard. Tug on lines to verify connection.
6. Position power steering cooler on the radiator and tighten nuts to 10 Nm (90 in. lbs.)
7. Position fan shroud on brackets.
8. Install fan shroud mounting nut. Tighten nut to 24 Nm (18 ft. lbs.).
9. Install the coolant recovery container.
10. Position coolant recovery tank hose, washer bottle hose and the positive battery cable into the clips located on the top of the radiator.
11. Install air box and turbocharger inlet hose. Tighten clamps to 4 Nm (35 in. lbs.).
12. Connect mass airflow sensor electrical connector and ambient air temp sensor electrical connector (if equipped).
13. Position heater controls to full heat position.
14. Fill cooling system with coolant.
15. Operate engine until it reaches normal temperature. Check cooling system and automatic transmission (if equipped) fluid levels.