
RAM 3500 HD Truck 2WD L6-6.7L DSL Turbo VIN A (2007)
NOTE: A distinct change of sound during the clutch pulley tapping process indicates that the pulley and bearing assembly has bottomed out
against the compressor housing.
5. Using clutch pulley installer (Special Tool 9355 in Kit 9349) (3) and a hammer (4), install the pulley and bearing assembly onto the front of the
A/C compressor. Tap the installer with a hammer until the pulley and bearing assembly has bottomed against the compressor housing.
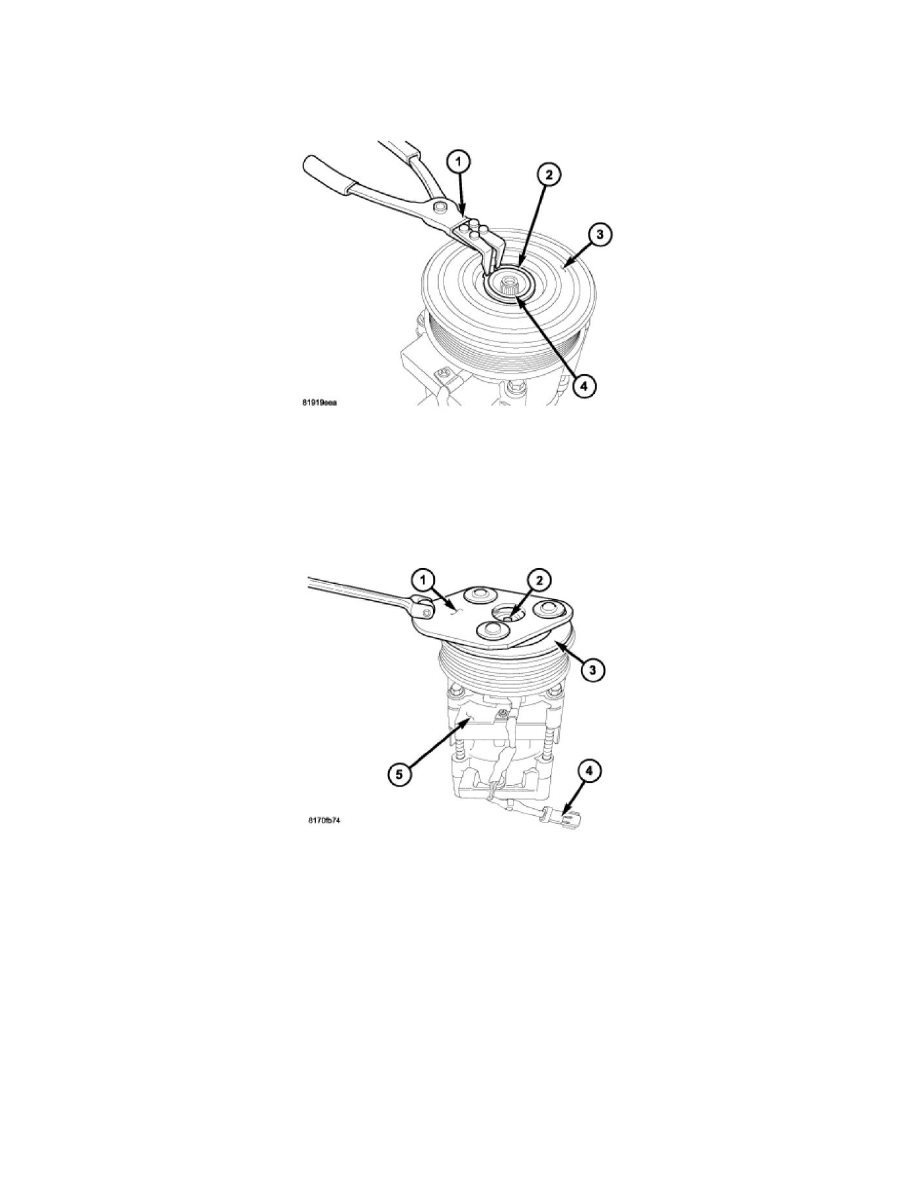
CAUTION: If the snap ring is not fully seated in the groove it will vibrate out, resulting in clutch failure and severe damage to the A/C
compressor.
NOTE: Install the snap ring with the beveled side of the snap ring facing outward.
6. Using Snap Ring Pliers 9764 or equivalent (1), install the snap ring (2) that secures the pulley and bearing assembly (3) to the front of the A/C
compressor (4). Make sure the snap ring is properly seated in the groove.
7. Verify that there is adequate clearance for the clutch field coil wire lead and connector (4) between the compressor housing and the pulley.
NOTE: When installing an original or a new clutch assembly, try the original shims first. When installing a clutch onto a compressor that
previously did not have a clutch, use the 1.0, 0.50 and 0.13 millimeter (0.040, 0.020 and 0.005 inch) shims from the clutch hardware package
which is provided with the new clutch.
8. Install the clutch shims onto the compressor shaft.
9. Using compressor clutch holding fixture (Special Tool 9351 in Kit 9349) (1), install the bolt (2) that secures the clutch plate (3) to the A/C
compressor (5). Hold the clutch plate stationary with the holding fixture and tighten the bolt to 15 Nm (133 in. lbs.).