
RAM 3500 HD Truck 2WD L6-6.7L DSL Turbo VIN A (2007)
retractor. Replace any belt that has a bent or damaged latch plate or anchor plate. Replace any child restraint anchor or the unit to which the anchor is
integral that has been bent or damaged. Never attempt to repair a seat belt or child restraint component. Always replace damaged or ineffective seat belt
and child restraint components with the correct, new and unused replacement parts listed in the DaimlerChrysler Mopar(R) Parts Catalog.
NOTE: The only component of this seat belt and retractor unit that is available for individual service replacement is the plastic web stop button that
prevents the latch plate from falling to the floor while in the stored position. Refer to the instructions supplied with the service kit for the proper web stop
button replacement procedures.
NOTE: All seat belt retractors except the driver side front retractor include a switchable automatic locking mechanism.
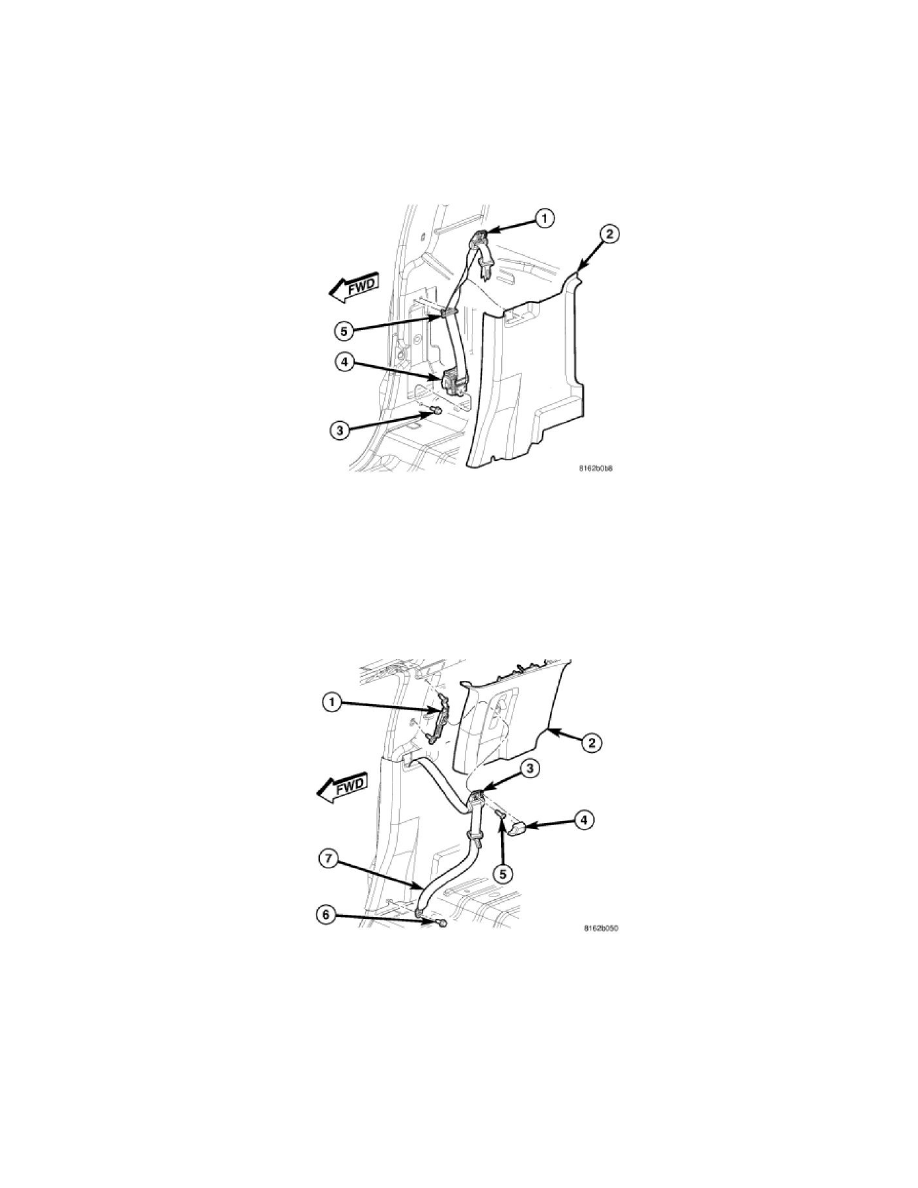
1. Position the rear outboard seat belt and retractor (4) to the inner C-pillar as a unit. Be certain to engage the hooks on the upper retractor bracket
into the mounting hole in the C-pillar.
2. Install and tighten the screw (3) that secures the lower retractor bracket to the C-pillar. Tighten the screw to 39 Nm (29 ft. lbs.).
3. Position the belt web guide (5) to the B-pillar and use hand pressure to press it firmly and evenly until the two clips that secure it snap into place.
4. Reinstall the lower trim (2) onto the inside of the C-pillar. Be certain that the turning loop (1) can be accessed from the face of the lower trim after
the seat belt webbing is inserted through the slot in the trim.
5. Reinstall the upper trim (2) onto the inside of the C-pillar.
6. Position the seat belt turning loop (3) onto the height adjuster (1) on the upper C-pillar.
7. Install and tighten the screw (5) that secures the turning loop to the height adjuster. Tighten the screw to 39 Nm (29 ft. lbs.).
8. Engage the upper edge of a new trim cover (4) over the top of the turning loop. Then squeeze the lower end of the trim cover and the turning loop
together firmly and evenly until the engagement tabs of the trim cover snap into the slots of the turning loop.
9. Position the seat belt lower anchor (7) to the mounting hole at the base of the C-pillar.