
RAM 3500 HD Truck 2WD L6-6.7L DSL Turbo VIN A (2007)
5. Set the dial indicator (2) back to zero.
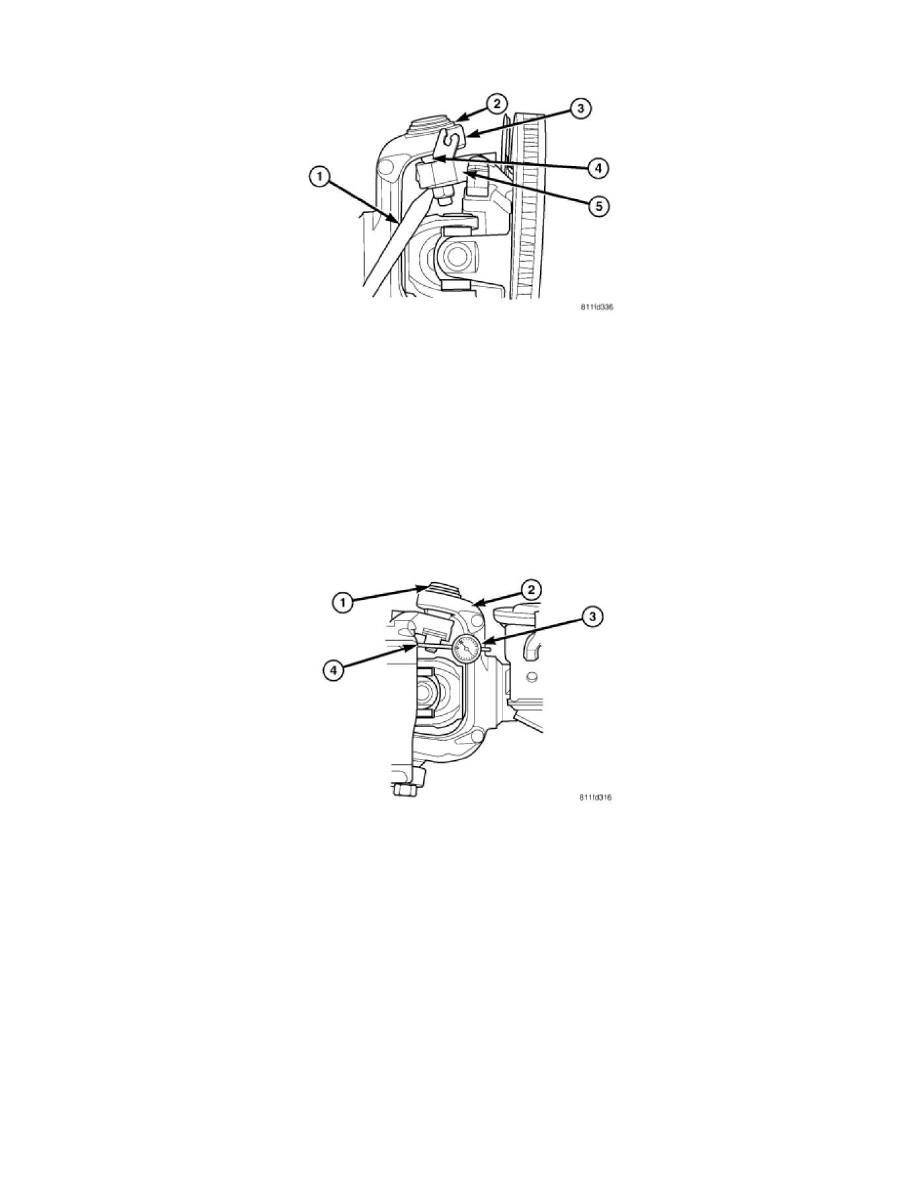
6. Set up a jackstand (3) and use a long prybar (1) to lift the knuckle assembly
7. Pry upwards on the flat part of the steering knuckle (5) next to the ball joint stud and nut (2) using the jackstand as leverage. Record the reading on
the dial indicator. This will be the second reading.
8. Add the two reading together for a total lower ball joint movement, If this reading is above 2.29 mm (0.090 in) then replacement of the lower ball
joint is necessary.
Upper Ball Joint
UPPER BALL JOINT
To properly diagnose the upper ball joint two readings from the dial indicator are necessary, The two readings must be added together to find a total ball
joint movement as identified in the steps below.
1. Raise and support the vehicle.
2. Attach a dial indicator (3) with the indicator resting on either the front or back sides of the steering knuckle (4) as close to the upper ball joint (1)
as possible.
3. Set the dial indicator(3) to zero.
4. Grab the tire by pushing in on the top of the tire and pulling out on the bottom of the tire. Record the reading on the dial indicator (3). This will be
the first reading.
5. Set the dial indicator (3) back to zero.
6. Grab the tire by pulling in on the top of the tire and pushing out on the bottom of the tire. Record the reading on the dial indicator (3). This will be
the second reading.
7. Add the two readings together for a total upper ball joint movement. If this reading is above 1.52 mm (0.060 in) then replacement of the upper ball
joint is necessary.